
Organise your contacts into named groups, then add and remove contacts as your work changes.
Groups and access groups
Togetha Contacts has two related concepts. You'll work with both, but most of the time only the first.
|
Term |
What it does |
|---|---|
|
Group |
A named collection of contacts, such as Customers or Suppliers. A contact can belong to more than one group. |
|
Access group |
Controls who can see a group. Every group lives inside one access group. New groups you create are private to you by default. |
Groups are visibility-scoped through access groups. Until you share a group, no one else can see it. See Sharing a group with your team below.
Prerequisites
-
You can open the Contacts page from the Apps menu.
-
You have at least one contact you want to put into a group, or you're ready to create a group first and add contacts later.
Creating a group
-
Open the Contacts page.
-
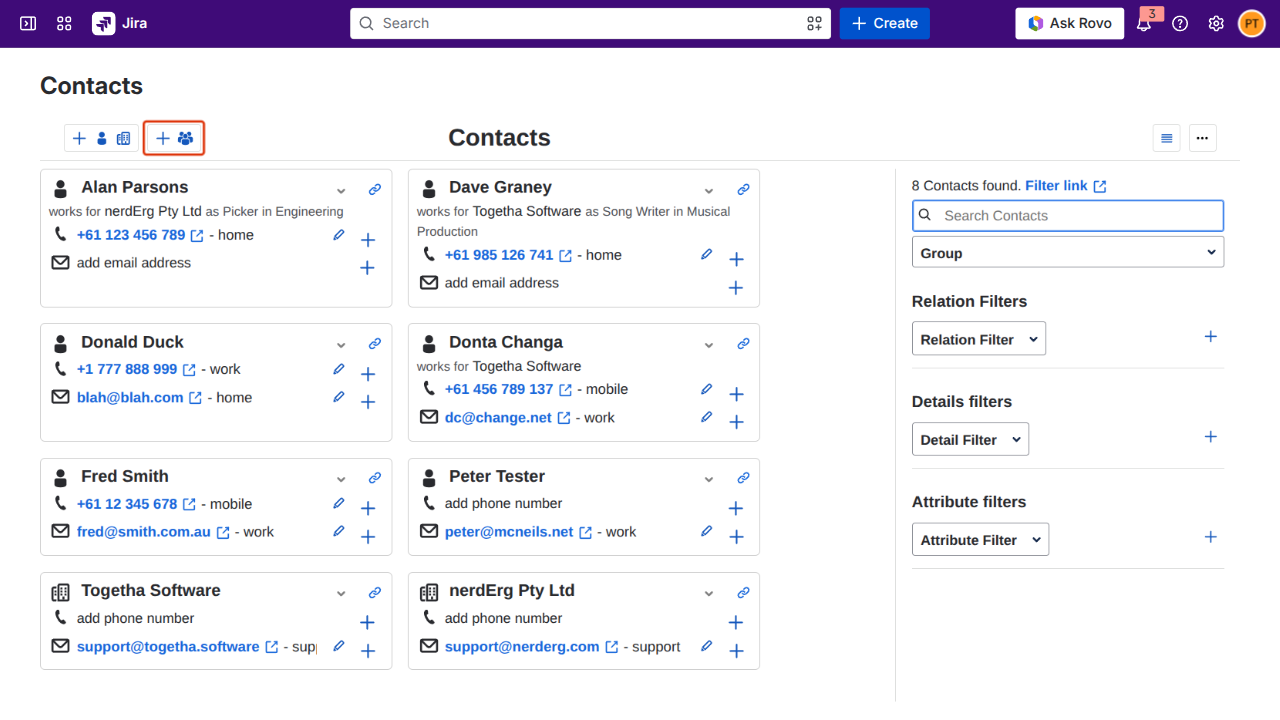
Click the Add group button in the top-left toolbar, next to the Add contact button. The button has a
+icon and a people icon. -
Enter a name for the group. Names are free text. Pick something short you'll recognise in the filter list.
-
Click Save. The group is created inside your default access group and is only visible to you.
Adding contacts to a group
-
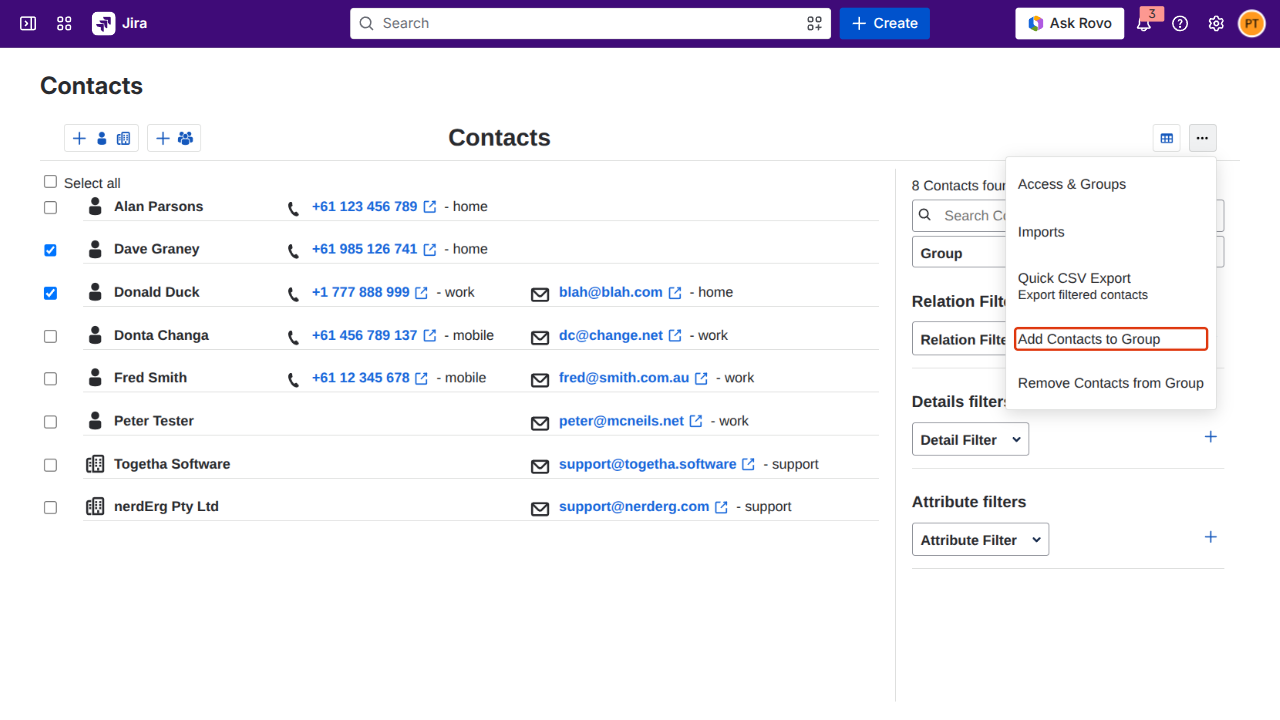
Tick the checkbox on each contact you want to add. Use list view (the table icon on the right of the toolbar) for the easiest multi-select.
-
Open the kebab menu (the three-dot menu on the right of the toolbar).
-
Click Add Contacts to Group.
-
Pick the group from the dropdown. Only groups you can write to appear.
-
Click Add to group. Each selected contact is added to the group. The contact's group memberships update straight away.
Removing contacts from a group
-
Tick the contacts you want to remove.
-
Open the kebab menu and click Remove Contacts from Group.
-
Pick the group to remove them from.
-
Confirm. The contacts are removed from that group but remain in your contact list.
Managing groups from the contact details dialog
When you only need to update the groups of a single contact, the contact details dialog is faster than the multi-select flow.
-
Click the contact's name anywhere it appears: the contact list, a card, the Contacts side panel on a Jira Work item, or a matching contacts result. The contact details dialog opens.
-
Switch to the Groups tab. You'll see every group the contact belongs to, including the (owner) group that controls who created the contact.
-
Add to a group: Click Add Contact to Group at the top of the tab, pick a group from the dropdown, and click Add to group.
-
Remove from a group: Click the delete button next to a group in the list. The contact is removed from that group straight away. You can't remove a contact from the (owner) group. That's the contact's default group; use Change contact owner instead if you need to hand the contact over.
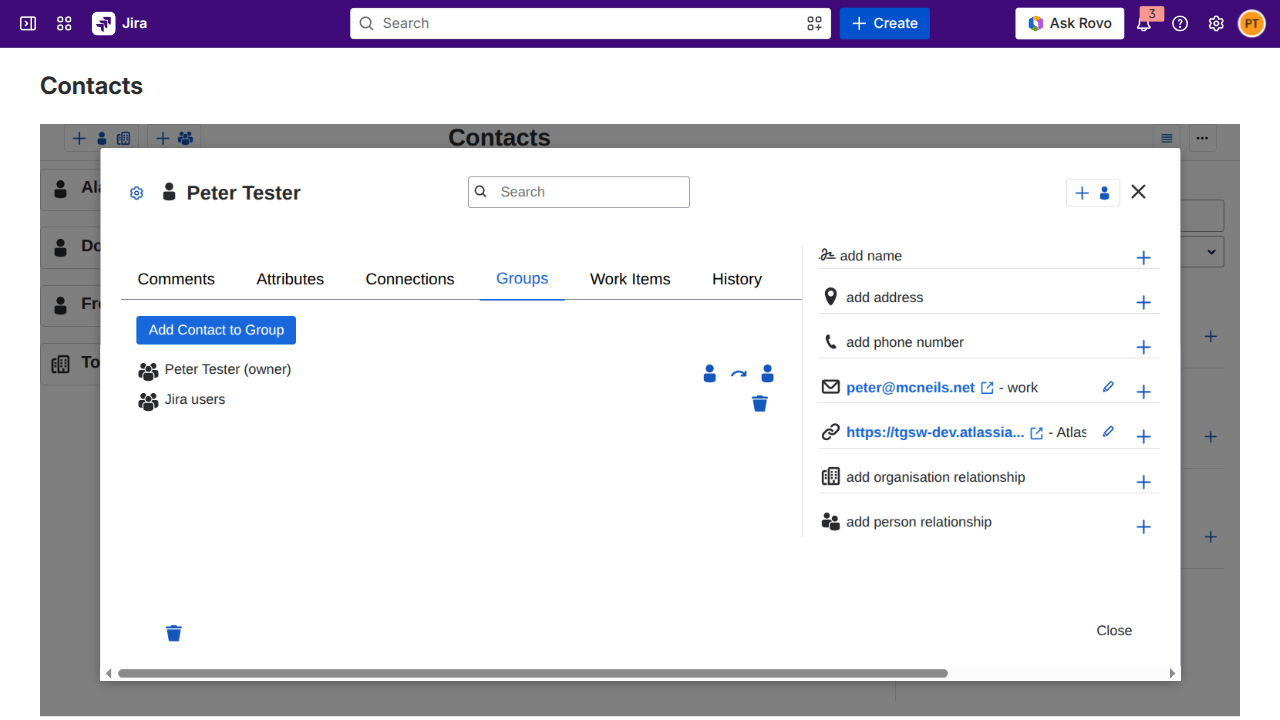
The Add Contact to Group button and the delete buttons only appear if you have write access to the contact. If a contact was shared with you read-only, the Groups tab is informational.
Filtering the contact list by group
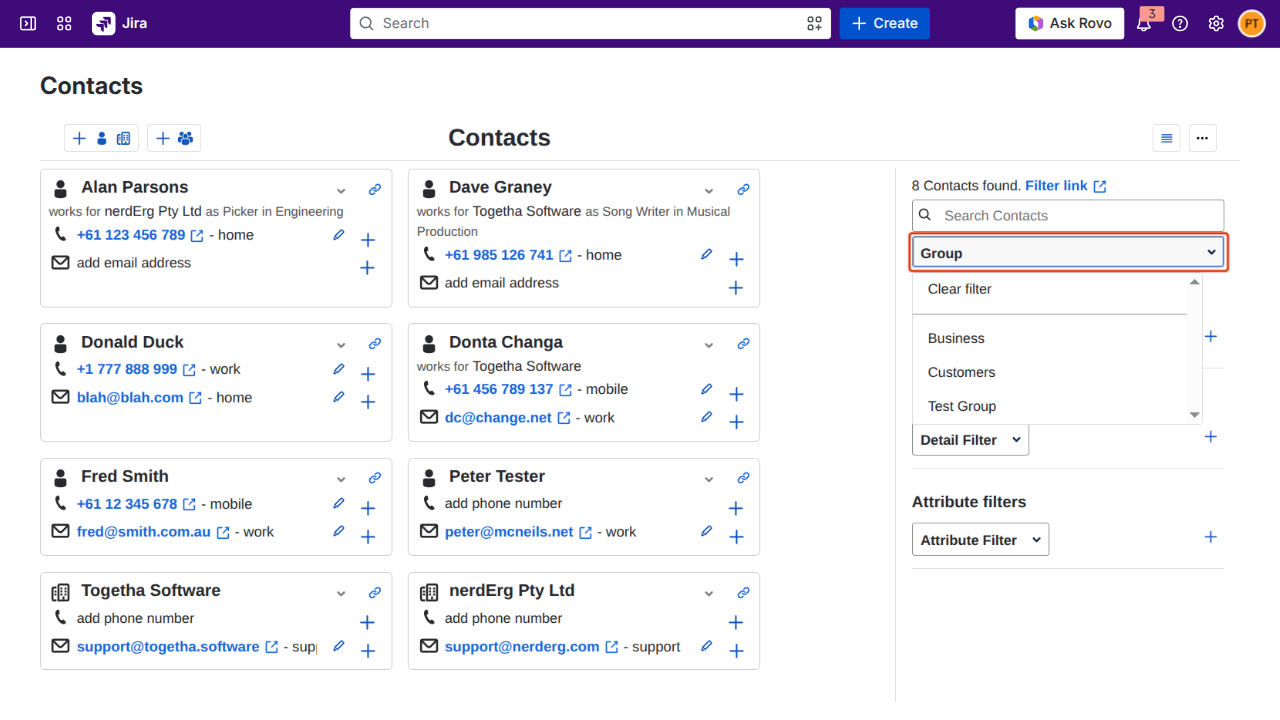
The side panel on the Contacts page has a Group filter. Pick a group and the list updates to show only its members. Combine the group filter with the search box and the contact-type filter to narrow further.
My Contacts sits at the top of the Group filter. Pick it to show only the contacts you own, which are the contacts in your default group (contacts you create or import are added there). It's an opt-in filter: when no group is selected, the list shows every contact you can see, across all your groups.
Sharing a group with your team
By default, a group is private to you. To share one with other people, you add it to an access group that includes those people.
-
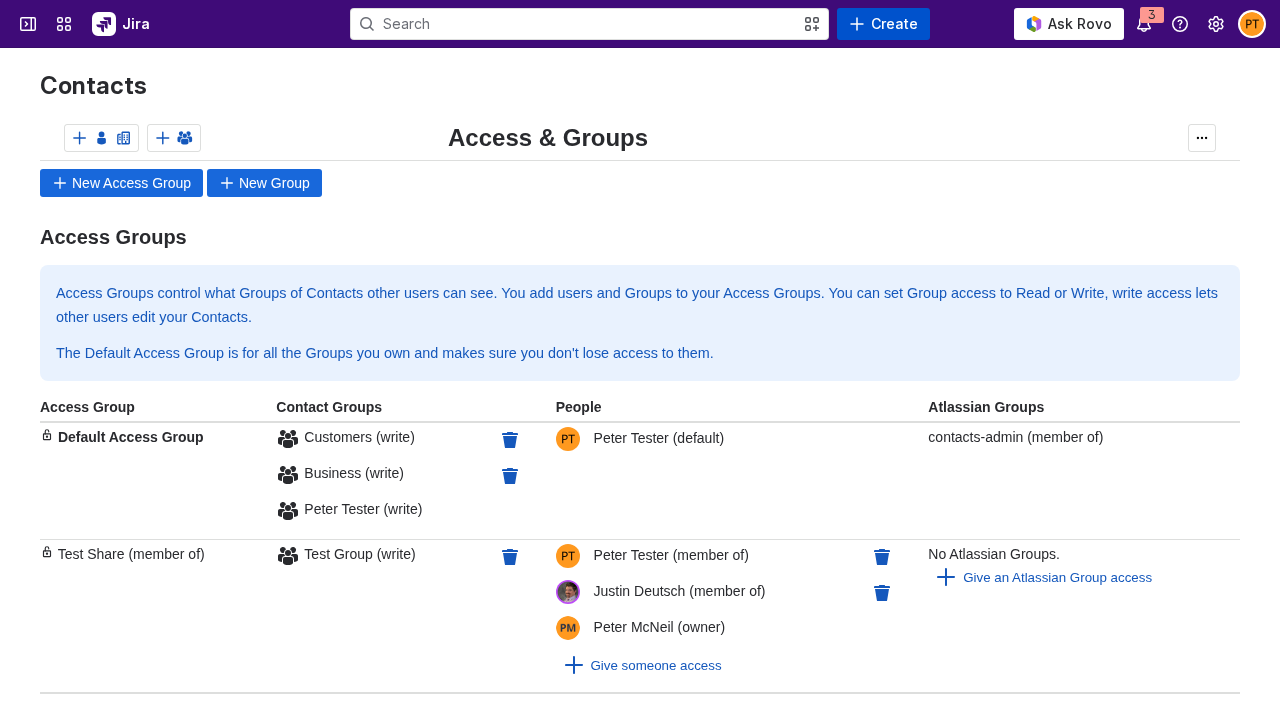
Open the kebab menu on the Contacts page and click Access & Groups.
-
Pick the target access group. If an access group you own already has the right people in it, use that and skip to step 4.
-
Create a new access group if no suitable one exists. Give it a name, then add the people or Atlassian groups who should see your contacts. You can only add groups to access groups you own.
-
Click Add a Contact Group in the Groups column of the target access group row.
-
Pick your group from the dropdown. Tick Write access if members should be able to edit and add contacts, not just view them.
-
Click Add to group. Your group now appears under that access group, and everyone in the access group can see its contacts.
Result
You have one or more named groups containing the contacts you work with most. You can filter the contact list to show only a group's members, and you can share a group with teammates through an access group.
Next:
-
Linking contacts to work items: attach a contact, or contacts from a group, to a Jira Work item.
-
Importing contacts from CSV: add many contacts to a group in one step.