The Togetha Contacts admin page is where a Jira admin configures the app: the contact administrator group, user imports, backups, JSM sync, input forms, relationships, contact attributes, the site-wide change history, and a support-gated database tool. This page describes each tab.
Opening the admin page
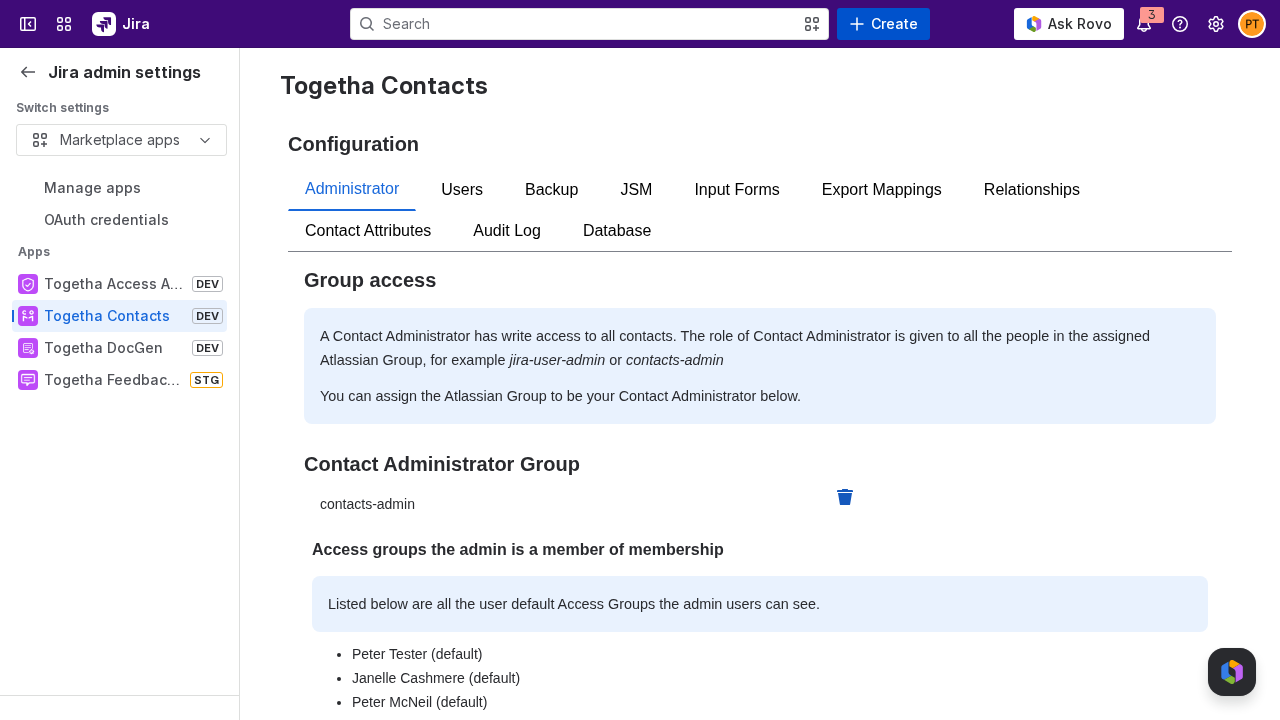
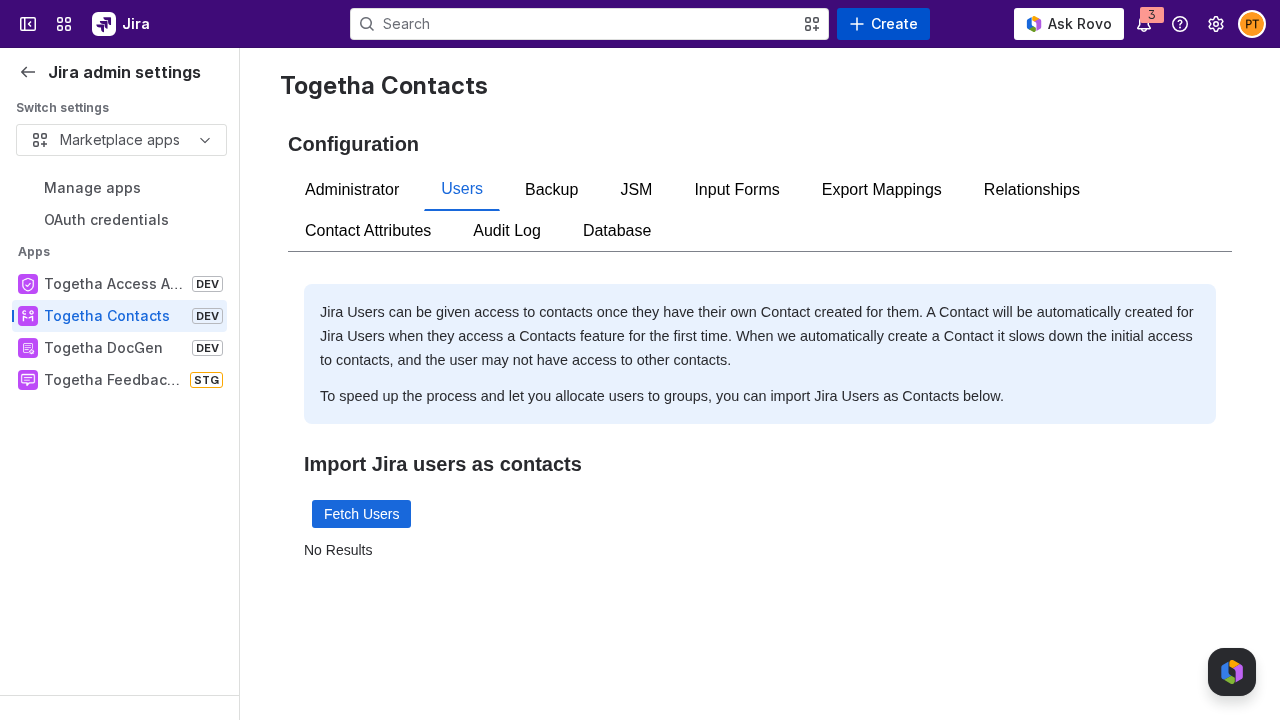
From Jira, open Settings, go to Apps, and select Togetha Contacts from the app list. The page opens on the Administrator tab, with a row of tabs across the top.
Tabs at a glance
|
Tab |
What you manage |
|---|---|
|
Administrator |
The Atlassian group whose members are Contact Administrators. |
|
Users |
Importing Jira users as contacts ahead of time. |
|
Backup |
Backing up and restoring the contacts database. |
|
JSM |
Syncing Jira Service Management organisations and customers into Contacts. |
|
Input Forms |
The forms shown in the Add contact dialog. |
|
Export Mappings |
Saved field mappings end users can pick when they export contacts. |
|
Relationships |
Which kinds of contacts and entities can be linked, and by which relation. |
|
Contact Attributes |
Custom fields added to Person and Organisation contacts. |
|
Audit Log |
The site-wide history of contact changes. |
|
Database |
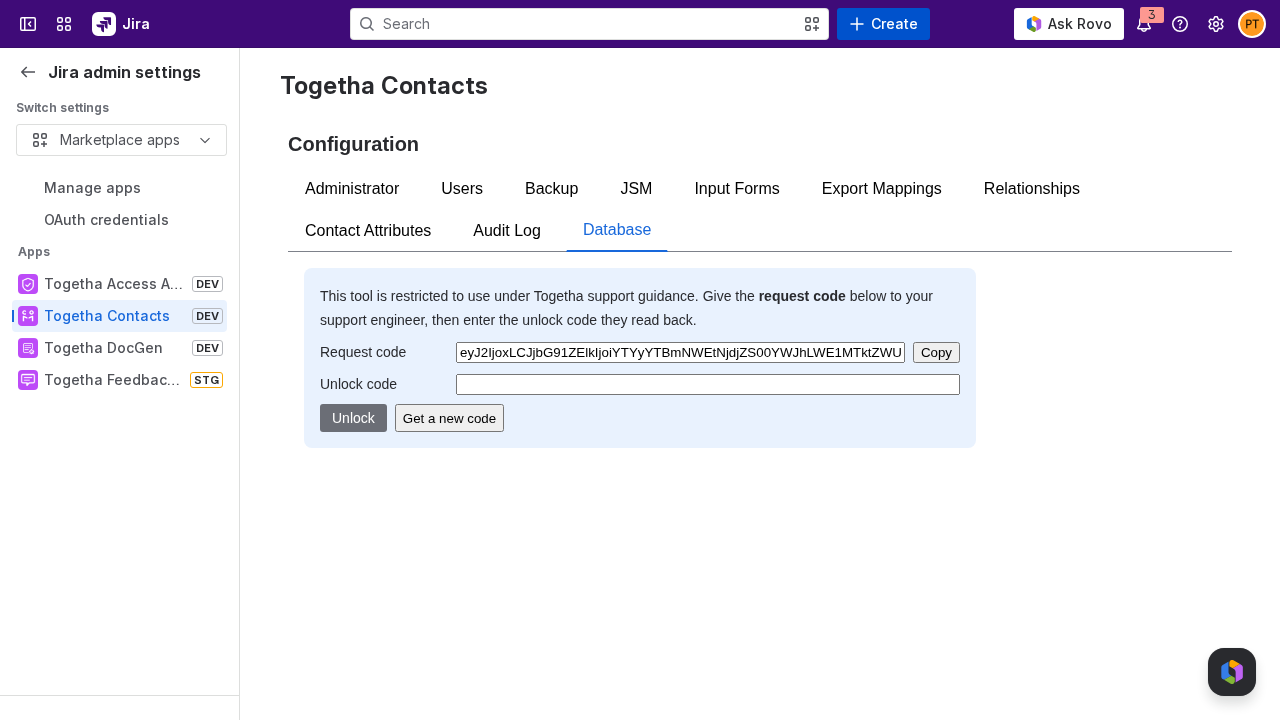
A raw SQL tool for the contacts database, used only under Togetha support guidance. |
Administrator
A Contact Administrator has write access to every contact in the app. You grant this role by nominating one Atlassian group: every member of that group becomes a Contact Administrator. Typical choices are a group such as jira-user-admin or contacts-admin.
|
Control |
What it does |
|---|---|
|
Contact Administrator Group |
Shows the current group, or Group not set. Click it to pick an Atlassian group. Selecting a new group replaces the previous one. |
|
Delete button |
Clears the current administrator group, so no group has the role. |
|
Access groups the admin is a member of |
Lists the default user Access Groups that administrators can see. Members of the admin group are added to these groups automatically. |
Users
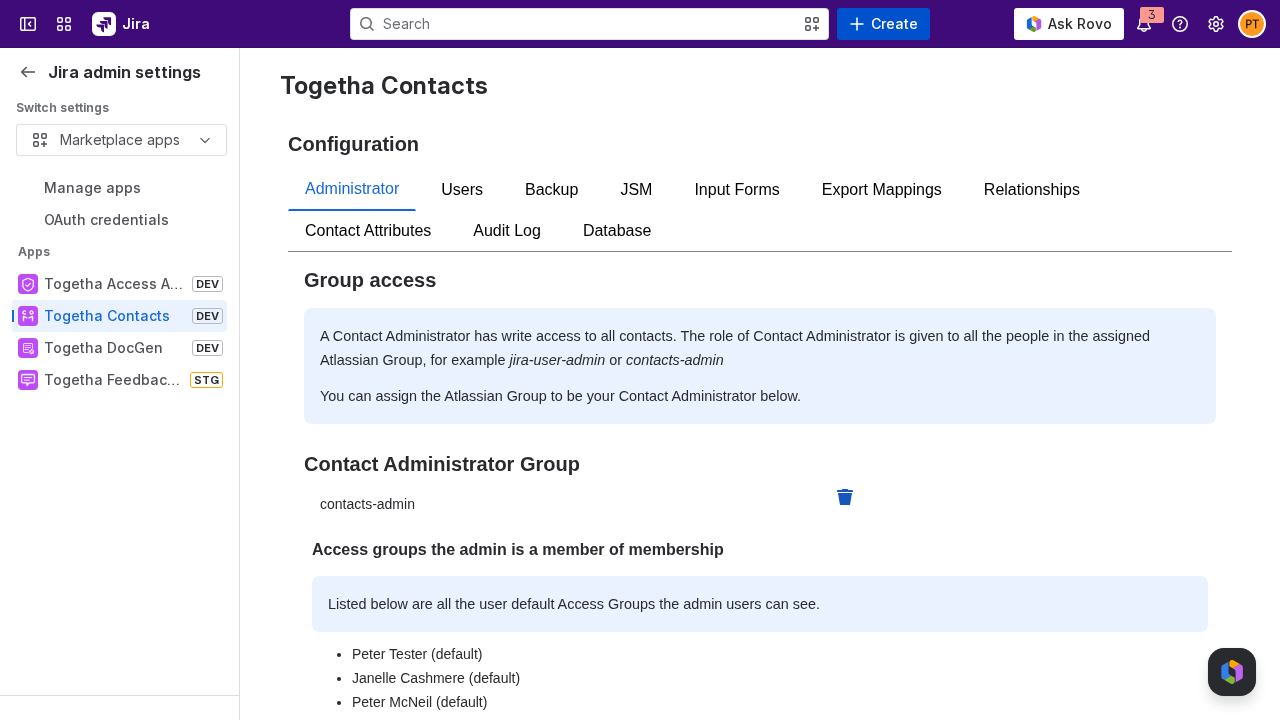
A contact is created automatically for each Jira user the first time they open a Contacts feature. Creating it on demand slows that first visit, and the new user may not yet have access to other contacts. Importing users ahead of time avoids both problems and lets you assign people to a group.
To import Jira users as contacts:
-
Click Fetch Users. The list shows every Jira account that is not an app, with its name, email, account type, and status.
-
Select the users you want to import.
-
Choose a group to import them into under Select a group to import into.
-
Click Import Selected Users. A confirmation appears when the import finishes.
Backup
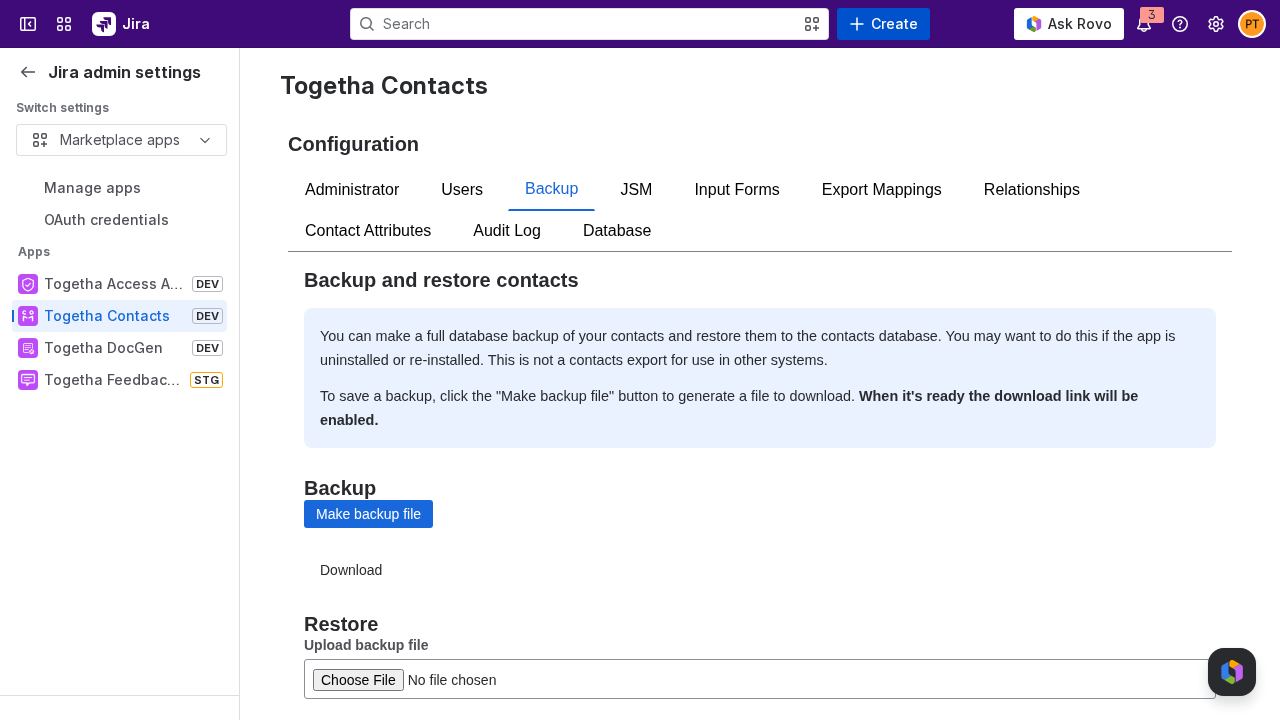
A backup is a full copy of the contacts database that you can restore later, for example before you uninstall or reinstall the app. It is not an export for use in other systems.
|
Action |
Steps |
|---|---|
|
Backup |
Click Make backup file. When the file is ready, the Download link becomes active. Click it to save a dated JSON file (for example |
|
Restore |
Under Restore, upload a backup JSON file with Upload backup file, then click Restore?. The status line reports progress as the config, entities, and relationships load, and shows Restore complete when finished. |
Restore is destructive. It deletes all current contacts, groups, and relationships before loading the backup file.
JSM
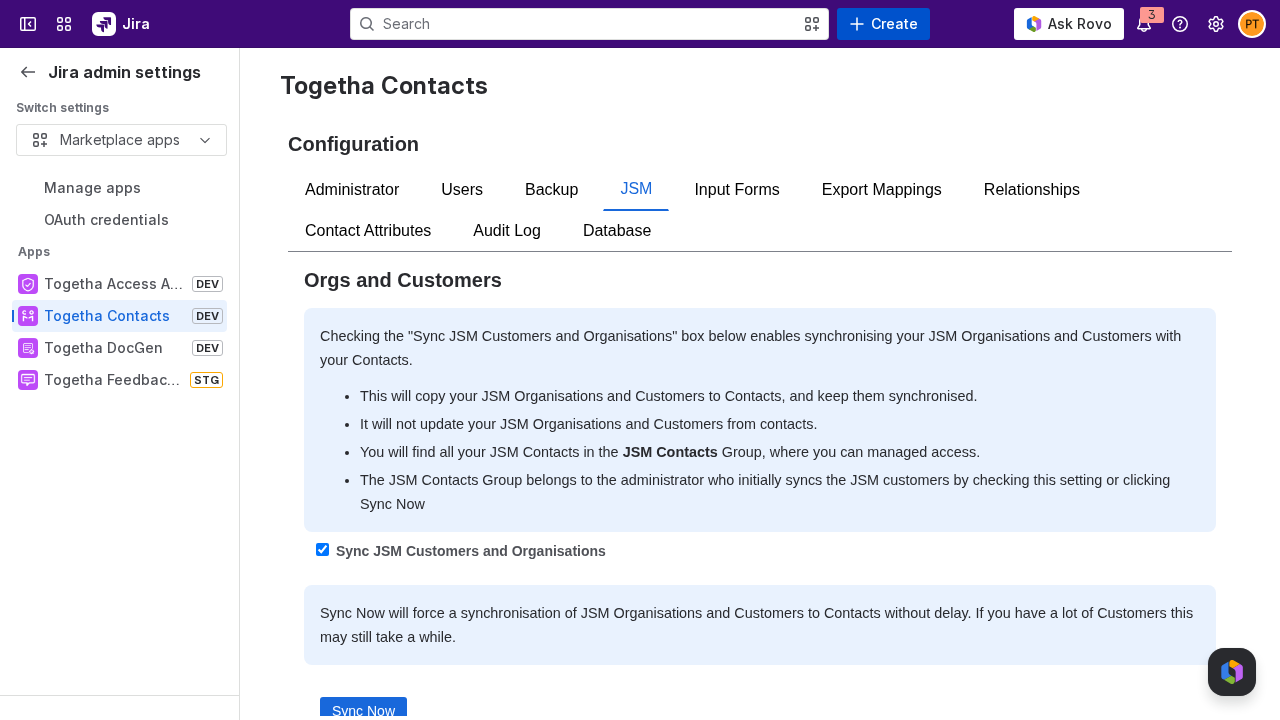
This tab syncs your Jira Service Management organisations and customers into Contacts.
|
Control |
What it does |
|---|---|
|
Sync JSM Customers and Organisations checkbox |
Turns the sync on or off. While on, JSM organisations and customers are copied into Contacts and kept up to date. |
|
Sync Now |
Forces an immediate sync without waiting for the next scheduled run. With many customers this can take a while. The status text shows in progress, failed, or success. |
Things to know about the sync:
-
The sync is one way. It copies from JSM into Contacts and never changes your JSM organisations or customers.
-
Synced contacts appear in the JSM Contacts group, where you manage who can see them.
-
The JSM Contacts group belongs to the administrator who first turns on the sync or clicks Sync Now.
Input Forms
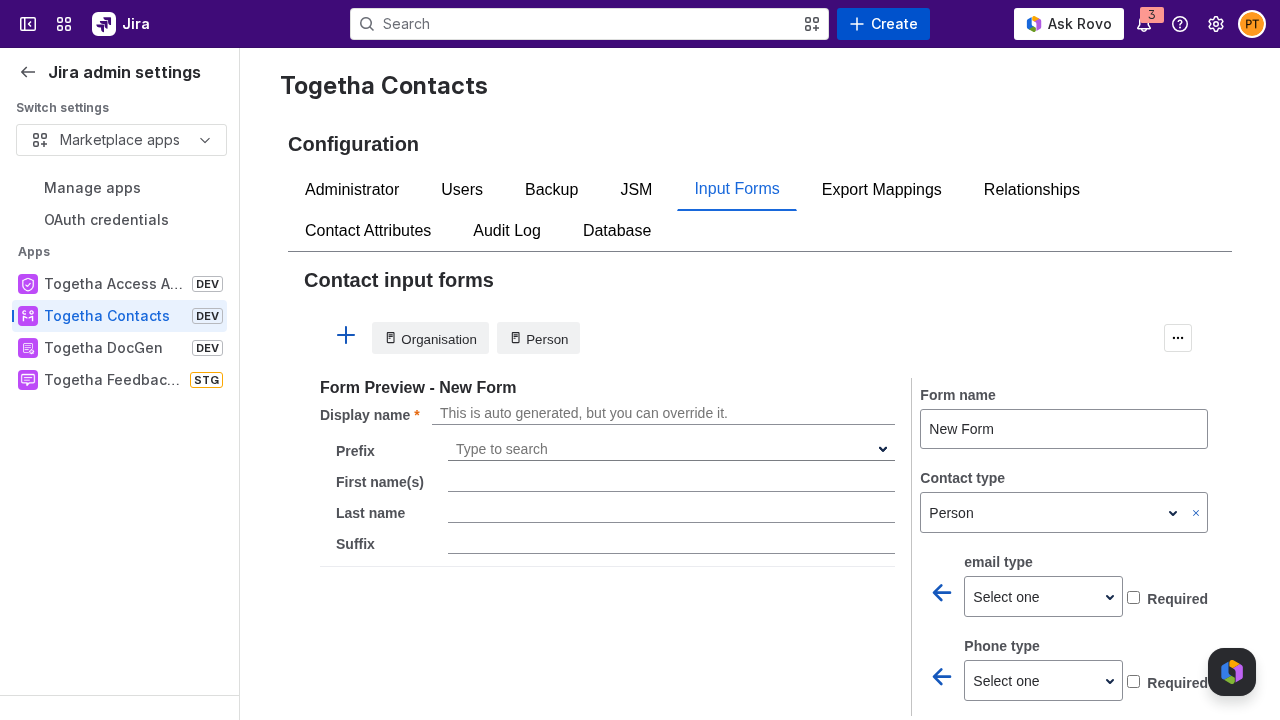
Input forms define the fields shown in the Add contact dialog. Each form has a name, a contact type of Person or Organisation, and a list of fields. End users pick a form by name when they create a contact.
The tab is split into a live Form Preview on the left and an editing panel on the right.
|
Control |
What it does |
|---|---|
|
Form name |
The name shown to end users in the Add contact dialog. |
|
Contact type |
Sets the form to Person or Organisation. Changing it resets the field list. |
|
Field rows |
Each row pairs a field type with an arrow button that adds it to the form, and a Required checkbox. |
|
Save |
Saves the form. Saving a form whose name matches an existing one replaces it. |
|
Clear |
Discards the current edits without saving. |
|
Delete button |
Removes the selected form. |
The field types you can add are:
|
Field type |
Adds |
|---|---|
|
Email type |
An email address field of the chosen relation, such as work or personal. |
|
Phone type |
A phone field of the chosen relation, such as mobile. |
|
Address type |
An address field of the chosen relation. |
|
Link type |
A link or URL field. |
|
Organisation Relation |
A relationship to an organisation, such as works for. |
|
Person Relation |
A relationship to another person. |
|
Detail field |
A property from the contact type's detail schema (organisations only). |
To work with forms, click a form name in the toolbar to edit it, use the add button to start a new form, or use the kebab menu to choose from all saved forms and to import or export form configurations.
Two starter forms ship with the app: a Person form and an Organisation form. The Person form captures an email, a mobile phone, and a works for organisation relationship that also records division and job title. The Organisation form captures support phone and email contacts, a website and a LinkedIn link, a CEO relationship, an industry detail, and a head office address. Both are ordinary saved forms, so you can edit their fields, rename them, or delete them the same way as any form you create.
Import and export forms
You can move form configurations between sites, or keep a backup, from the Input Forms kebab menu.
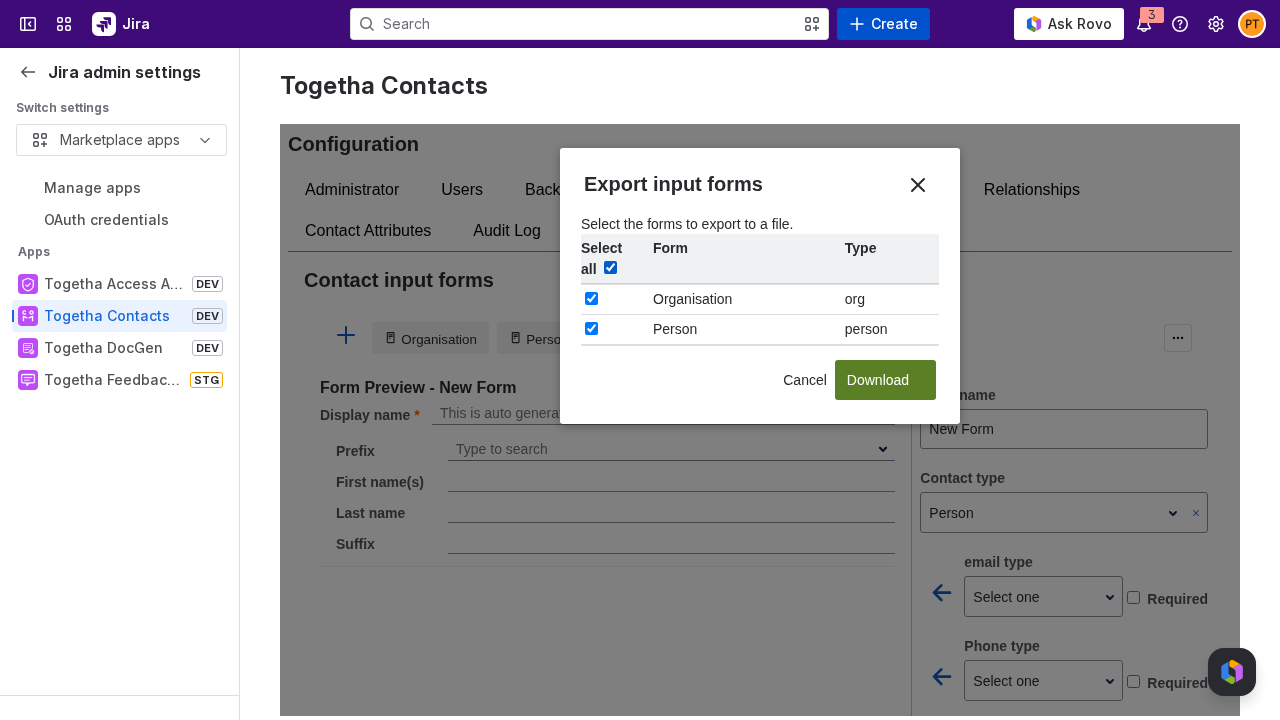
To export, open the kebab menu and choose Export forms…. Select the forms you want, then click Download to save them as a JSON file. The form you are currently editing is selected for you.
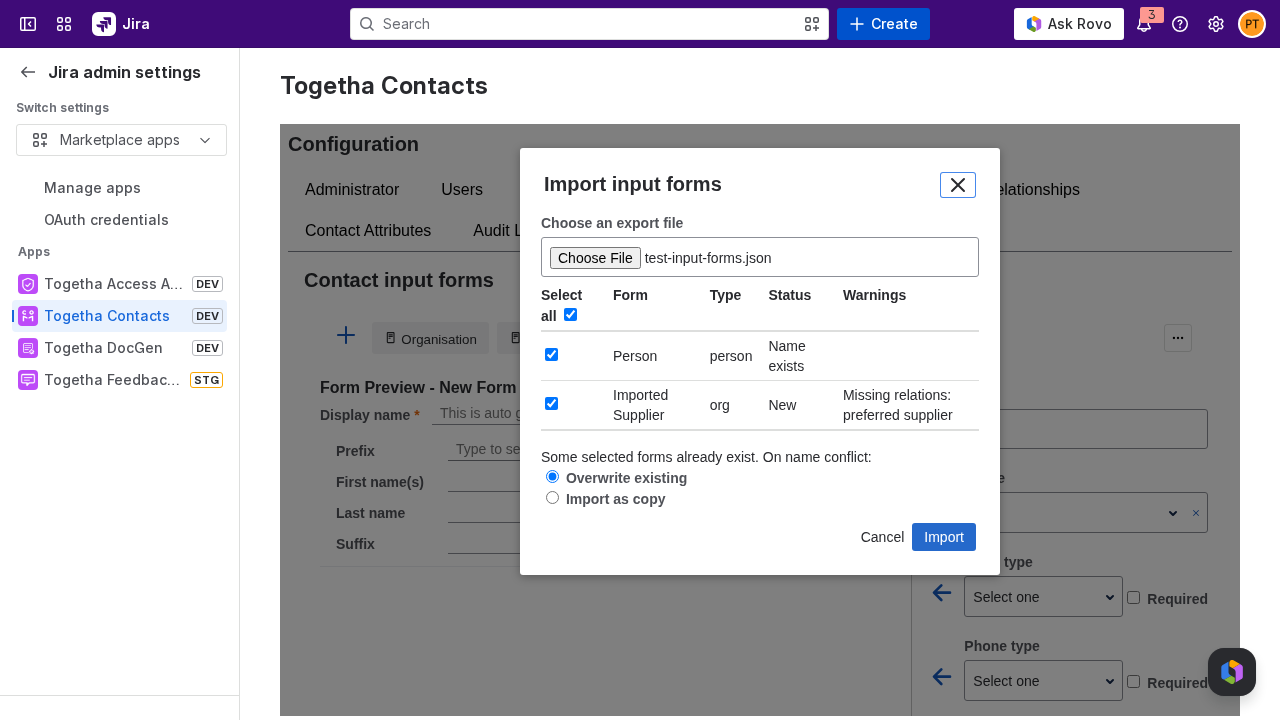
To import, open the kebab menu and choose Import forms…, then choose a JSON file you exported earlier. Each form in the file is listed with its name, type, a status of New or Name exists, and any warnings. A warning appears when a form uses a relationship that this site does not have, so you can add the missing relationship before people use the form.
All forms in the file are selected to start with. Clear the ones you do not want. When a selected form has the same name as one already on this site, choose how to resolve the clash:
-
Overwrite existing replaces the current form with the imported one.
-
Import as copy keeps both and saves the imported form under a new name.
Click Import to save the selected forms. Imported forms are saved straight away.
Export Mappings
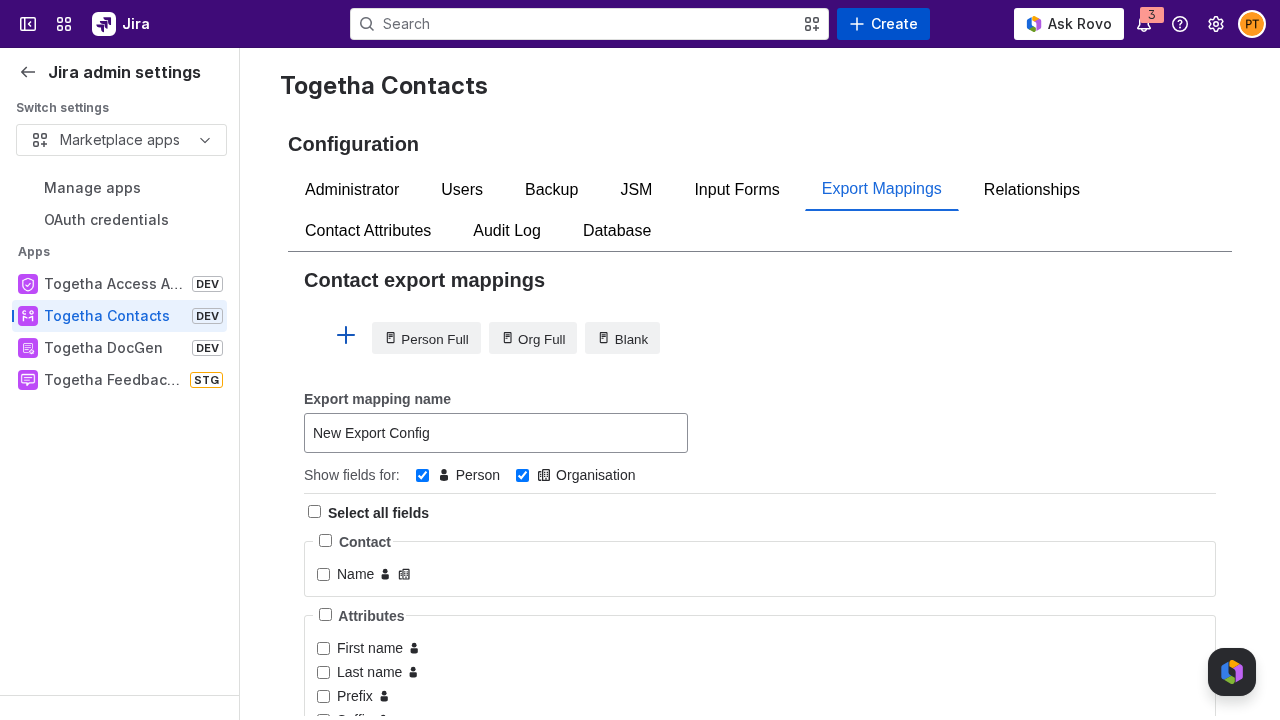
An export mapping is a saved set of fields for exporting contacts. Each one has a name and a list of fields. End users pick a mapping by name in the Export contacts dialog, so they can export a consistent set of columns without choosing fields by hand. See Exporting contacts.
The tab lists your saved mappings as buttons across the top, with an add button to start a new one. Below the list are a name field and a field picker.
|
Control |
What it does |
|---|---|
|
Add button |
Starts a new mapping with an empty field list and the name New Export Config. |
|
Mapping buttons |
Click a saved mapping to load it for editing. The one you are editing is highlighted. |
|
Export mapping name |
The name end users see in the Export contacts dialog. |
|
Field picker |
The fields to include in the export. |
|
Save |
Saves the mapping. Saving over an existing name replaces it. |
|
Clear |
Discards the current edits and returns to a new, empty mapping. |
|
Delete button |
Removes the loaded mapping. |
To create an export mapping:
-
Click the add button to start a new mapping.
-
Type a name in Export mapping name.
-
Tick the fields to include in the picker.
-
Click Save. The mapping appears in the list and becomes available in the Export contacts dialog.
The field picker is the same one end users see when they export. Each field is tagged with a person icon, a building icon, or both, showing whether it applies to Person contacts, Organisation contacts, or both. Untick Person or Organisation at the top to narrow the list, then use a section's select-all, or the global select-all, to tick every field currently shown.
Relationships
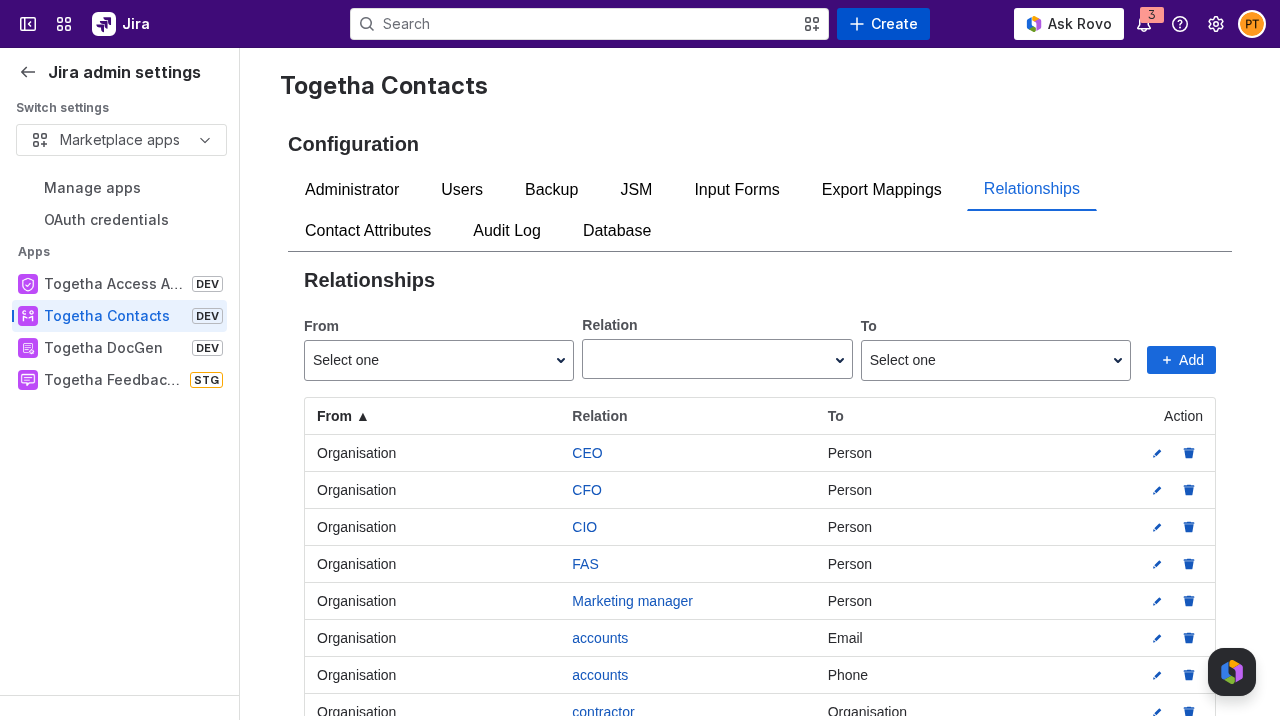
The Relationships tab controls which kinds of contacts and entities can be linked, and by which relation. A relationship type is a triple: a From entity type, a relation, and a To entity type. For example, Person — works for — Organisation. Contacts can only be linked in ways defined here.
The table lists every relationship type, with sortable From, Relation, and To columns. Click a column heading to sort by it.
To add a relationship type:
-
Under From, pick the entity type the relationship starts from. Only contact types (Person and Organisation) can be the start.
-
Under Relation, pick an existing relation, or type a new label to create one.
-
Under To, pick the entity type the relationship points to.
-
Click Add.
To rename a relation, click its name in the Relation column. The edit dialog lets you change the name and its detail fields. Renaming a relation changes how it appears for every contact that uses it.
To delete a relationship type, click the trash icon on its row. What happens next depends on whether the type is in use:
-
If contacts are using the relationship type, deletion is blocked and a message shows how many relationships use it. Remove or re-link those relationships first, then try again.
-
If it is not in use, confirm the deletion. If the underlying relation is then left unused, you are asked whether to delete the relation from the system entirely.
Default relationships are marked with a system badge. You can view them but not edit or delete them, because the app depends on them.
Contact Attributes
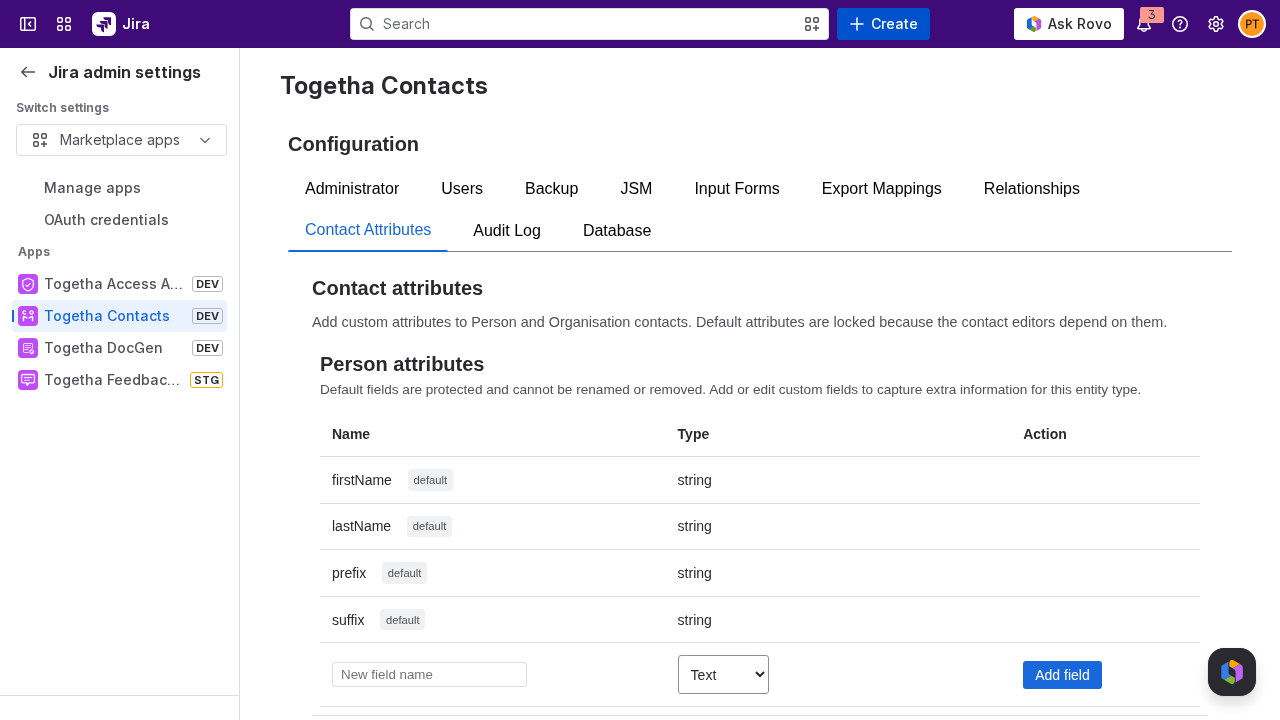
The Contact Attributes tab adds custom fields to Person and Organisation contacts, on top of the built-in fields. Each contact type has its own editor, listing every field with its name and type.
Default fields show a default badge. They are locked because the contact editors depend on them, so you cannot rename or remove them.
To add a custom field:
-
Type a name in New field name.
-
Choose a field type.
-
For a Choice field, enter the options as a comma-separated list, for example
red, green, blue. -
Click Add field.
The field types are:
|
Type |
Stores |
|---|---|
|
Text |
Free text. |
|
Number |
A numeric value. |
|
Yes / No |
A true or false value. |
|
Date |
A calendar date. |
|
Choice |
A single value from a fixed list of options you define. |
To change a custom field's type or options, click its edit icon, make the change, and click Save. To remove a custom field, click its delete button. Custom fields appear in the contact editor for that contact type.
Audit Log
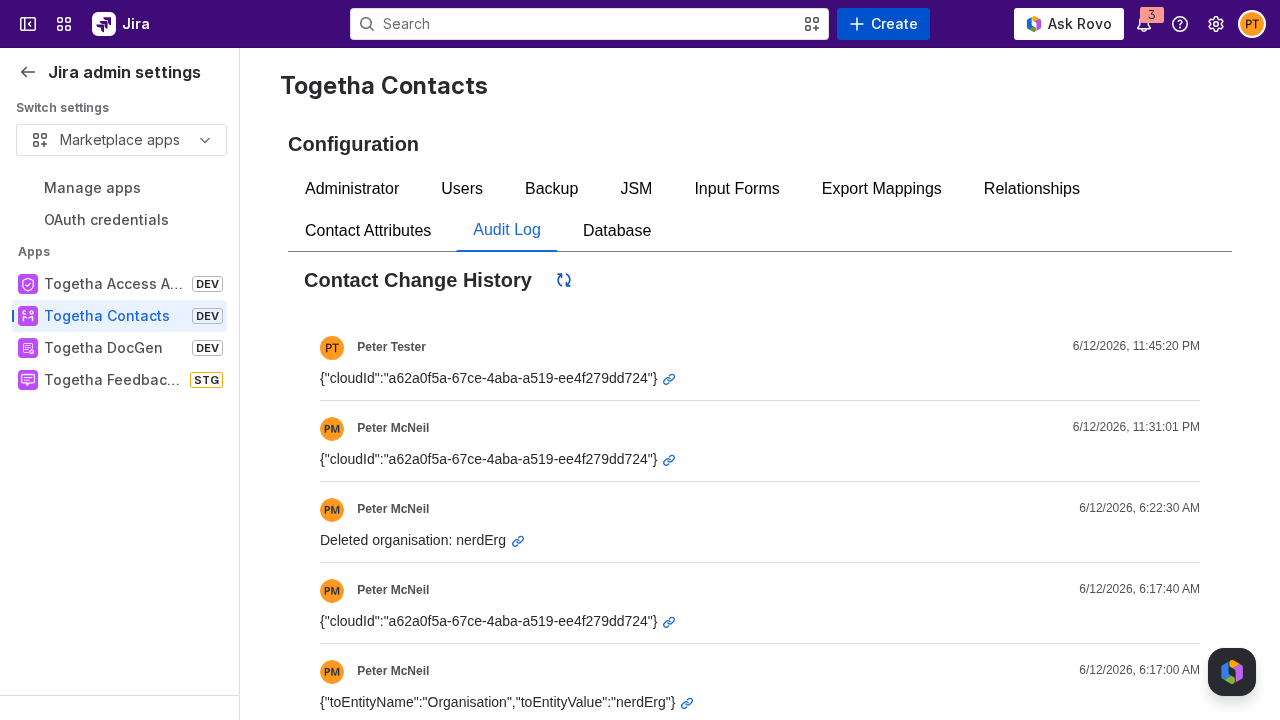
The Audit Log tab shows the site-wide history of contact changes across all users. Each entry lists the user who made the change, the date and time, a description of what changed, and a link to the affected contact.
The history records these change types:
|
Change |
Example description |
|---|---|
|
Contact created |
Created person: Jane Doe |
|
Contact updated |
Updated contact: Jane Doe |
|
Contact deleted |
Deleted person: Jane Doe |
|
Relationship added |
Added work email jane@example.com |
|
Relationship updated |
Updated work email jane@example.com |
|
Relationship removed |
Removed work email jane@example.com |
|
Type changed |
Changed type from Person to Organisation |
The log shows 100 entries per page. Use Previous and Next to move between pages, and the refresh button next to the Contact Change History heading to reload the current page.
Database
The Database tab is a raw SQL tool for the contacts database. It is restricted to use under Togetha support guidance and is locked by default.
To unlock it:
-
Open the Database tab. It shows a request code.
-
Contact Togetha support and read them the request code. Use Copy to copy it to your clipboard.
-
Support reads back an 8-digit unlock code.
-
Enter the unlock code and click Unlock.
While unlocked, a status bar shows how long access lasts (30 minutes) and counts down. Click Lock now to end the session early. When the time runs out, the tab re-locks automatically and you need a new code to continue.
A few things to know:
-
Each request code works once. If a code expires before you use it, click Get a new code.
-
The unlock code allows a limited number of attempts before you need a new request code.
-
If support unlock has not been configured for your site, the tab reports that it is unavailable. Contact Togetha support.
This tool runs SQL directly against the live contacts database and can change or delete data. Only use it while working with Togetha support.