
Export your contacts to a CSV or Excel file. You choose which fields to include, so you can produce anything from a simple name-and-email list to a full export of every attribute and related entity.
How exporting works
Exporting reads your contacts and writes the fields you pick into a single file, one contact per row. It doesn't change or remove any contacts, so you can export as often as you like.
You control three things in the export dialog:
|
Choice |
What it does |
|---|---|
|
Format |
CSV (opens in any spreadsheet or text editor) or Excel (an |
|
Export mapping |
An optional saved set of fields, set up by an admin, so you don't have to pick fields by hand. |
|
Fields |
The columns to include, such as Name, Groups, emails, phone numbers, and addresses. |
When a contact has more than one value for a field, such as two email addresses, the values share one cell, separated by a pipe character and a line break.
Prerequisites
-
You can open the Contacts page from the Apps menu.
-
You have at least one contact to export.
Choose which contacts to export
Export acts on the contacts you select. If you don't select any, it exports every contact currently shown by your filters.
-
Open the Contacts page.
-
Apply a Group filter or search if you want to narrow the list first.
-
Switch to list view using the table icon on the right of the toolbar, then tick the checkbox on each contact you want to export. Skip this step to export the whole filtered list.
Export your contacts
-
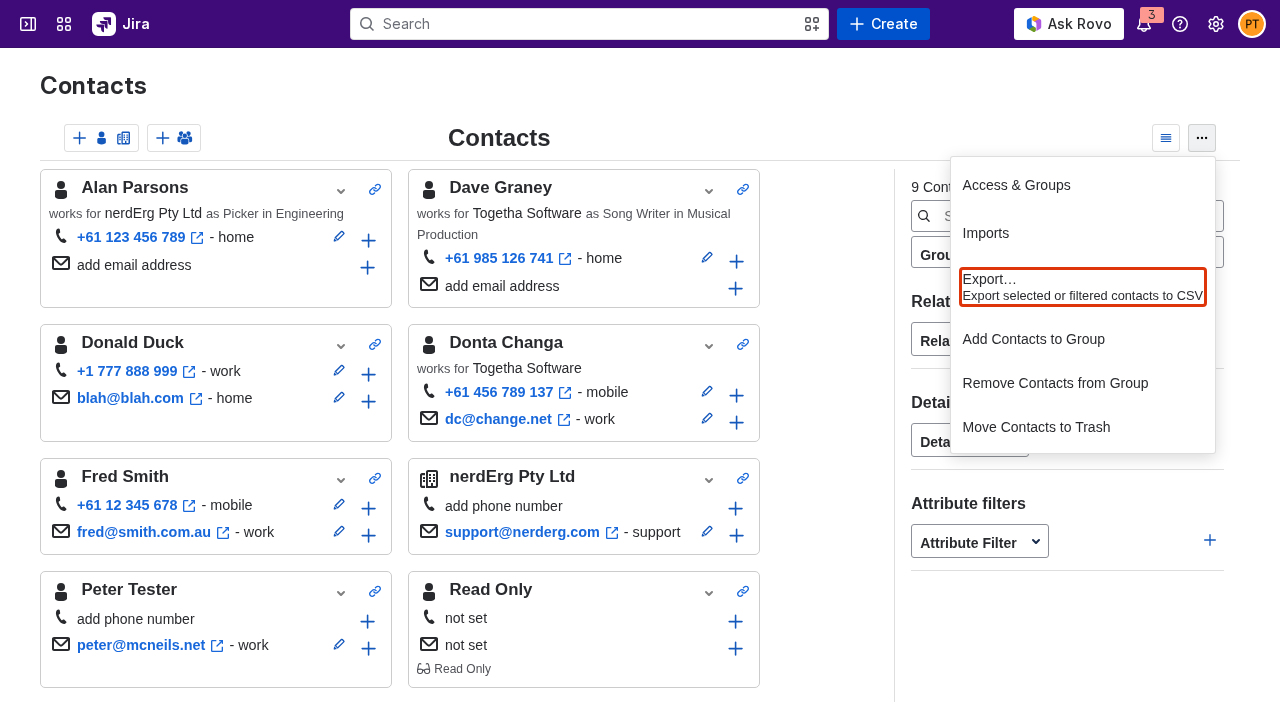
Open the kebab menu (the three-dot menu on the right of the toolbar) and choose Export.
-
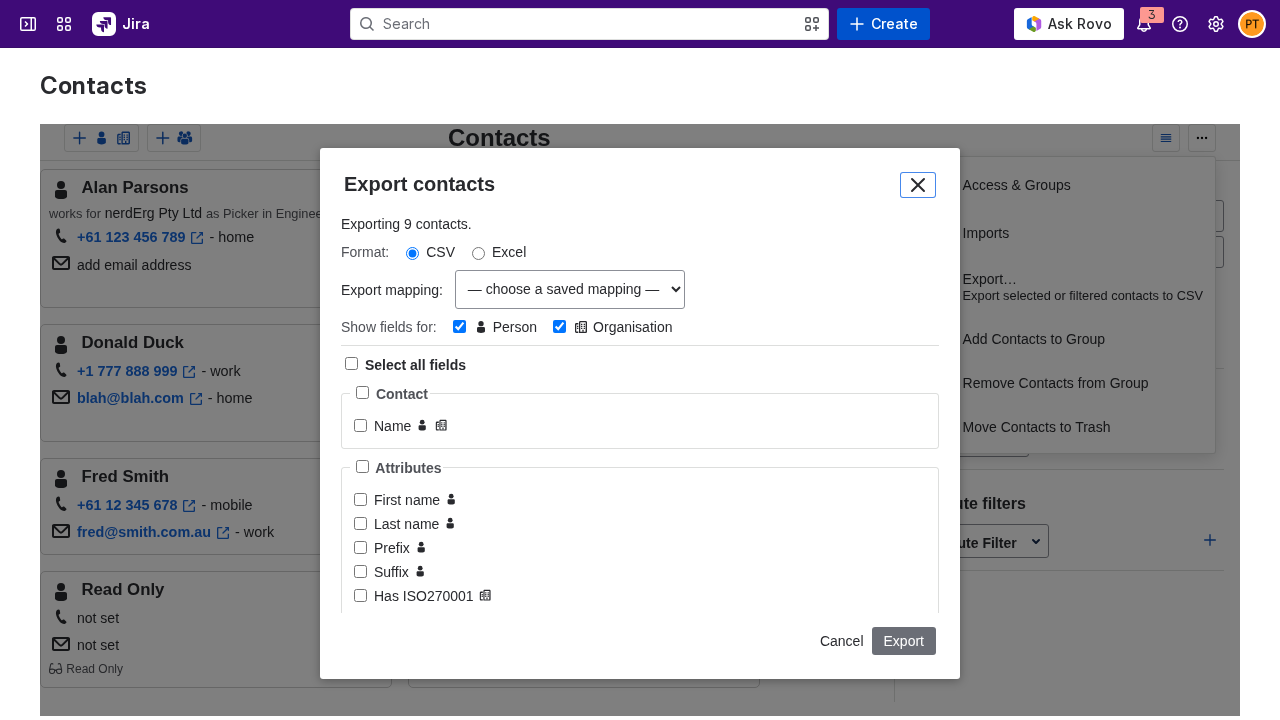
Check the contact count. The dialog opens with the heading Export contacts and tells you how many contacts it will export.
-
Choose a format. Select CSV or Excel.
-
Choose an export mapping (optional). If an admin has saved any mappings, pick one from the Export mapping list to fill in the fields for you. You can still adjust the selected fields afterward.
-
Pick the fields to include. Tick the fields you want in the field picker. Use a section's select-all, or the global select-all, to tick several at once.
-
Click Export. Once the file is ready, the button changes to a Download button.
-
Click Download to save the file. CSV files are named
contacts-export-<date>.csvand Excel filescontacts-export-<date>.xlsx.
Narrow the field picker to people or organisations
The field picker groups fields into sections and tags each field with a person icon, a building (organisation) icon, or both, showing which kind of contact the field applies to.
-
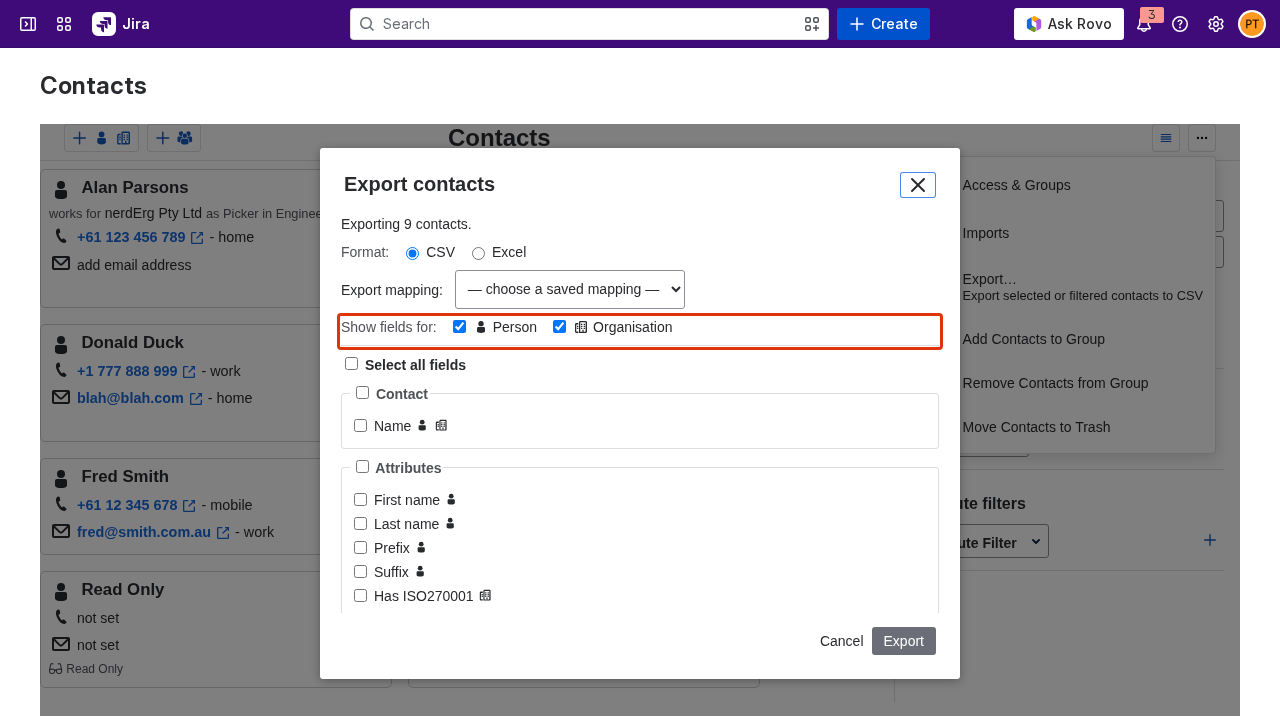
Use the Person and Organisation checkboxes at the top of the picker. Both are ticked by default.
-
Untick Organisation to show only fields that apply to people, or untick Person to show only fields that apply to organisations.
-
Click select-all to tick every field currently shown. Select-all acts only on the fields visible under the current filter, so you can quickly build a people-only or organisations-only export.
Result
Your contacts download as a CSV or Excel file containing the fields you chose, one contact per row. The columns always follow a fixed order, starting with Name, then attributes and groups, then any related fields such as emails, phone numbers, and addresses.
Next:
-
Importing contacts from CSV: bring contacts back in from a spreadsheet.
-
Working with groups: filter your contacts before exporting.