
Attach a contact to a Jira Work item using the Contacts custom field, so the contact appears in the work item's Contacts side panel and turns up in contact-based searches.
Prerequisites
-
The Contacts custom field has been added to your Jira Space by a Jira admin. Without that, work items in your Space have no place to hold a contact. If you don't see a Contacts field on a work item, ask your Jira admin to add one through Space settings → Fields. They may need to create the custom field first.
-
The contact you want to link already exists. If it doesn't, create it first using the steps in Creating a contact.
-
The contact is in a group you can see. The field's contact picker only shows contacts you have access to.
Linking a contact to a work item
-
Open the work item.
-
Find the Contacts field on the work item's details panel. The field shows the configured field name (for example Primary contact or Billing contact). When empty, it shows set Contact.
-
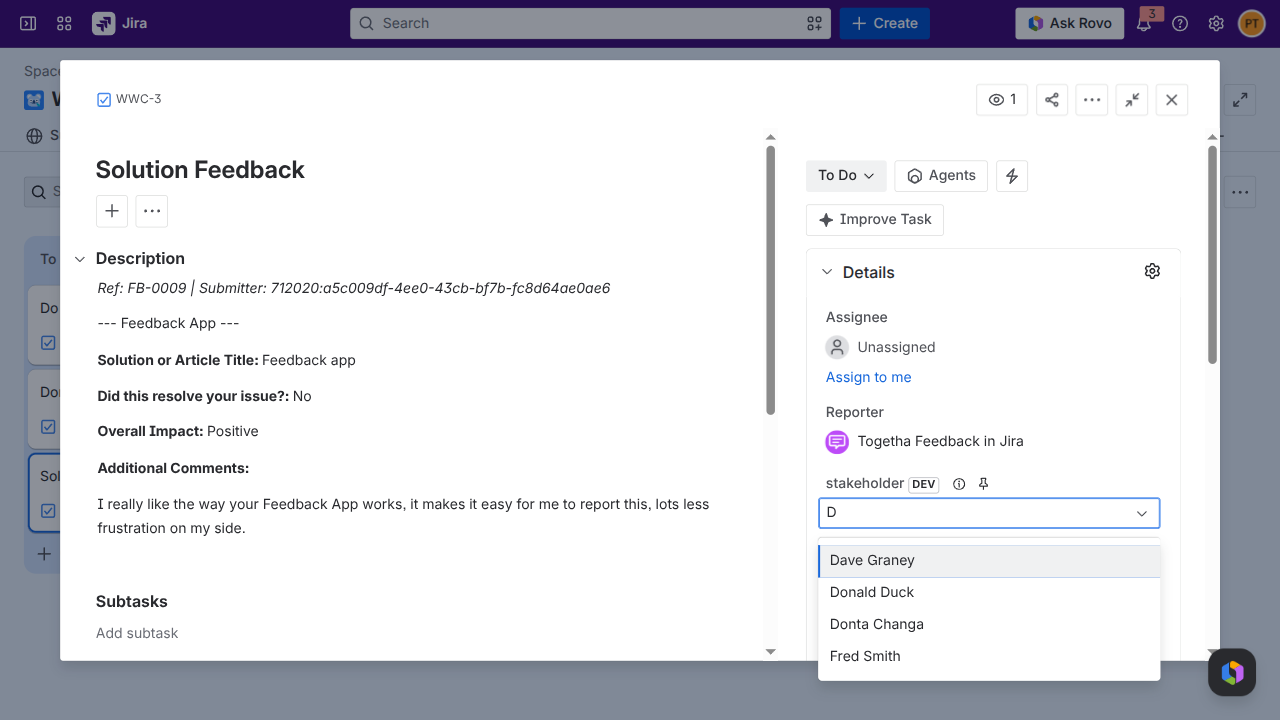
Click the field to open the contact picker.
-
Type to search. Enter a name or organisation to search by name, or type an email address to search by email instead (see Searching by email address below). The picker filters as you type, across the contacts you can see.
-
Select the contact from the results. The field saves automatically. The contact appears in the field and in the Contacts side panel on the right of the work item.
Searching by email address
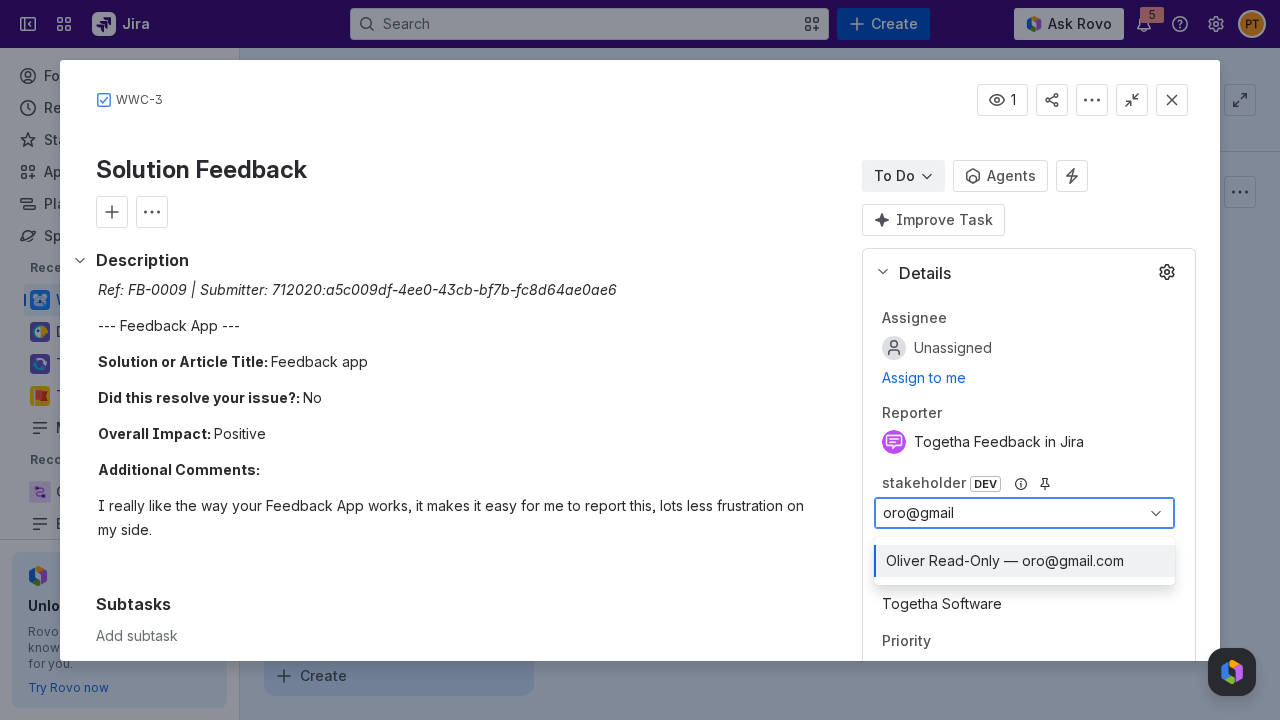
The contact picker searches by name by default. As soon as your search text contains an @, it switches to searching by email address and matches contacts whose email contains what you typed.
-
Type any part of an address, such as
@acme.comorjordan@, to find every contact you can see with a matching email. -
Each result shows the contact name with its matching email address after it, so you can tell apart contacts who share a name.
-
A contact appears once even if more than one of its email addresses matches your search.
-
Picking a result links the contact the same way a name search does. Only the contact name is stored on the work item, not the email text shown in the result.
Viewing linked contacts in the side panel
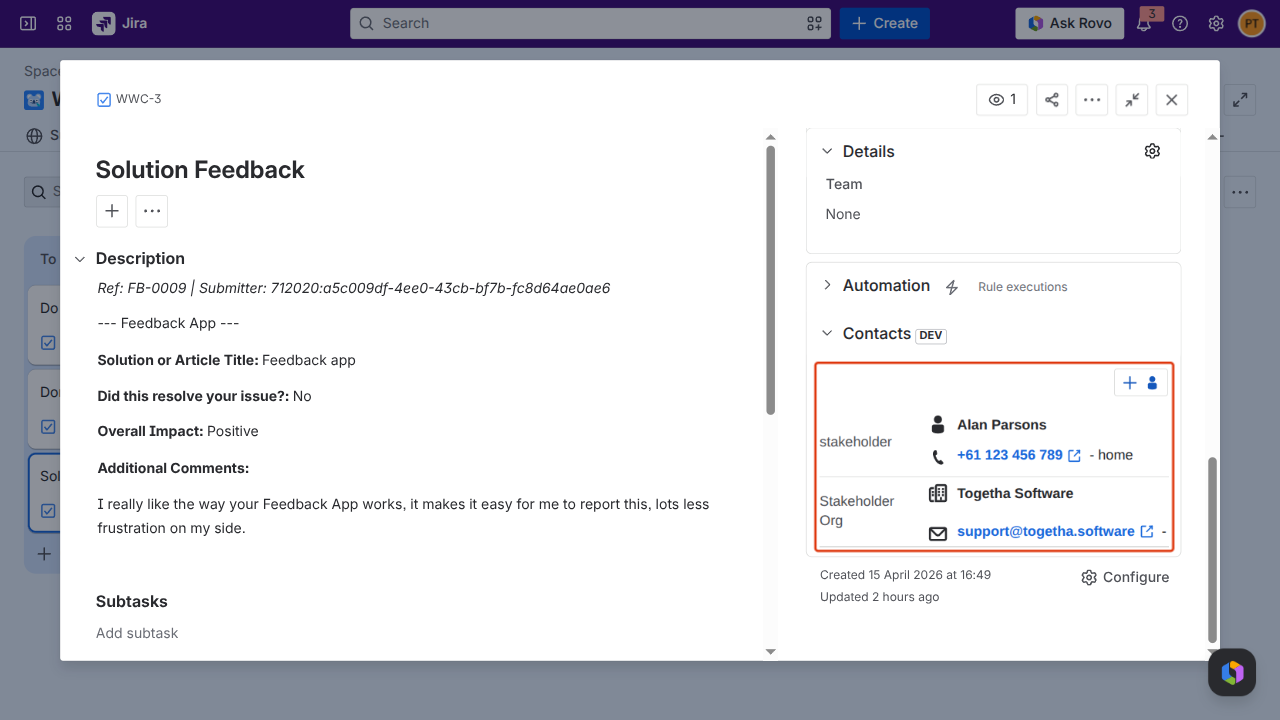
The Contacts side panel appears on every work item. It lists each Contact field on the work item together with the current contact for that field.
-
Click a contact's name to open the contact details dialog without leaving the work item. From there you can see comments, attributes, connections, the contact's groups, and other linked work items.
-
The label to the left of each name is the field name configured for that screen.
-
If a field is empty, the panel shows Contact not set.
-
If a contact has been deleted from the system, the panel shows Contact has been deleted. Pick a different contact in the field to clear that state.
Viewing all work items linked to a contact
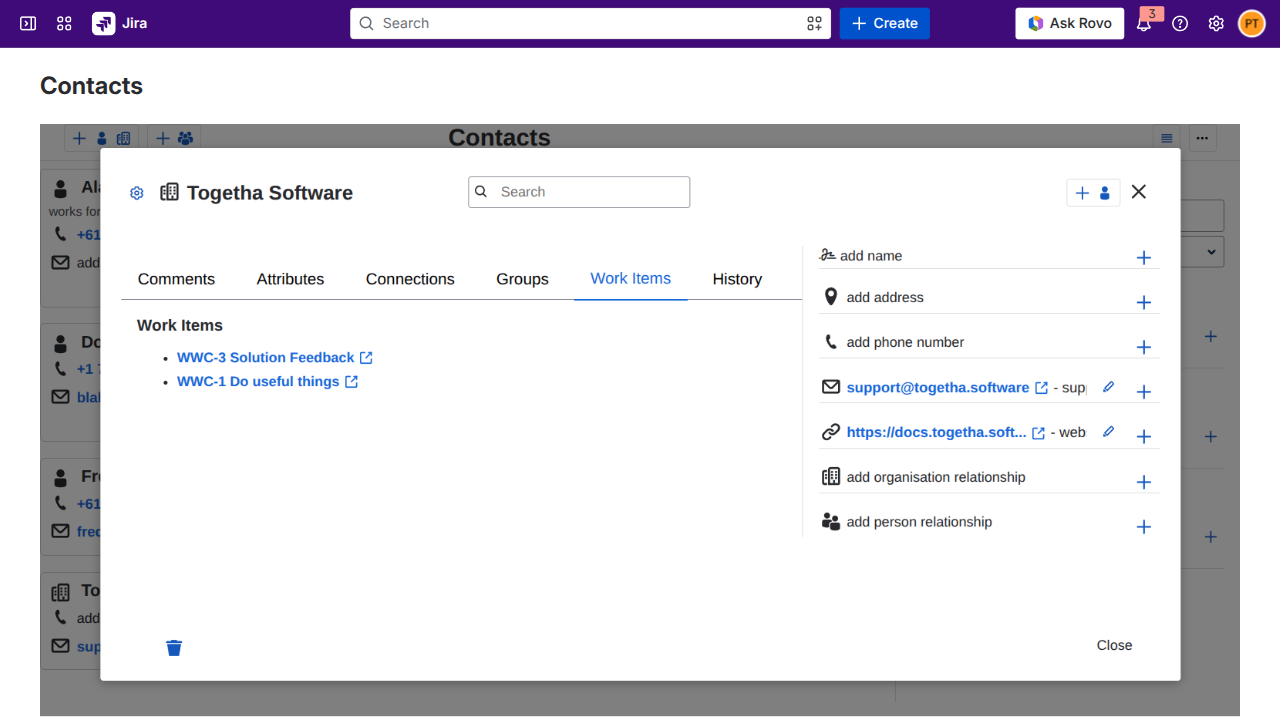
To see every work item a contact is attached to (the reverse view of the side panel), open the contact details dialog and switch to the Work Items tab.
-
Open the contact details dialog. Click the contact's name anywhere it appears: the contact list, a card, the Contacts side panel on a work item, or a matching contacts result.
-
Switch to the Work Items tab. The list shows every work item that has this contact in any of its Contacts fields, across every Jira Space you have access to. Each entry shows the work item key and summary.
-
Click a work item in the list to open it in Jira.
If the contact isn't linked to any work item, or you don't have permission to see any of the linked work items, the tab shows No work items found.
Creating a contact while you're on a work item
If the contact you need doesn't exist yet:
-
Click the Add contact button (the
+and person icon) at the top of the Contacts side panel. -
Fill in the contact form in the dialog that opens. See Creating a contact for the form details.
-
Save. The new contact is created. To finish linking it to this work item, go back to the Contacts field on the work item and pick the contact you just created.
Creating a contact from the side panel does not automatically link it to the current work item. You still need to pick it in a Contacts field on that work item.
Multiple contact fields on one work item
A Jira Space can have more than one Contacts field on a screen, configured by your Jira admin. Each field holds a single contact. Common setups include separate fields for Primary contact, Billing contact, and Technical contact. Each field shows as a separate row in the Contacts side panel.
Searching for work items by contact
The Contacts custom field is indexed for Jira search. From any work item search you can filter by contact name, for example:
"Primary contact" = "Acme Corporation"
The contact ID is also stored as a work item property under tscontacts.contacts.contactIds, which lets automation rules and advanced queries match work items by contact.
Result
The contact is attached to the work item through a Contacts field. The Contacts side panel shows the linked contact, the contact's detail page lists the work item under linked work items, and Jira search can find the work item by contact name.
Next:
-
Importing contacts from CSV: load contacts in bulk before linking them.
-
Working with groups: make sure the contact is in a group your teammates can see.