
Hand over contacts you own to another user. Transferring moves the selected contacts into that user's contacts so they become the owner, which is useful when you change roles or share responsibility for a set of contacts.
How transferring works
Transferring takes contacts out of your default group and puts them into the other user's default group. The contact's other group memberships stay as they are, so if you and the new owner both belong to a shared group that the contact is in, you'll still see it after the transfer.
|
Detail |
What happens |
|---|---|
|
Ownership |
The contacts move to the other user's contacts, and they become the owner. |
|
Your access |
You lose access to a transferred contact unless you share another group that contains it. |
|
Other groups |
Memberships in shared groups are kept. Only your default group membership is swapped. |
Transferring is the bulk version of changing the owner of a single contact. It acts on every contact you've selected in one step.
You can only transfer your own contacts. Contacts shared with you can't be transfered.
Prerequisites
-
You can open the Contacts page from the Apps menu.
-
You have write access to the contacts you want to transfer (contacts you created, or contacts in a group shared with you with write access).
-
The person you're transferring to has opened Contacts at least once, so they have a place to receive the contacts.
Transfer contacts to another user
The Transfer Contacts to… action appears only while the My Contacts group filter is selected.
-
Open the Contacts page and open the Group filter in the side panel.
-
Select My Contacts. The list shows the contacts you own.
-
Switch to list view using the table icon on the right of the toolbar.
-
Tick the checkbox on each contact you want to transfer.
-
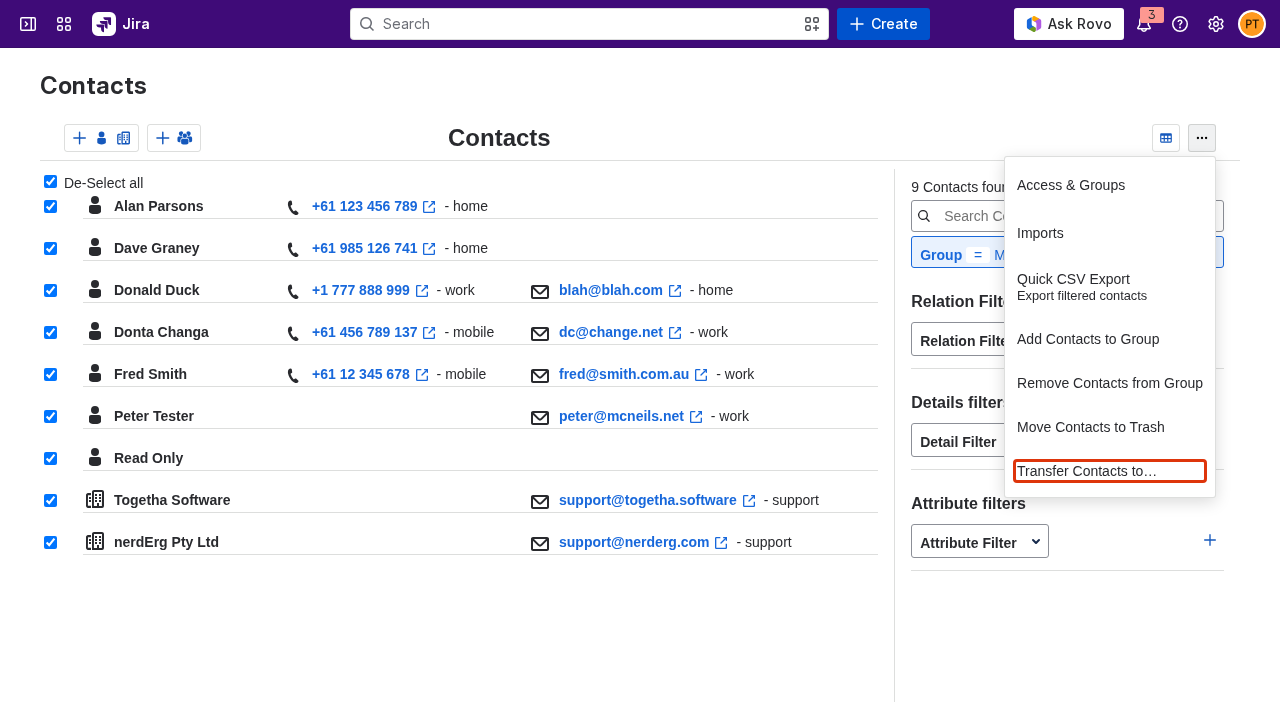
Open the kebab menu (the three-dot menu on the right of the toolbar) and click Transfer Contacts to…
-
Search for and select the user to transfer the contacts to.
-
Click Transfer. The contacts move to that user's contacts and leave your My Contacts list.
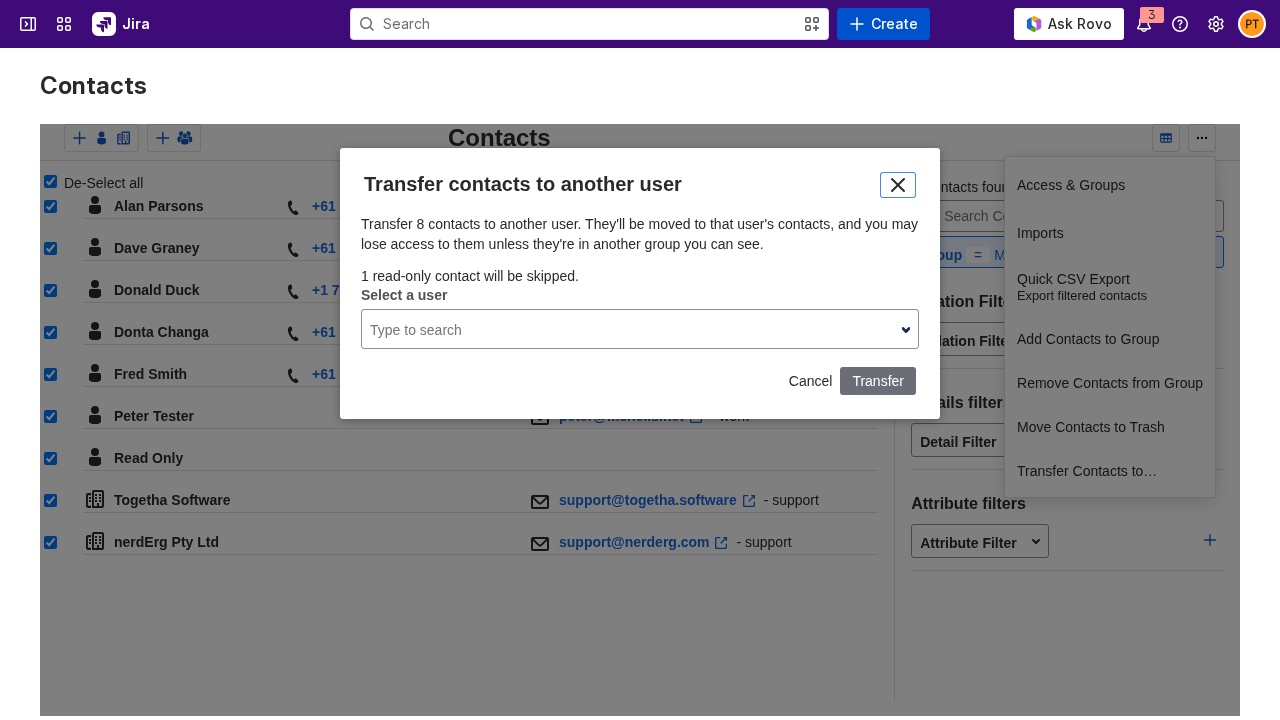
The dialog tells you how many contacts it will transfer and reminds you that you may lose access to them.
Transfer a single contact
To hand over one contact, change its owner from the contact details dialog.
-
Click the contact's name to open the contact details dialog.
-
Open the Groups tab. Your default group is listed as your name followed by (owner).
-
Click the change owner button (the icon beside your owner group). The Change owner dialog opens.
-
Search for and select the new owner, then click Change owner. The contact moves to that user's default group and leaves yours.
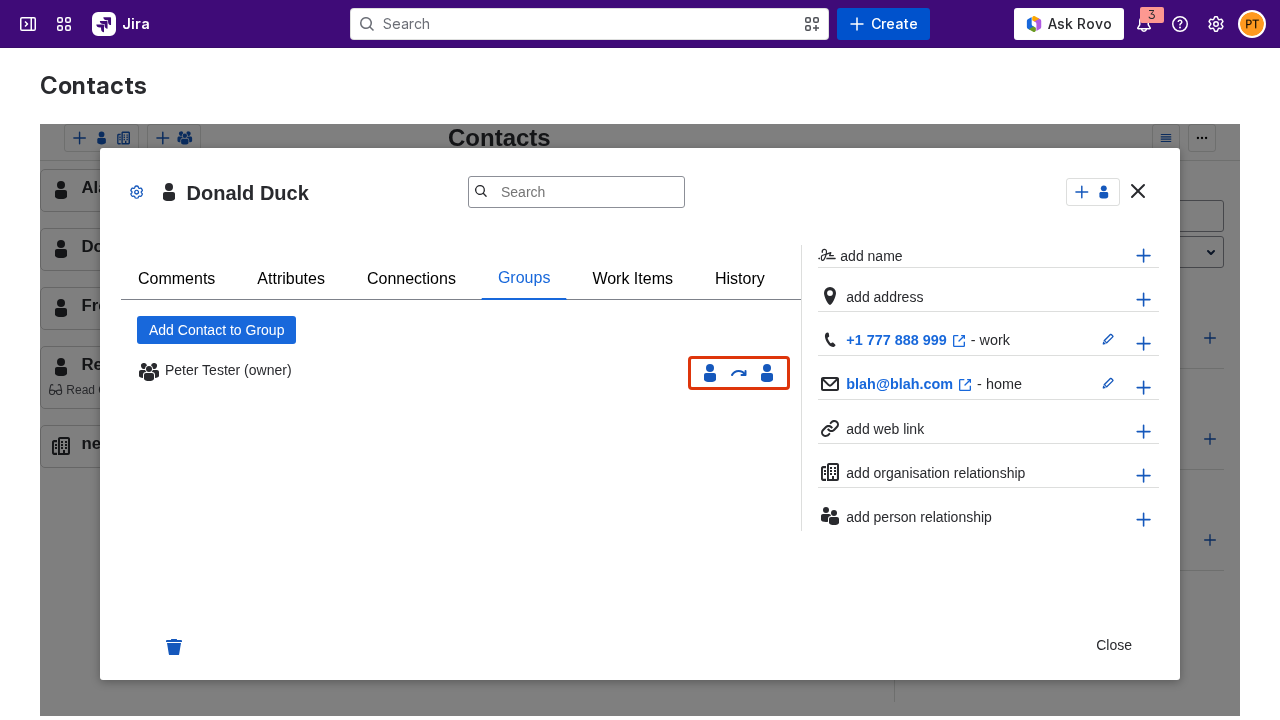
The change owner button shows only for contacts you own, so you won't see it on contacts shared with you. Like a bulk transfer, this moves the contact out of your default group and into the new owner's, and you may lose access to it unless you share another group that contains it.
When contacts are skipped or blocked
A transfer leaves some contacts untouched in these cases:
-
Read-only contacts you selected are skipped. The dialog tells you how many it will skip, and only the contacts you can write to are transferred. (This is very unlikely to happen)
-
Transferring to yourself does nothing, because the contacts are already in your contacts.
-
A user who has never opened Contacts can't receive a transfer yet. The dialog shows a message asking you to have them open Contacts once, and no contacts are transferred.
Result
The transferred contacts now belong to the other user and appear in their contacts. They've left your My Contacts list. If you both share another group that holds a transferred contact, you'll still see it through that group.
Next:
-
Working with groups: share a group so you and the new owner can both see a contact.
-
Deleting contacts: move contacts you no longer need to the trash.