
Create a person or organisation contact, either from the main Contacts page or from anywhere in Jira through the command palette.
Prerequisites
-
Togetha Contacts is installed on your Jira site.
-
You can open the Contacts page from the Apps menu, or the New Contact command appears in your Jira command palette.
Choose where to start
You can open the Add contact dialog from two places:
|
Starting point |
How to open |
|---|---|
|
Contacts page |
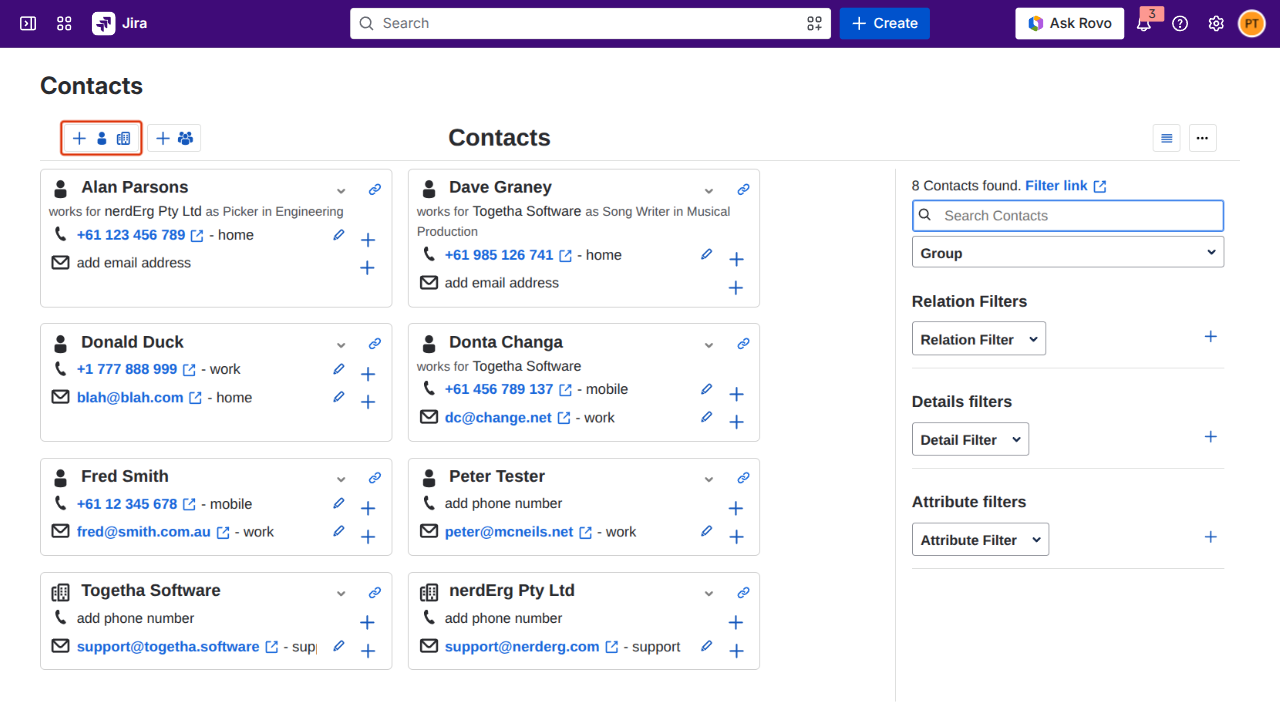
Open the Contacts page from the Apps menu, then click the Add contact button in the top-left toolbar. |
|
Anywhere in Jira |
Press |
Steps
-
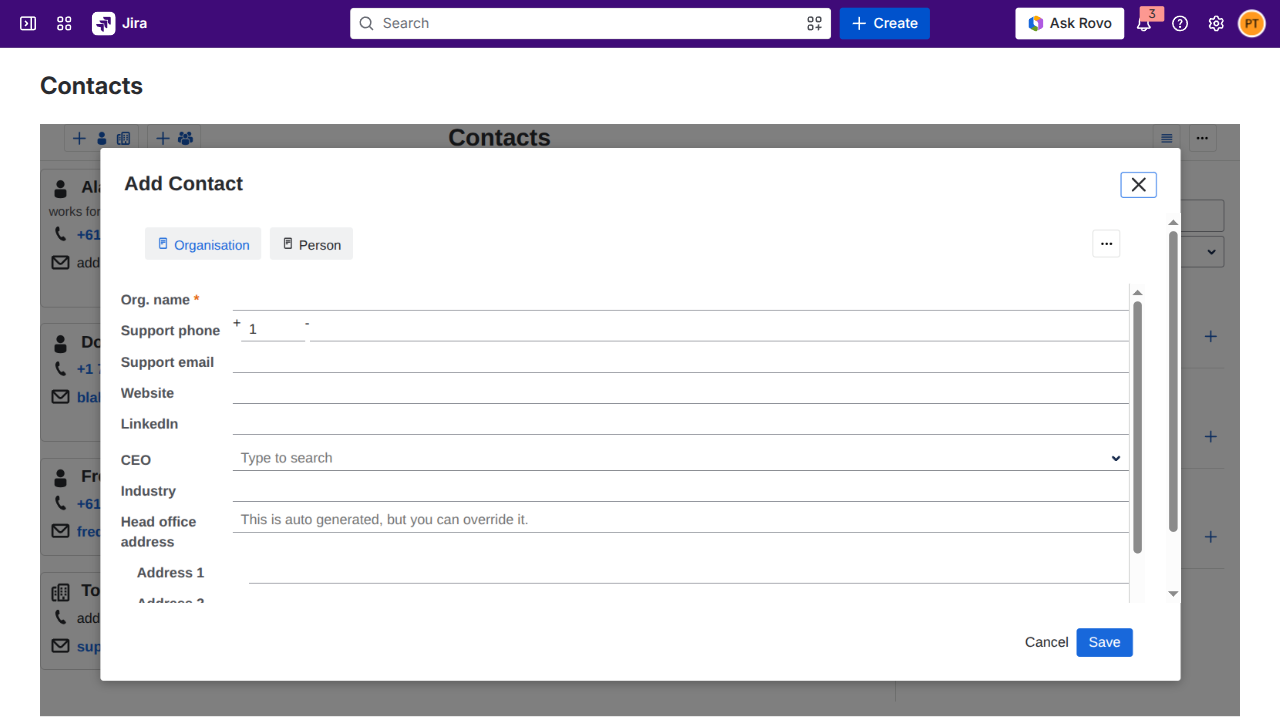
Open the Add contact dialog using one of the two methods above. The dialog shows the input form selector at the top and the form fields below.
-
Pick a form. The available forms are listed as buttons at the top of the dialog. Default creates a person with email, mobile, and an optional organisation relationship. Your admin may have added more forms for specific contact types.
-
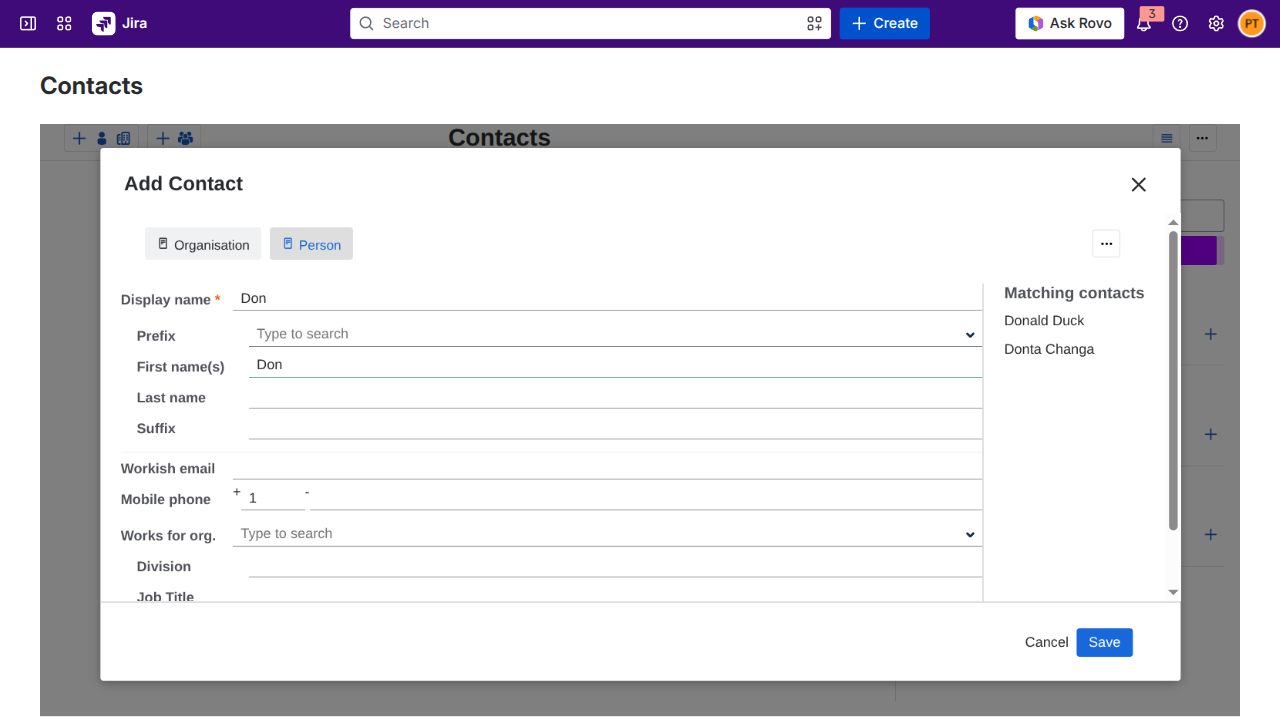
Enter the name. As you type, any contacts with a matching name appear in a Matching contacts panel to the right of the form. Click a match to open it in the contact details dialog so you can confirm whether the contact already exists, or carry on typing if your contact is new.
-
Fill in the remaining fields. Required fields are marked with an asterisk. Empty optional fields are skipped when the contact is saved.
-
Link an organisation (if the form includes the relationship). Start typing in the organisation field and pick an existing organisation from the suggestion list.
-
Click Save. The dialog closes and the new contact appears in your contact list. Validation errors, if any, display above the Save button.
Result
The contact is saved against your account and appears in your list on the Contacts page. The contact is private to you until you share it with a group.
Avoiding duplicates
The Matching contacts panel shows existing contacts that match the name you're typing. Before you save, check the panel and confirm the contact you're adding doesn't already exist. The panel only appears once the dialog is wide enough to show it side-by-side with the form.
Next:
-
Working with groups: add your new contact to a shared group.
-
Linking contacts to work items: attach this contact to a Jira Work item.