
Mapping connects a feedback form to a target Jira space and work item type, and decides which Jira field each form field populates. When a submission is accepted, the mapping is what creates the Jira work item.
You can configure mapping in Step 3 of the form wizard when creating a form, or by editing an existing form.
Pick a space and work item type
-
From the Space dropdown, choose the Jira space to create issues in.
-
From the Work Item Type dropdown, choose the issue type (e.g. Task, Bug, Story).
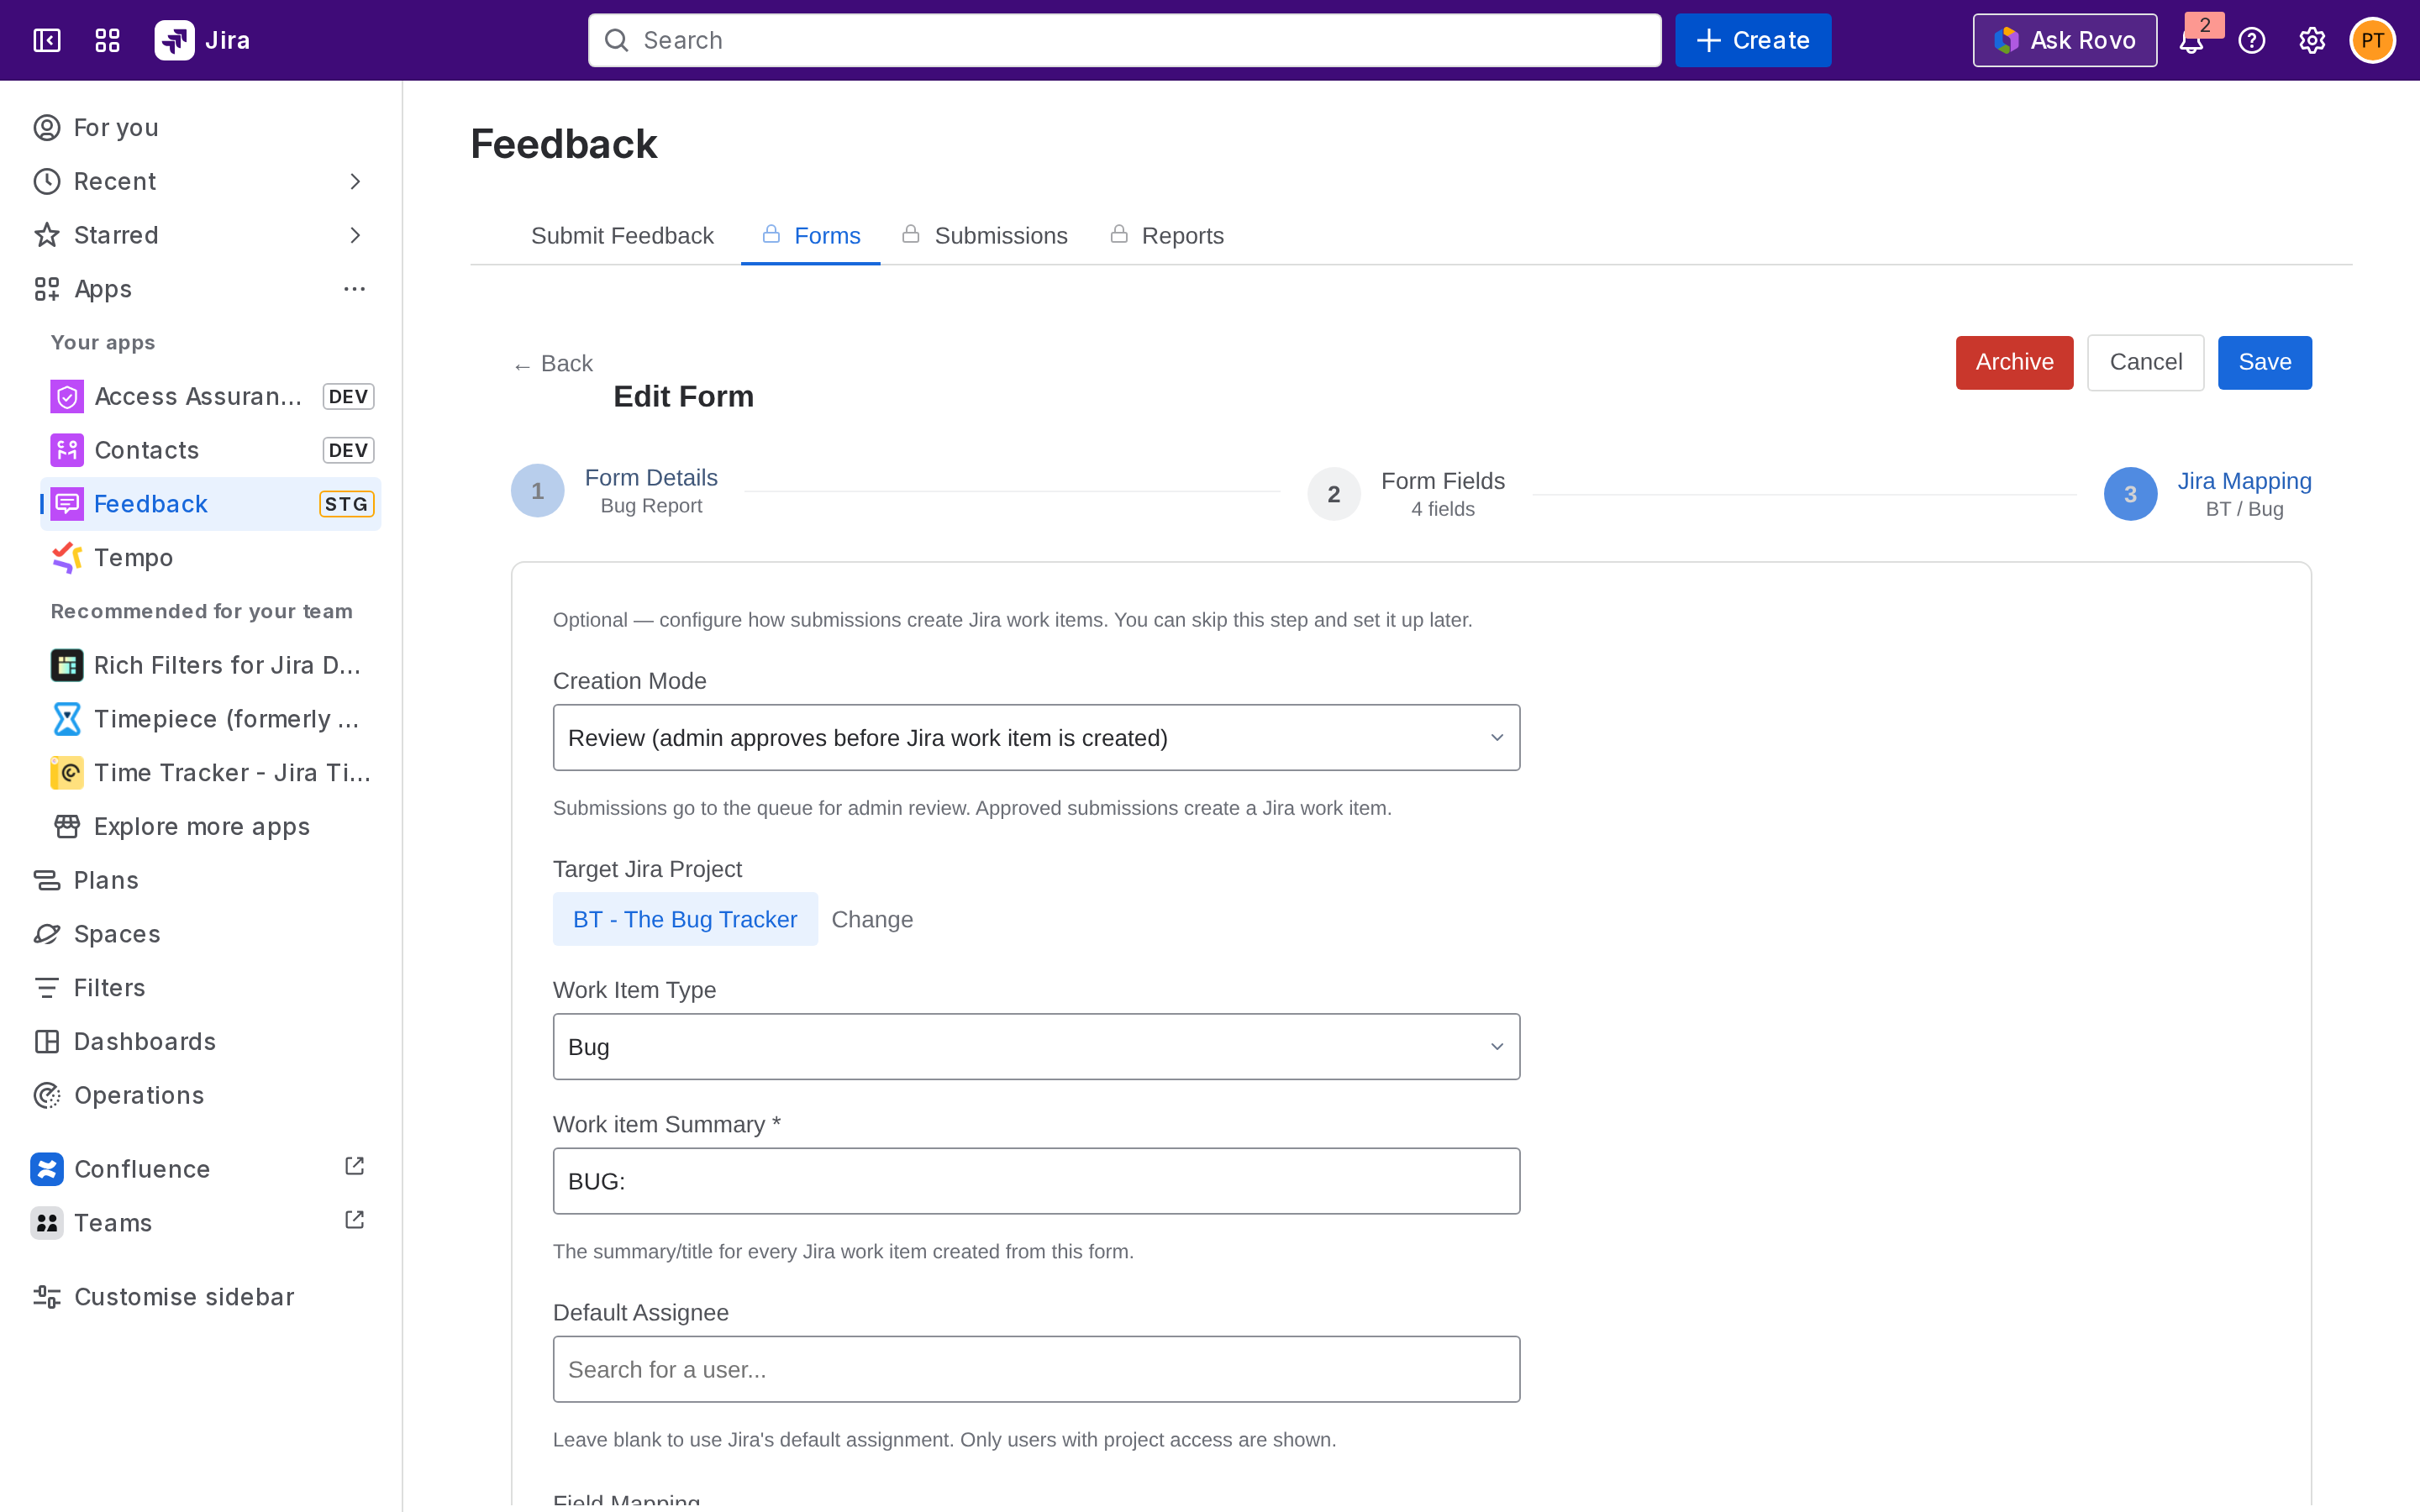
The form fields are listed below the issue-type picker once both selections are made.
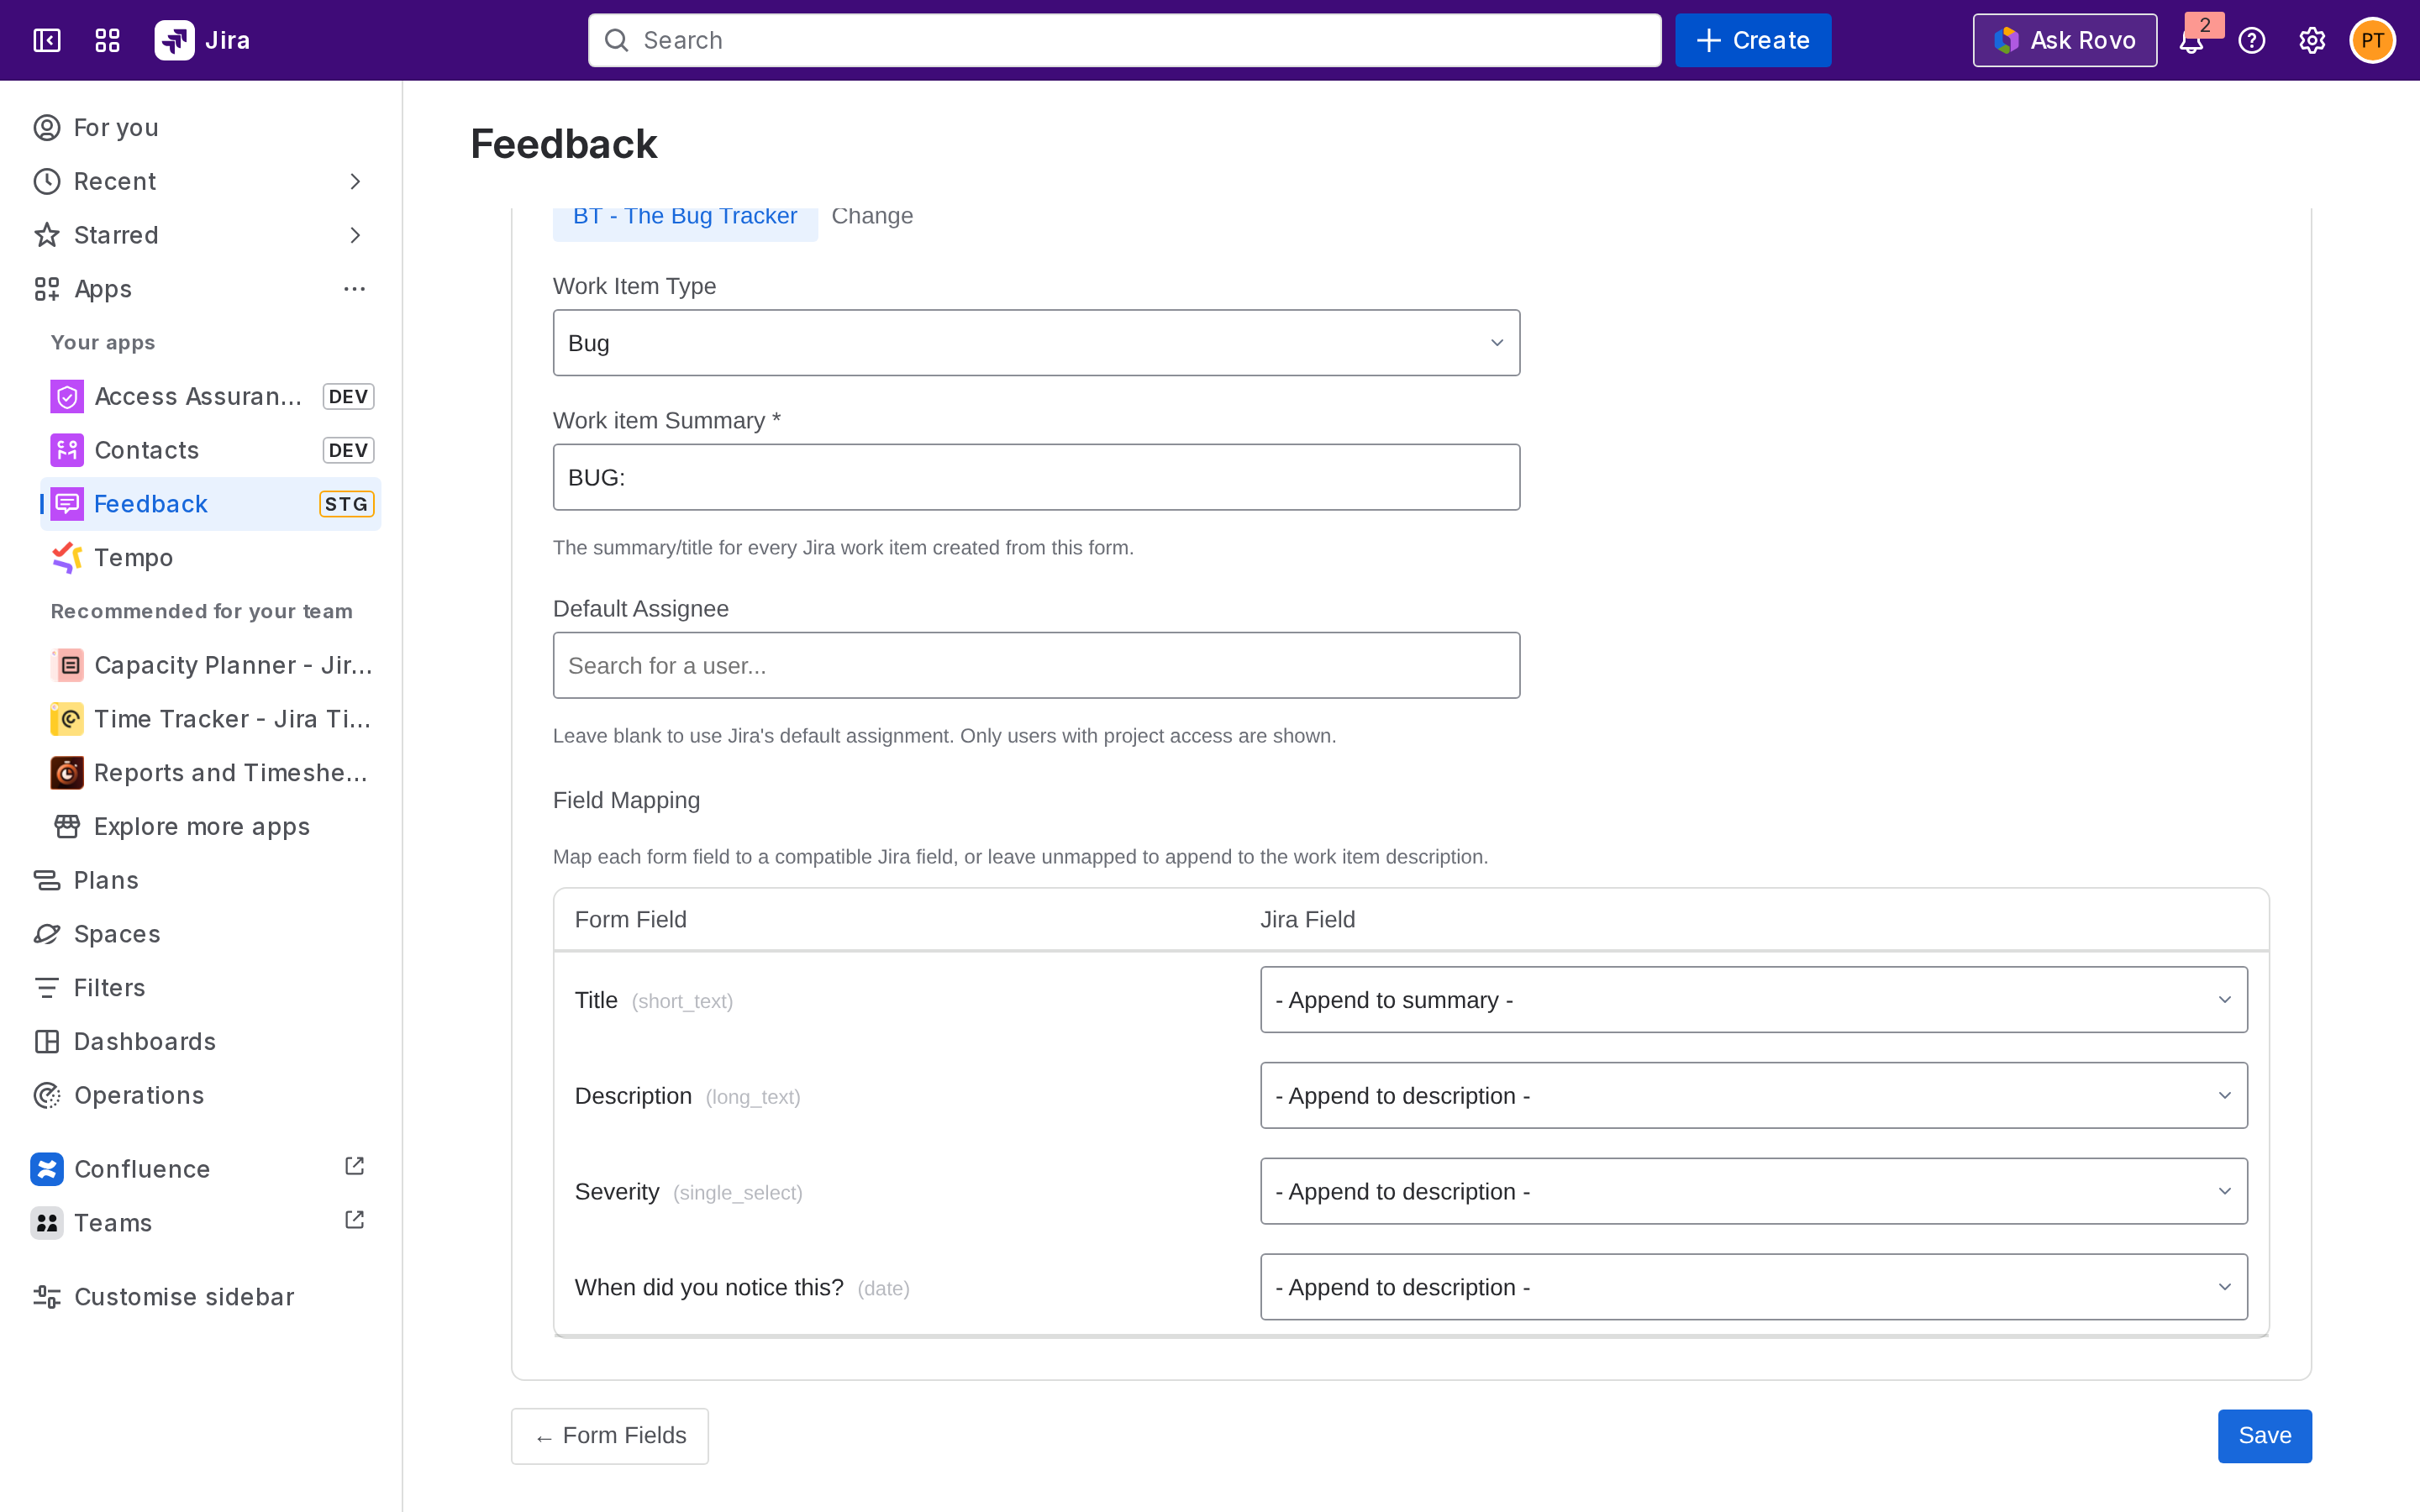
Map each form field
For each form field, pick the matching Jira field from its row's dropdown. Common targets:
-
A Short Text field → Summary (Jira's required summary).
-
A Rich Text Area → Description.
-
Single / Multi Select → custom Jira fields of the same type.
-
Date → Due Date or a custom date field.
Required-field warnings
If the chosen issue type has required Jira fields that no form field maps to, the table shows a warning. The form can still be saved as a Draft, but submissions cannot be accepted into Jira until the missing fields are mapped or the issue type is changed.
What happens on submission
When a user submits a mapped form:
-
The submission is saved with status Pending Review.
-
An admin opens it on the Submissions tab and chooses Accept & Create in Jira.
-
Togetha Feedback uses the mapping to build a Jira work item and creates it. The submission moves to Created and links to the new issue.
If Jira creation fails (for example, a required field is unexpectedly missing), the submission moves to Failed and the admin can retry, see Reviewing and accepting submissions.
Next step
Submitting feedback (for users) - what end users see.