---
language: "en"
---
# Togetha Software
## Support and more
*
### [Our Apps](https://docs.togetha.software/docs/our-apps.md)
You can find our Apps listed on the Atlassian Marketplace. Togetha MailDrop for Confluence lets you drag an email from your email client onto your Confluence p...
*
### [Support and Feedback](https://docs.togetha.software/docs/support.md)
Are you having an issue with Our Apps? If you log a support ticket we'll get back to you ASAP. You can log a support ticket at https://support.togetha.group or...
*
### [Resources](https://docs.togetha.software/docs/resources.md)
Trust and Licenses License Agreement DPA Privacy Policy App Privacy Statements Documentation
*
### [The Blog](https://docs.togetha.software/docs/blogs.md)
In this section you'll find our musings on different subjects, some of which will relate directly to our products and others just on life. We hope you enjoy. E...
---
language: "en"
---
# App Privacy Statements
## App Privacy
We do not have access to customer data via our apps beyond the information provided by Atlassian Marketplace for evaluating or purchasing our products. We use data anonymised by Atlassian to manage our product offerings. This document forms part of our full [Privacy Policy](https://docs.togetha.software/docs/privacy-policy.md).
### Togetha Cloud Apps
No personal data is stored or forwarded to third parties from our cloud apps. Only meta and configuration data is stored using an anonymised user ID. The apps fetch all relevant data from the Atlassian Cloud and store it back there.
*** ** * ** ***
**MailDrop for Confluence** lets you drag an email from your email client onto your Confluence page and have it's *contents* added to the page.
* *MailDrop for Confluence* processes the email directly in Confluence, you do not need to set up a mail server, and your data never leaves Confluence, there are no third party servers involved.
* We only log anonymous data about the processing of an attachment. For example we do not log the attachment filenames, just attachment IDs.
* This app does not use Cookies.
*** ** * ** ***
All app metadata is stored in the Atlassian Cloud. The cloud app is hosted and operated in Atlassian's Cloud data centre. Atlassian provide the ability to set data residency.
The data is not deleted automatically, but on request to support. In addition, we ensure that all stored and anonymised data is logically separated so that the actions of one user do not affect those of another.
### Means of processing
To obtain and modify data in the Cloud, our apps use public REST APIs. For example, using the Atlassian Cloud REST API, we obtain Page contents and Attachments to display email contents in Confluence.
### Support
If you have any problems using our products, you may contact our support team. Depending on the issue, we may request log files, which you can give to us. All log files, including any data transferred with them, are only used to analyse and solve your issues, nothing further.
### Security vulnerabilities
We continuously work to keep our products and data secure. If you find any security vulnerability contact our support team so we can prevent data breaches and protect your information.
### Cookies
For products that work with browsers, we use cookies to store user information for the duration of the visit and until the next visit at a later time. A "cookie "is a small amount of data stored on the hard drive of the user's computer.
### In-App Statistics
Anonymous usage data help improve our apps to meet your needs. We may collect anonymous statistical usage data on our apps where appropriate.
The type of data that might be collected is:
* IP address
* Metadata
* Technical information related to your device system and use of the product(s)
The data if collected will be transmitted to our servers based in Australia. The transmission of IP and metadata only occurs because it is part of the TCP/IP protocol. Upon the arrival of the data on our server, the IP address and the metadata are removed from the anonymous usage statistics for static analysis. The IP address and the metadata are not stored.
For the processing the anonymous static usage data itself, the EU-DSGVO is inapplicable (Recital 26 of the EU-DSGVO). After collection and removal of the IP information it is not possible to assign the data to a specific person.
At no time can we assign this anonymous statistical usage data to a specific person. Consolidating this anonymous statistical usage data with other data sources cannot and will not be carried out.
The short-term processing of the IP and the metadata is based on our legitimate mutual interest (Art. 6 Para. 1 S.1 lit. f. EU-DSGVO) to improve the app in the interest of the customer.
---
language: "en"
---
# Automation actions
Togetha Contacts adds four actions to Jira automation rules: one that creates a contact from rule data, one that reads field values out of a contact, one that updates an existing contact, and one that finds or creates a contact from a Jira user or JSM organisation and sets it on a Contacts custom field. This page covers configuring each action and using its results in later steps of the same rule.
> **Breaking change:** The earlier **Create Contact from form** action has been removed. Any existing automation rules that used it must be recreated using the new **Create Contact** action described below.
## Prerequisites
* You can create or edit automation rules in the Jira Space (project admin or Jira admin permission).
* Togetha Contacts is installed on the site.
* For the **Get Contact field values** and **Set Contact field values** actions, the triggering work item has a Contacts custom field that holds the contact you want to read or change.
* To link one contact to another with **Set Contact field values**, you also need the other contact's ID, usually from a second Contacts custom field.
## Adding an action to a rule
1. **Edit or create an automation rule** in **Project settings** then **Automation**, or in the global automation area.
2. **Add a New action** component to the rule.
3. **Pick the action.** Togetha Contacts actions appear in the component list as **Create Contact** , **Get Contact field values** , **Set Contact field values** , and **Set Contact from User**.
4. **Fill in the configuration form** that opens, then save the rule.
After you add or change one of these actions, Jira can take up to 20 minutes to show the action's outputs in the smart value picker, because of platform caching. If the outputs don't appear straight away, save the rule and check again later.
## Create Contact
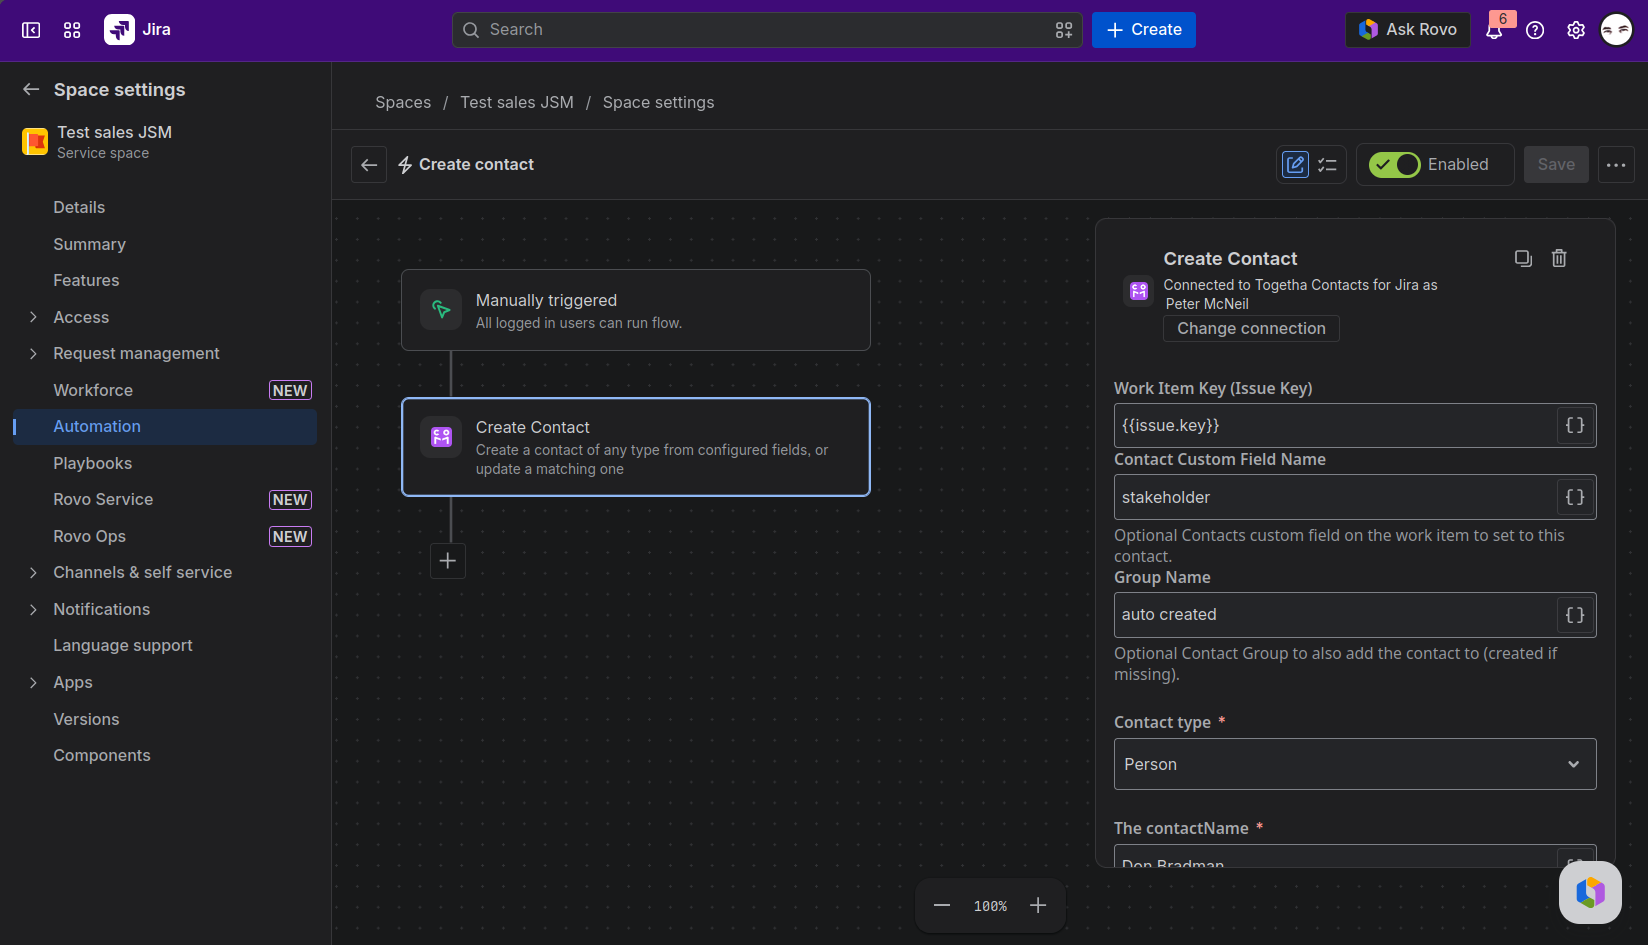
This action creates a contact from values you configure in the rule. It works for any contact type --- Person, Organisation, or any type configured in your Contacts app. It can also detect whether a matching contact already exists and update it instead of creating a duplicate, add the contact to a group, and write it to a Contacts custom field on the triggering Jira Work item.
### Configure the action
The form is laid out top to bottom in the order below.
#### 1. Link the new contact to a work item (optional)
| Field | Description |
|-------------------------------|------------------------------------------------------------------------------------------------------------------------------------------------------|
| **Work Item Key (Issue Key)** | The Jira Work item key, usually `{{issue.key}}`. Required only when you also set Contact Custom Field Name. |
| **Contact Custom Field Name** | The name of a Contacts custom field on the Jira Work item. When set, the action writes the new or matched contact into that field on that work item. |
#### 2. Add the contact to a group (optional)
Set **Group Name** to add the contact to a group. The group is created if it doesn't already exist.
#### 3. Choose the contact type
Select the **Contact type**, for example Person or Organisation. This tells the form which attributes and relations to offer in the fields below.
#### 4. Set the contact's fields
Add a **field** for each thing you want to set on the contact, using the **Add field** button. You must include a **Name**, which is required and cannot be removed. Beyond Name, each field targets one of:
| Target | What it sets |
|-----------------------------------|-------------------------------------------------------------------------------------------------|
| The contact (name and attributes) | The contact's name and any of its contact attributes. |
| A related value | A value reached through a relation, such as a work email, a mobile number, or a postal address. |
| A relationship to another contact | A link from this contact to another contact, such as the organisation they work for. |
Every field accepts a smart value, so you can map Jira Work item fields directly into the contact.
For a related value or a relationship to another contact, choose a **Mode**:
* **Update** (the default) changes the first matching value of that type, and creates one if the contact doesn't have it yet.
* **Add** always creates a new value.
The Mode only takes effect when the action matches an existing contact (see the next step). When the action creates a new contact, every field is added.
#### 5. Turn on match toggles (optional, for duplicate detection)
The Name, each contact attribute, and each related value has a **Match** toggle. When you turn on the toggle for a field, that field's value is used to look for an existing contact before creating a new one.
* **What can be toggled:** the Name, any contact attribute, and any related value. Relationships (links to other contacts) cannot be used for matching.
* **Match logic:** matching is **case-insensitive** and uses **OR** logic. A match on **any** toggled field is enough to find an existing contact. The match is scoped to the chosen contact type.
* **On match:** the action updates the found contact with the configured fields, applying each field's Mode, and returns `created: false`.
* **No match, or no toggles on:** a new contact is created and `created: true` is returned.
### Outputs
After the action runs, it returns these values as smart values for later steps in the rule:
| Output | Description |
|---------------|----------------------------------------------------------------------------------------------|
| `contactId` | The ID of the created or matched contact. |
| `contactName` | The contact's display name. |
| `created` | `true` if a new contact was created, `false` if an existing contact was matched and updated. |
To use an output, select this action's smart value in the picker, then add the output name. For example, a later **Add comment** step could use a body of `Created contact {{...contactName}}`, where the leading part is the smart value shown in the picker for this action.
## Get Contact field values
This action reads selected values out of a contact and returns them as smart values. You can point it at a contact you already know by its ID, or search for a contact by field values within one of your groups.
### Configure the action
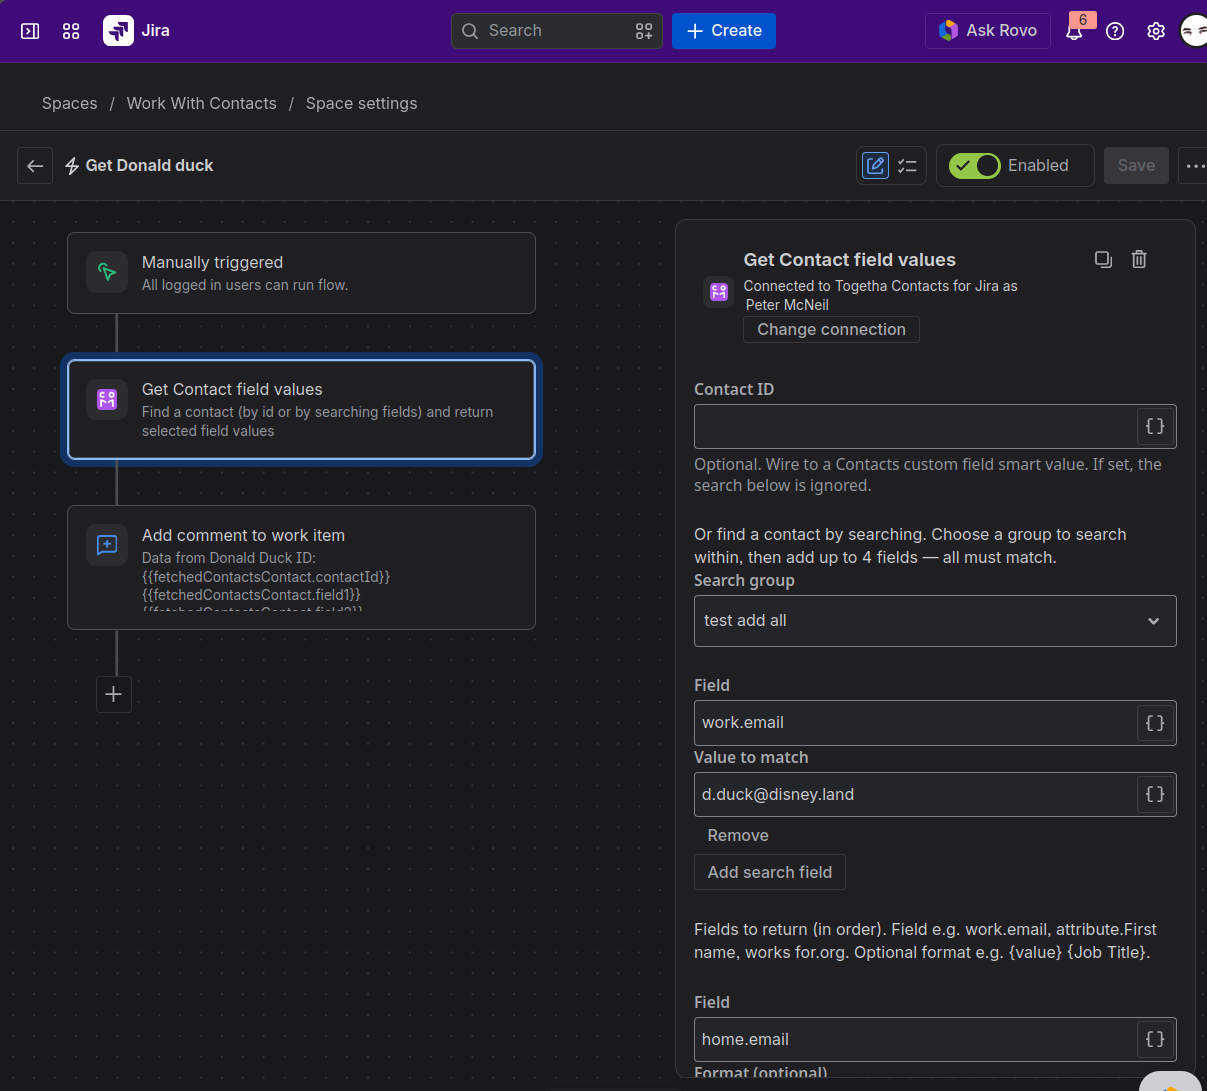
The action resolves a contact in one of two ways. Set **Contact ID** or use the search fields --- not both.
**Option 1 --- resolve by Contact ID:**
1. **Set Contact ID** to a Contacts custom field smart value that resolves to the contact's ID.
2. Leave the search group and search fields blank.
**Option 2 --- find a contact by searching:**
1. Leave **Contact ID** blank.
2. Choose a **Search group** from the picker. The picker lists the groups you can access. Your default group is shown as **My Contacts**.
3. **Add up to 4 search fields** using the **Add search field** button. Each search field has a **Field** specifier (same grammar as the return fields below) and a **Value to match** box. All search fields must match --- the action uses AND logic.
4. The action returns the **first matching contact** (the oldest one created).
If no contact matches the search, the action sets `found` to `false` and returns empty outputs, rather than stopping the rule with an error.
If Contact ID is set, it is used directly and all search fields are ignored. Only use the search fields when Contact ID is blank.
**Both options --- configure return fields:**
1. **Add a row for each value you want to return.** Each row has a **Field** box and an optional **Format** box. Use the **Add field** button to add rows.
2. **Save the rule.** The values come back as outputs `field1` to `field8`, in the order of your rows.
### Naming the field to read or search
The **Field** box in the return rows and the **Field** box in the search rows use the same grammar. Matching ignores case on the keywords and relation labels, but spaces within a label matter.
| Field box | Matches or returns |
|------------------------------------------------------------------|----------------------------------------------------------------------------------------------------------------------------------------------------|
| `value` or `name` | The contact's name. |
| `attribute.` followed by an attribute name | A contact attribute. Example: `attribute.First name`. |
| a relation, a dot, then a type | A related value reached through a relation. Examples: `work.email`, `home.email`, `work.phone`, `works for.org`, `postal.address`. |
| a relation, a dot, a type, `.attribute.`, then an attribute name | An attribute on a related entity. Example: `work.phone.attribute.+Country Code`. Only available in the search fields --- not in the return fields. |
A few rules apply:
* Type relation labels with spaces as they appear. Use `works for`, not `worksFor`.
* `org` is accepted as a shorthand for organisation.
* When returning values, if a contact has more than one matching value --- for example 2 work emails --- the values come back joined with a pipe character.
* When nothing matches a return row, that row returns an empty value, and the remaining rows keep their positions.
* Search matching is **exact and case-insensitive**. Partial matches and wildcards are not supported.
### Formatting a return value
Leave the **Format** box blank to return the raw value. To build a string, type a format. Any text outside braces is kept as is, and each token in braces is replaced.
| Token | Replaced with |
|-----------------|---------------------------------------------------------------------------------------------------------------------|
| `{value}` | The matched value (for example the email address or phone number). |
| `{Detail name}` | A detail on the relationship, or on the entity, with that name. A `+` inside the braces is part of the detail name. |
For example:
| Field | Format | Result |
|------------------|---------------------------|---------------------|
| `work.phone` | `+{Country Code} {value}` | +61 23456789 |
| `works for.org` | `{value} {Job Title}` | Smith Co Engineer |
| `postal.address` | `{Postcode/zip}` | 27890 |
| `home.email` | (blank) | peter@nomail.com.au |
Attributes always come back as plain text. A format typed on an `attribute.` row is ignored.
### Outputs
The action returns these smart values for later steps in the rule:
| Output | Description |
|----------------------|--------------------------------------------------------------------------------|
| `field1` to `field8` | Your configured return rows, in order. Rows you didn't fill return empty. |
| `contactId` | The ID of the resolved contact. Empty when no contact was found. |
| `found` | `true` when a contact was resolved, `false` when the search returned no match. |
This action returns at most 8 field outputs. If you configure more than 8 return rows, only the first 8 are returned.
To use a value in a later step, select this action's smart value in the picker and add the output name. For example:
{{fetchedContactsContact.field1}}
{{fetchedContactsContact.field2}}
{{fetchedContactsContact.contactId}}
{{fetchedContactsContact.found}}
## Set Contact field values
This action updates an existing contact. It can change the contact's name and attributes, add or update related values such as an email, phone number, or address, and link the contact to another contact. Point it at a contact with a Contacts custom field, choose the contact type, then add a change for each thing you want to set.
### Configure the action
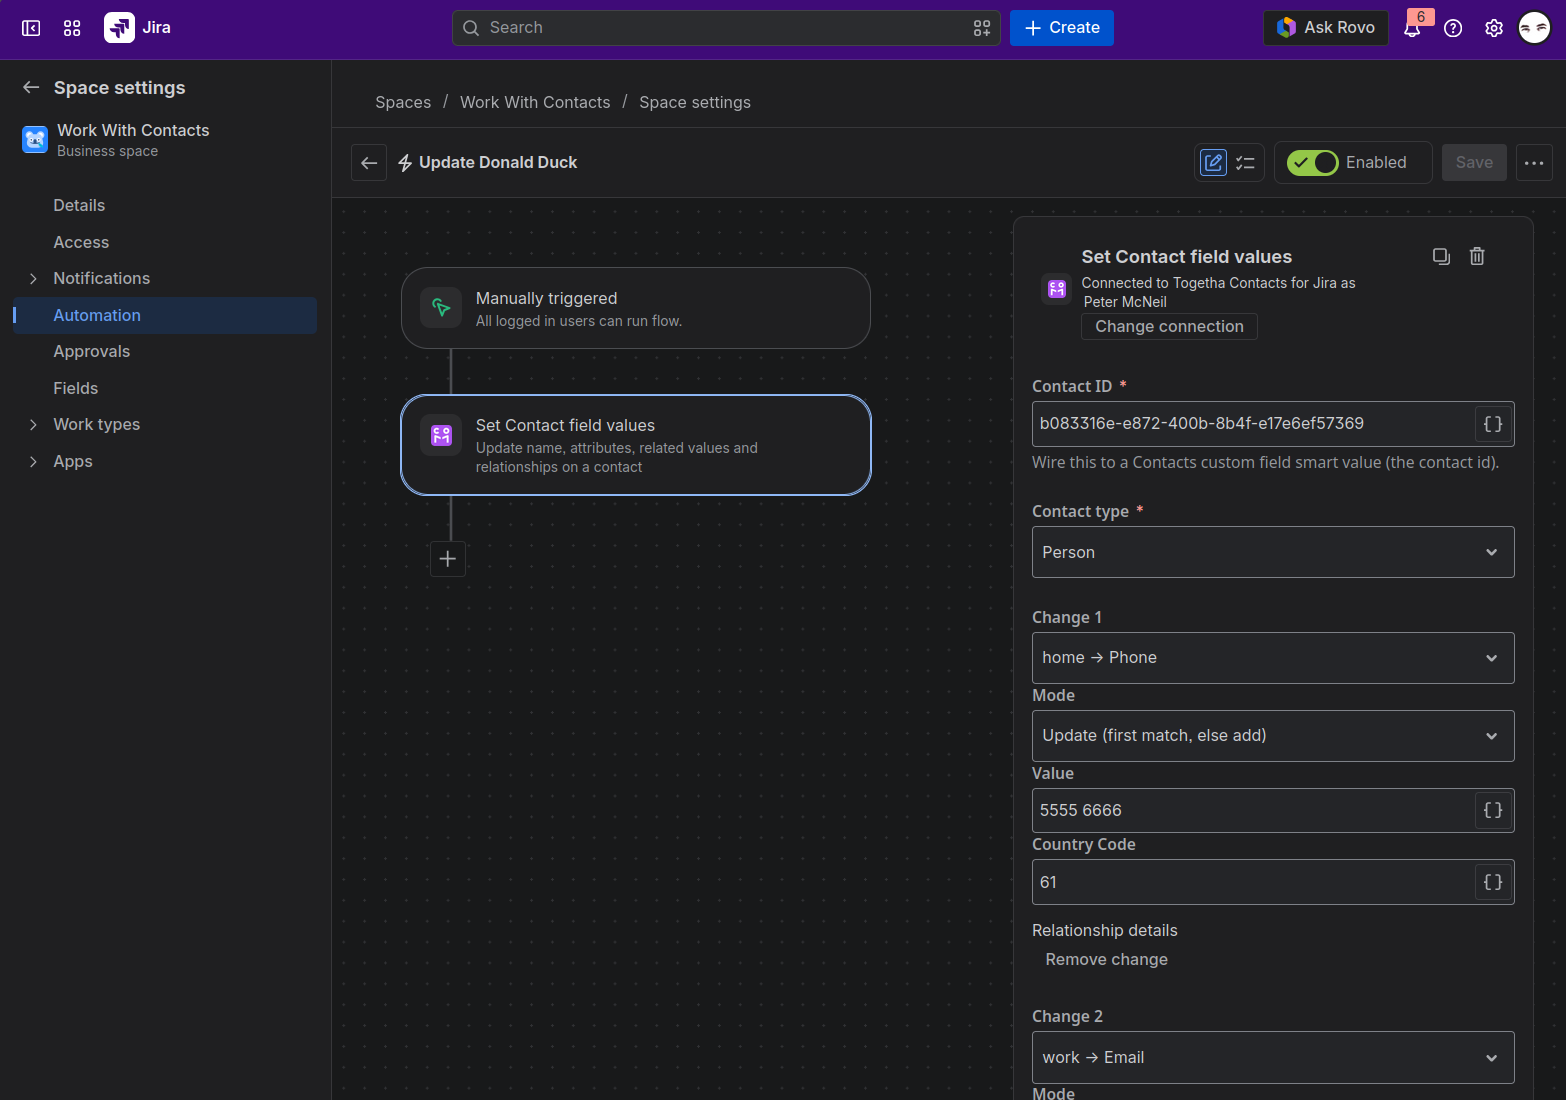
1. **Set Contact ID** to a Contacts custom field smart value that resolves to the contact's ID.
2. **Choose the Contact type**, Person or Organisation. This tells the form which attributes and relations to offer.
3. **Add a change** for each thing you want to set, using the **Add change** button. For each change, pick what to set, then fill in the fields that appear.
4. **Save the rule.**
### Choosing what to set
Each change targets one of the following.
| Target | What it sets |
|-----------------------------------|-------------------------------------------------------------------------------------------------|
| The contact (name and attributes) | The contact's name and any of its attributes. |
| A related value | A value reached through a relation, such as a work email, a mobile number, or a postal address. |
| A relationship to another contact | A link from this contact to another contact, such as the organisation they work for. |
The fields shown for each change depend on the target and the contact type. Attribute and detail fields are labelled with their names, and every field accepts a smart value.
### Adding or updating related values
For a related value such as an email or address, choose **Add** or **Update**.
* **Update** changes the first matching value of that type, and creates one if the contact doesn't have it yet. For example, updating a work email changes the contact's existing work email, or adds one if there isn't a work email.
* **Add** always creates a new value.
Fill in the value and any details the type supports, for example the lines and postcode of an address, or a note on a phone number.
### Linking to another contact
To set a relationship such as "works for", supply the **Related contact ID** of the other contact. This is a second Contacts custom field smart value that points at the organisation or person you want to link to. The action does not create the other contact, so it must already exist.
Choose **Add** to create the link, or **Update** to change the details on an existing link, such as a job title. As with related values, **Update** creates the link if it isn't there yet.
### Blank values are skipped
A field that resolves to an empty value is left unchanged, so a smart value that comes back empty at run time never wipes existing data. To clear a value, edit the contact in the contact details dialog rather than using this action.
### Outputs
After the action runs, it returns these values as smart values for later steps in the rule:
| Output | Description |
|-----------------|--------------------------------------------------------------------------------|
| `contactId` | The ID of the updated contact. |
| `contactName` | The contact's name after the update. |
| `changeSummary` | A short summary of what changed, for example `2 updated, 1 created, 1 linked`. |
## Set Contact from User
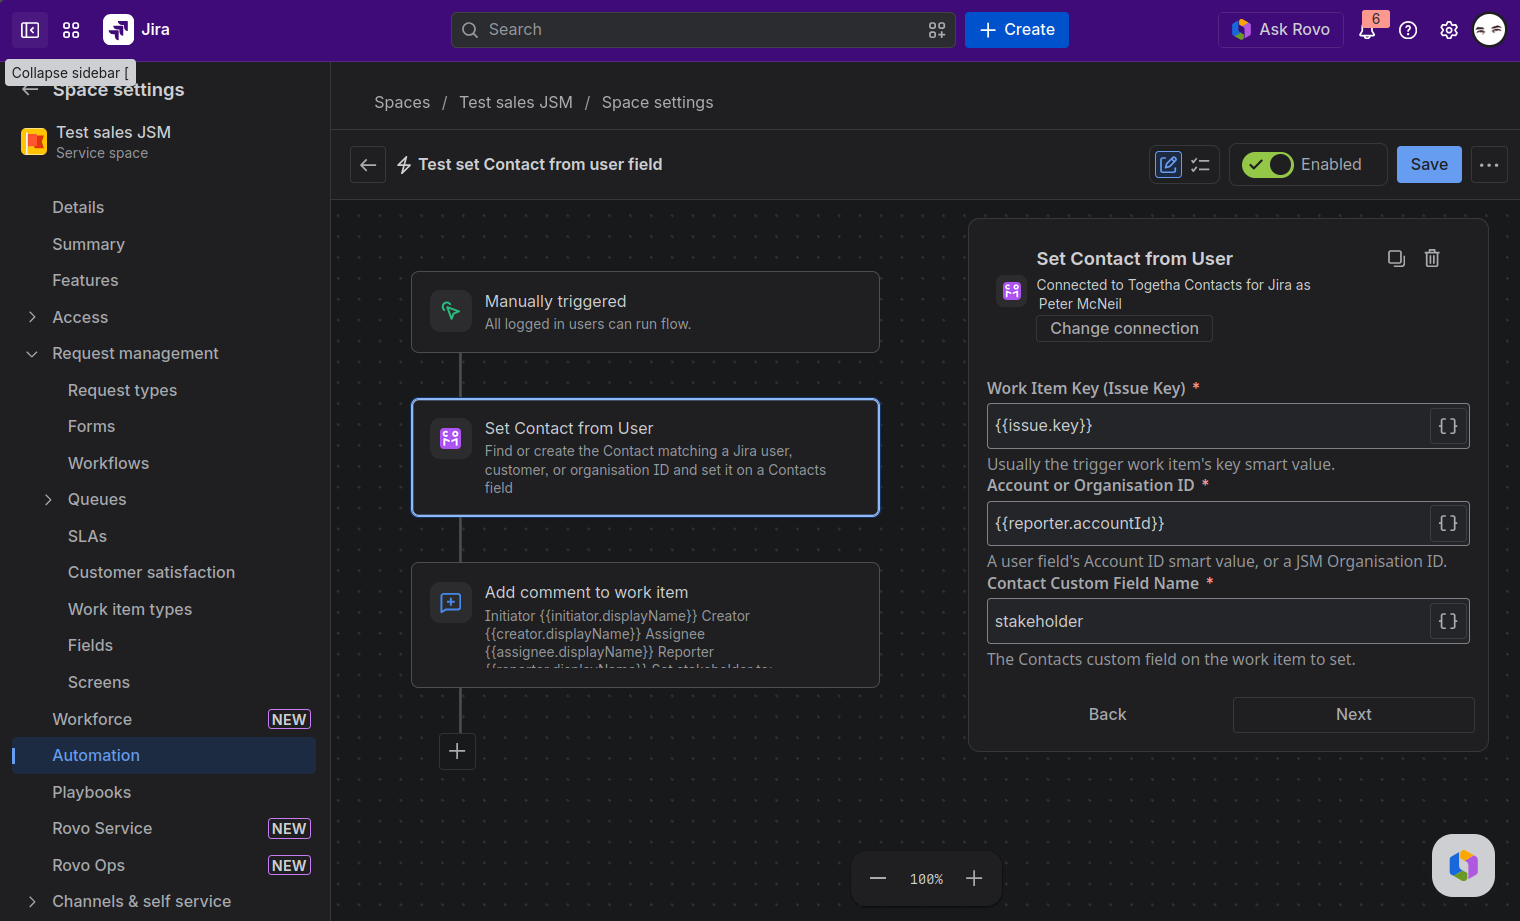
This action finds an existing contact whose source matches a Jira account ID or a JSM organisation ID, or creates one if no match is found, then writes the contact into a Contacts custom field on a work item. Use it to automatically link a reporter, assignee, or JSM customer or organisation to a contact whenever a rule fires.
### How it finds or creates the contact
The action accepts two kinds of ID.
* **Jira account ID** --- a Jira user's account ID, typically from a User-picker custom field smart value such as `{{issue.reporter.accountId}}` or `{{issue.assignee.accountId}}`. The action checks whether a Person contact already has that account ID as its source. If one exists, it is used as-is. If not, the action fetches the Jira user's profile and creates a new Person contact with the same logic as the Jira user import: the display name becomes the contact's name, and the profile URL is stored as a related link.
* **JSM organisation ID** --- a JSM organisation ID from a customer portal field or smart value. The action first looks for a Person contact whose source matches (a JSM customer), then for an Organisation contact whose source matches (a JSM organisation). If a JSM customer exists with that ID, it is used. If not but a JSM organisation exists, that is used. If neither exists, the action creates an Organisation contact using the same logic as the JSM organisation import: the organisation name becomes the contact's name.
Once the contact is found or created, the action writes it to the named Contacts custom field on the work item.
### Configure the action
| Field | Description |
|--------------------------------|--------------------------------------------------------------------------------------------------------------------------------------------------------------------------------------------------------------------|
| **Issue Key** | The key of the work item to update, usually `{{issue.key}}`. |
| **Account or Organisation ID** | The Jira account ID or JSM organisation ID to look up. Use a smart value such as `{{issue.reporter.accountId}}` or `{{issue.assignee.accountId}}` for a Jira user, or the equivalent JSM organisation smart value. |
| **Contact Field** | The name of the Contacts custom field on the work item where the found or created contact will be written. |
### Outputs
After the action runs, it returns these values as smart values for later steps in the rule:
| Output | Description |
|---------------|--------------------------------------------------------------------------------|
| `contactId` | The ID of the found or created contact. |
| `contactName` | The contact's display name. |
| `created` | `true` if a new contact was created, `false` if an existing contact was found. |
To use an output, select this action's smart value in the picker, then add the output name. For example, a later **Add comment** step could include `{{...contactName}}`.
## Result
Your rule can now create contacts from work item data, read contact values into later steps, update a contact when a work item changes, and automatically find or create a contact from a Jira user or JSM organisation. Common patterns include creating a contact when a work item is raised and writing its ID into a Contacts custom field, reading a contact's email and organisation into a notification, updating a contact's phone number from a form field on the work item, or linking the reporter or assignee to a contact when a work item is created.
Next:
* [Linking contacts to work items](https://docs.togetha.software/docs/linking-contacts-to-work-items.md): how the Contacts custom field works on a work item.
* [Creating a contact](https://docs.togetha.software/docs/creating-a-contact.md): the manual version of the create flow, with the same fields.
---
language: "en"
---
# The Blog
In this section you'll find our musings on different subjects, some of which will relate directly to our products and others just on life. We hope you enjoy.
* [Email is evil - All hail email](https://docs.togetha.software/docs/email-is-evil-all-hail-email.md)
---
language: "en"
---
# Security Statement
## **Overview**
Togetha Software provides hosted Forge Apps for Atlassian Cloud Products. These Cloud Apps can be identified by the "Cloud" category in the corresponding Atlassian Marketplace listing. Our Cloud Apps do not store Customer Data locally, but store Customer Data in the corresponding Atlassian Cloud Product. The Atlassian Cloud Product Security Statement can be found [here](https://www.atlassian.com/trust/security/security-practices#security-philosophy).
## **Facilities**
Togetha Software Forge apps are hosted by Atlassian on Atlassian Infrastructure, and Atlassian manage the security of that Infrastructure. Our applications do not currently store any user data separately from the Atlassian application, or on other infrastructure.
[Forge](https://developer.atlassian.com/platform/forge/) is a platform that lets us build apps and integrations on top of Jira, Confluence, and Compass Cloud products. When we build a Forge app, Atlassian takes care of the infrastructure, including security considerations.
We also utilise Atlassians Cloud for SaaS applications like Jira, Confluence, Compass and Bit Bucket which we use to build and support our Apps.
## **Certification**
You can find Atlassian's [Security Practices here](https://www.atlassian.com/trust/security/security-practices#team).
Togetha Group is working to be certified as a Cloud Security Compliant vendor with Atlassian, with significant security program resourcing. You can learn more about Atlassian's [Marketplace Apps Trust programs](https://www.atlassian.com/trust/marketplace).
## **People and Access**
Within Togetha a limited number of trusted and vetted team members have access to the production environment for the purposes of maintaining our cloud applications and assisting our customers. Additionally, we monitor all access to Togetha Group's Cloud.
Customers are responsible for maintaining the security of their own login information.
## **Data Storage**
Our Cloud Apps do not store Customer Data outside their corresponding Atlassian Cloud Product.
Togetha may store information about you as a client, please refer to our [Privacy Policy](https://docs.togetha.software/docs/privacy-policy.md) for details.
## **Data Retention**
Togetha Software builds solutions with Forge that use Atlassian's Functions-As-A-Service (FaaS) model so that client data remains in client instances and does not need to be handled outside their cloud tenancy or system boundary. Client data that is handled by us for the purposes of delivering our services is described in our DPA schedule. Backup data can be stored for up to 3 years on AWS.
## **Backups**
For our Cloud Apps we recommend our clients familiarise themselves with [Atlassian's Shared Responsibilities](https://www.atlassian.com/whitepapers/cloud-security-shared-responsibilities) model for resilience, and work with them to find best pattern approaches to backing up and managing their instance data, within their own environments.
Togetha keeps multiple cloud backups of customer data related to sales and support for up to 3 years.
## **Security Incident Policy**
Every care is taken by Togetha Group to protect customer data from incidents (either accidentally or deliberately) to avoid a data protection breach that could compromise security. For more information, please contact us for our Security Incident Policy via [support@togetha.software](mailto:support@togetha.software).
## **Bug Fix Policy**
**Bug Severity - Critical**
SLA - Within 10 business days of being reported
Example - Direct access to application or database servers
**Bug Severity - High**
SLA - Within 3 weeks of being reported
Example - Leakage of sensitive data through bugs / exploits in the application
**Bug Severity - Medium**
SLA - Within 6 weeks of being reported
Example - Leakage of non-sensitive data
## **Privacy**
Togetha Group understands the importance of ensuring the privacy of your personally identifiable information and being legally compliant to privacy laws and regulations. For more information, please see our [Privacy Policy](https://docs.togetha.software/docs/privacy-policy.md).
---
language: "en"
---
# Contacts admin page
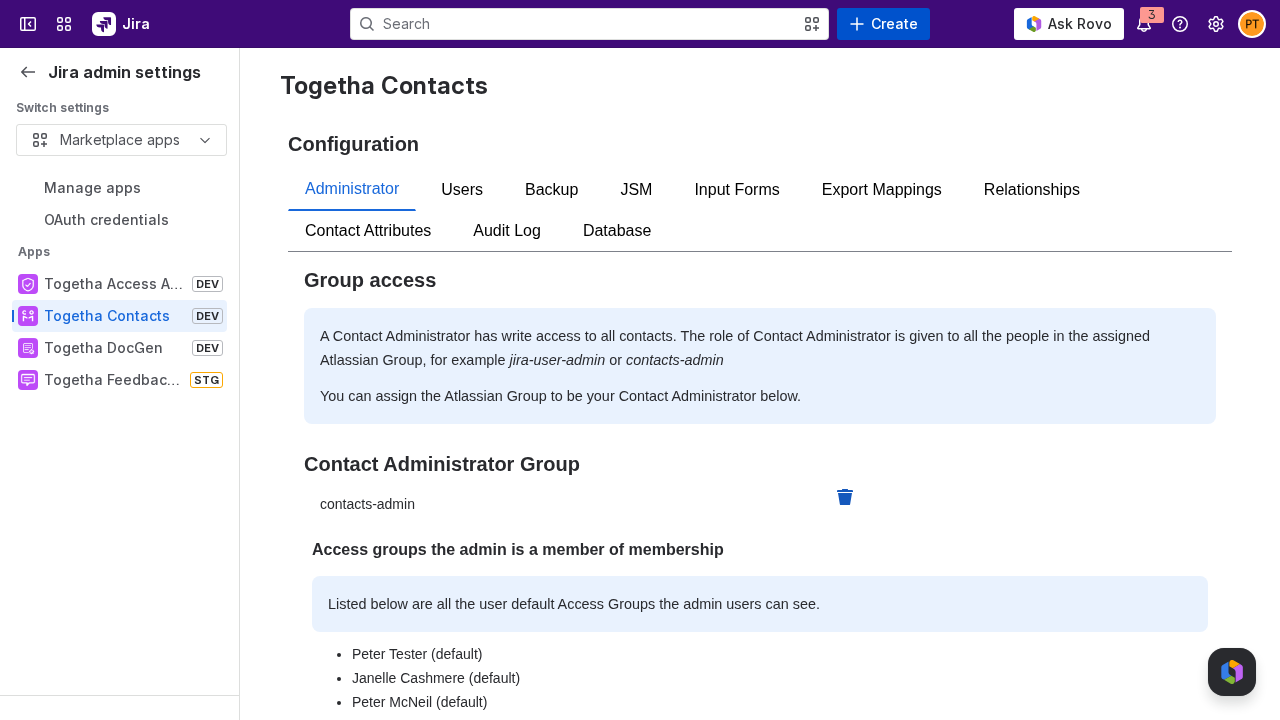
The Togetha Contacts admin page is where a Jira admin configures the app: the contact administrator group, user imports, backups, JSM sync, input forms, relationships, contact attributes, the site-wide change history, and a support-gated database tool. This page describes each tab.
## Opening the admin page
From Jira, open **Settings** , go to **Apps** , and select **Togetha Contacts** from the app list. The page opens on the **Administrator** tab, with a row of tabs across the top.
## Tabs at a glance
| Tab | What you manage |
|------------------------|-------------------------------------------------------------------------------------|
| **Administrator** | The Atlassian group whose members are Contact Administrators. |
| **Users** | Importing Jira users as contacts ahead of time. |
| **Backup** | Backing up and restoring the contacts database. |
| **JSM** | Syncing Jira Service Management organisations and customers into Contacts. |
| **Input Forms** | The forms shown in the Add contact dialog. |
| **Export Mappings** | Saved field mappings end users can pick when they export contacts. |
| **Relationships** | Which kinds of contacts and entities can be linked, and by which relation. |
| **Contact Attributes** | Custom fields added to Person and Organisation contacts. |
| **Audit Log** | The site-wide history of contact changes. |
| **Database** | A raw SQL tool for the contacts database, used only under Togetha support guidance. |
## Administrator
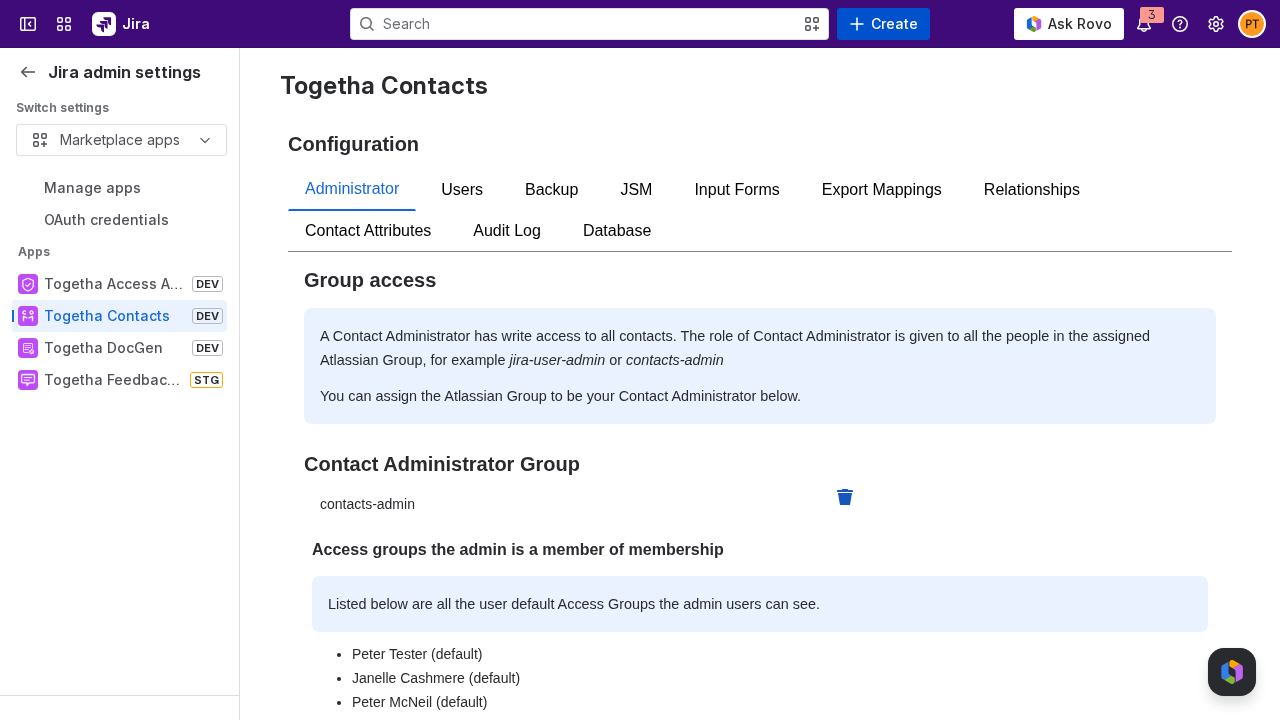
A Contact Administrator has write access to every contact in the app. You grant this role by nominating one Atlassian group: every member of that group becomes a Contact Administrator. Typical choices are a group such as `jira-user-admin` or `contacts-admin`.
| Control | What it does |
|--------------------------------------------|---------------------------------------------------------------------------------------------------------------------------------------|
| **Contact Administrator Group** | Shows the current group, or **Group not set**. Click it to pick an Atlassian group. Selecting a new group replaces the previous one. |
| Delete button | Clears the current administrator group, so no group has the role. |
| **Access groups the admin is a member of** | Lists the default user Access Groups that administrators can see. Members of the admin group are added to these groups automatically. |
## Users
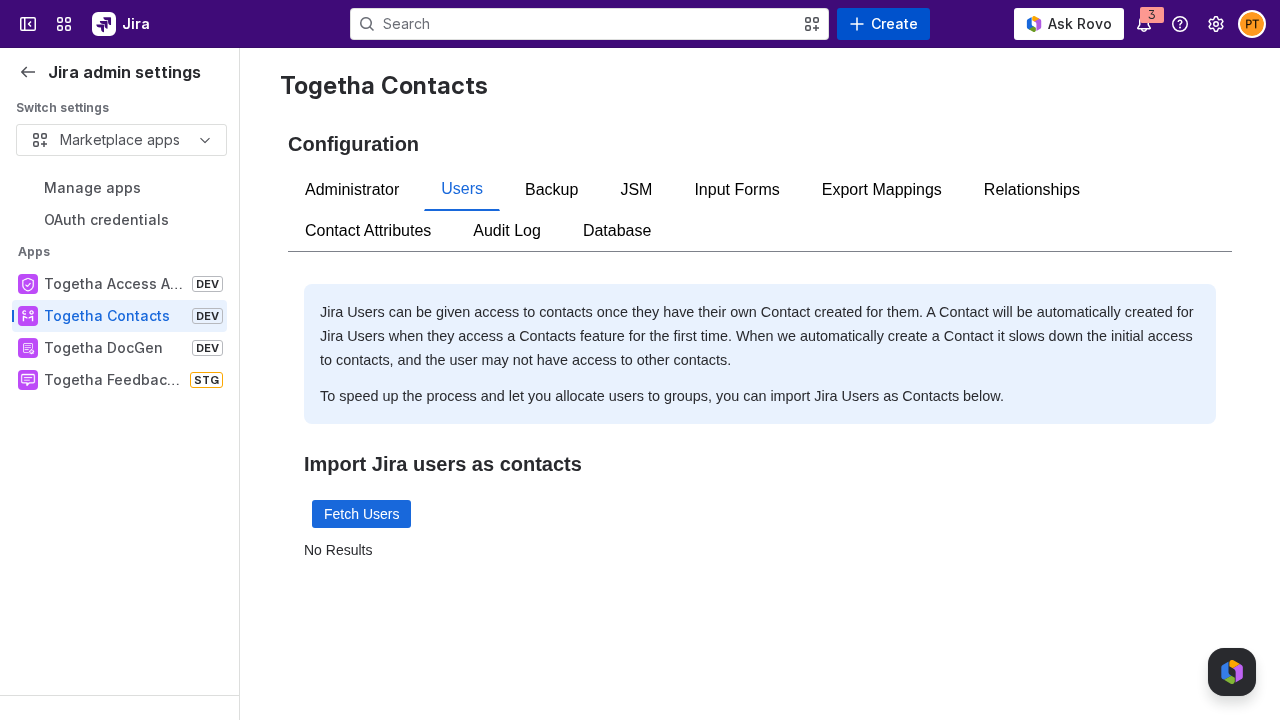
A contact is created automatically for each Jira user the first time they open a Contacts feature. Creating it on demand slows that first visit, and the new user may not yet have access to other contacts. Importing users ahead of time avoids both problems and lets you assign people to a group.
To import Jira users as contacts:
1. Click **Fetch Users**. The list shows every Jira account that is not an app, with its name, email, account type, and status.
2. Select the users you want to import.
3. Choose a group to import them into under **Select a group to import into**.
4. Click **Import Selected Users**. A confirmation appears when the import finishes.
## Backup
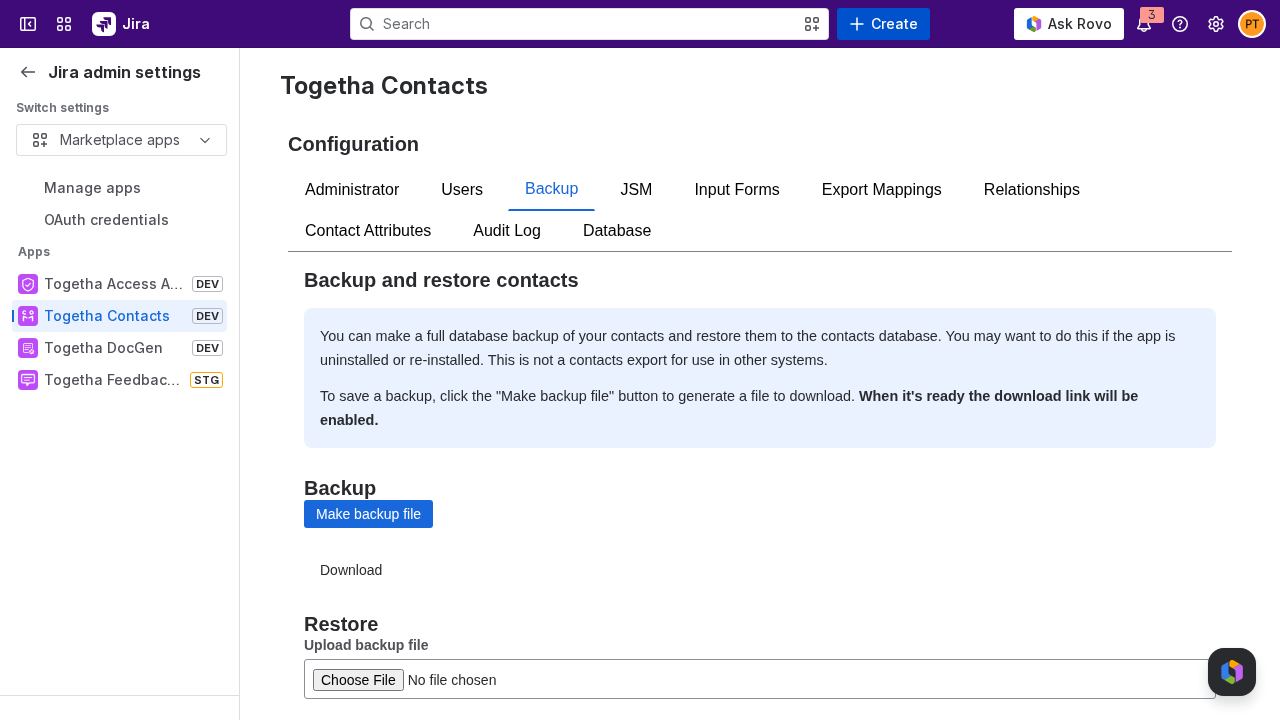
A backup is a full copy of the contacts database that you can restore later, for example before you uninstall or reinstall the app. It is not an export for use in other systems.
| Action | Steps |
|-------------|---------------------------------------------------------------------------------------------------------------------------------------------------------------------------------------------------------------------------------------|
| **Backup** | Click **Make backup file** . When the file is ready, the **Download** link becomes active. Click it to save a dated JSON file (for example `contacts-backup-....json`). |
| **Restore** | Under **Restore** , upload a backup JSON file with **Upload backup file** , then click **Restore?** . The status line reports progress as the config, entities, and relationships load, and shows **Restore complete** when finished. |
Restore is destructive. It deletes all current contacts, groups, and relationships before loading the backup file.
## JSM
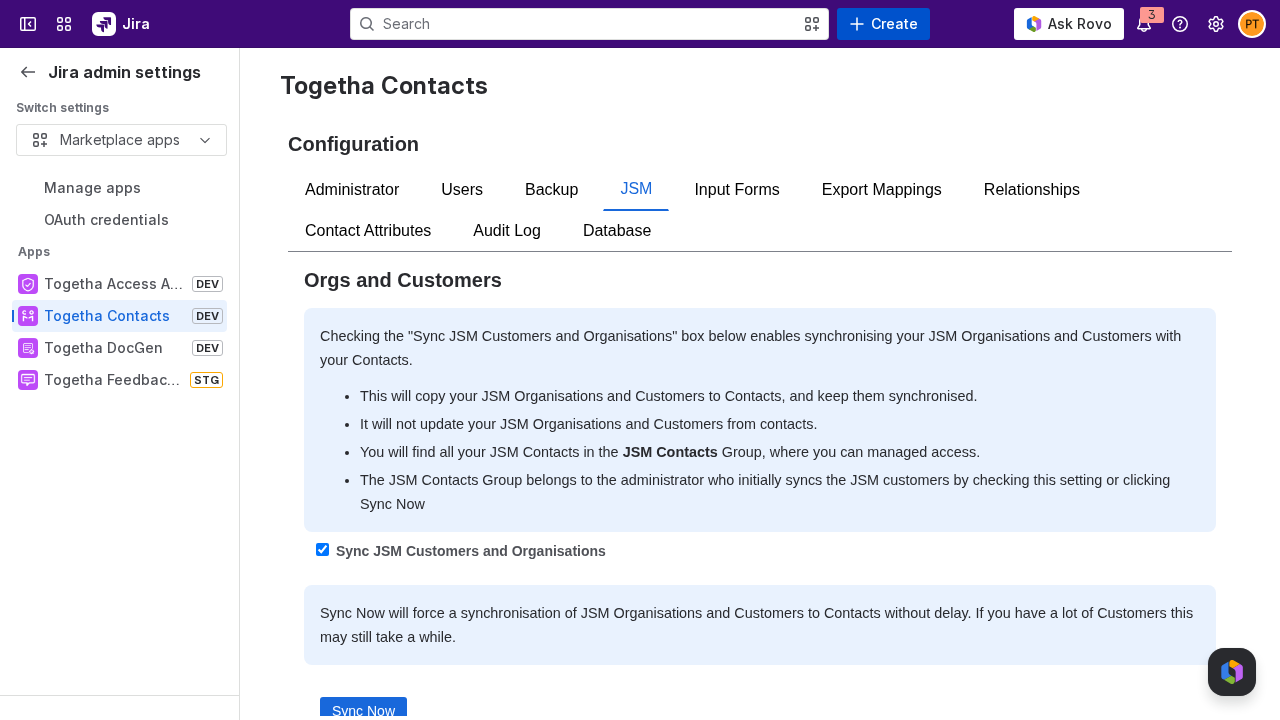
This tab syncs your Jira Service Management organisations and customers into Contacts.
| Control | What it does |
|---------------------------------------------------|--------------------------------------------------------------------------------------------------------------------------------------------------------------------------------------|
| **Sync JSM Customers and Organisations** checkbox | Turns the sync on or off. While on, JSM organisations and customers are copied into Contacts and kept up to date. |
| **Sync Now** | Forces an immediate sync without waiting for the next scheduled run. With many customers this can take a while. The status text shows **in progress** , **failed** , or **success**. |
Things to know about the sync:
* The sync is one way. It copies from JSM into Contacts and never changes your JSM organisations or customers.
* Synced contacts appear in the **JSM Contacts** group, where you manage who can see them.
* The JSM Contacts group belongs to the administrator who first turns on the sync or clicks **Sync Now**.
## Input Forms
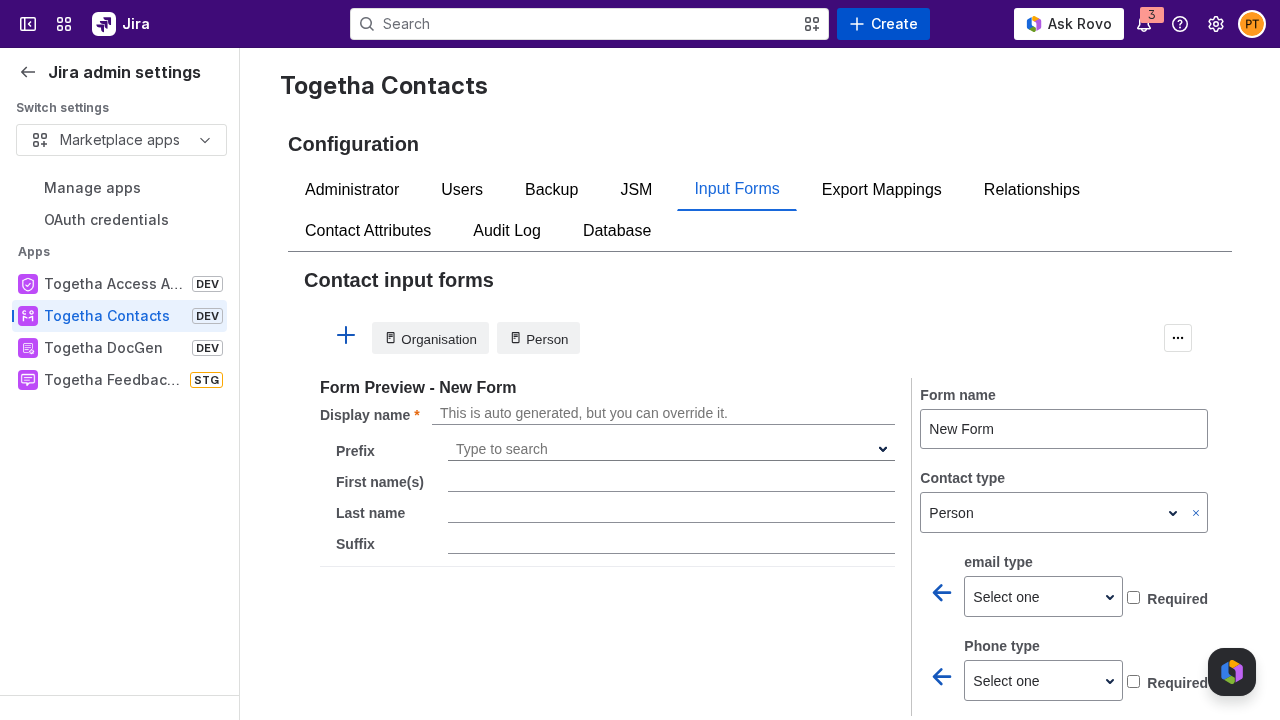
Input forms define the fields shown in the Add contact dialog. Each form has a name, a contact type of **Person** or **Organisation**, and a list of fields. End users pick a form by name when they create a contact.
The tab is split into a live **Form Preview** on the left and an editing panel on the right.
| Control | What it does |
|------------------|---------------------------------------------------------------------------------------------------------|
| **Form name** | The name shown to end users in the Add contact dialog. |
| **Contact type** | Sets the form to **Person** or **Organisation**. Changing it resets the field list. |
| Field rows | Each row pairs a field type with an arrow button that adds it to the form, and a **Required** checkbox. |
| **Save** | Saves the form. Saving a form whose name matches an existing one replaces it. |
| **Clear** | Discards the current edits without saving. |
| Delete button | Removes the selected form. |
The field types you can add are:
| Field type | Adds |
|-----------------------|--------------------------------------------------------------------------|
| Email type | An email address field of the chosen relation, such as work or personal. |
| Phone type | A phone field of the chosen relation, such as mobile. |
| Address type | An address field of the chosen relation. |
| Link type | A link or URL field. |
| Organisation Relation | A relationship to an organisation, such as **works for**. |
| Person Relation | A relationship to another person. |
| Detail field | A property from the contact type's detail schema (organisations only). |
To work with forms, click a form name in the toolbar to edit it, use the add button to start a new form, or use the kebab menu to choose from all saved forms and to import or export form configurations.
Two starter forms ship with the app: a **Person** form and an **Organisation** form. The Person form captures an email, a mobile phone, and a **works for** organisation relationship that also records division and job title. The Organisation form captures support phone and email contacts, a website and a LinkedIn link, a CEO relationship, an industry detail, and a head office address. Both are ordinary saved forms, so you can edit their fields, rename them, or delete them the same way as any form you create.
### Import and export forms
You can move form configurations between sites, or keep a backup, from the **Input Forms** kebab menu.
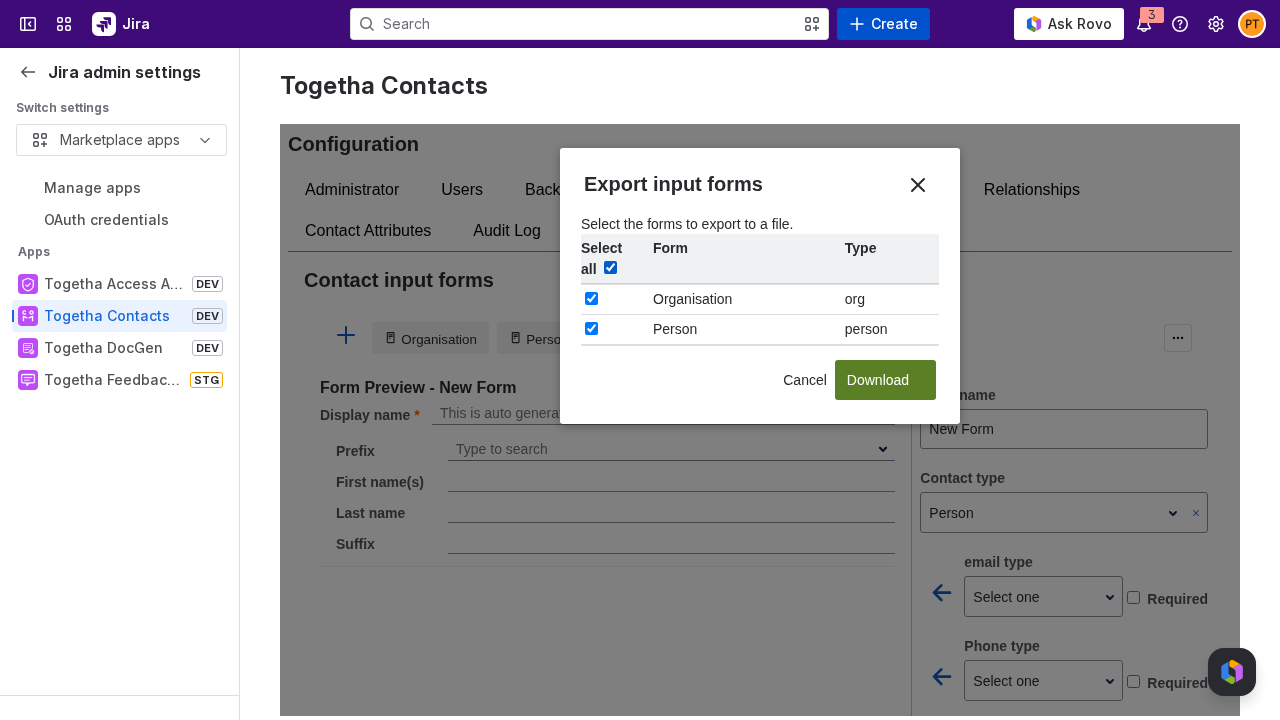
To export, open the kebab menu and choose **Export forms...** . Select the forms you want, then click **Download** to save them as a JSON file. The form you are currently editing is selected for you.
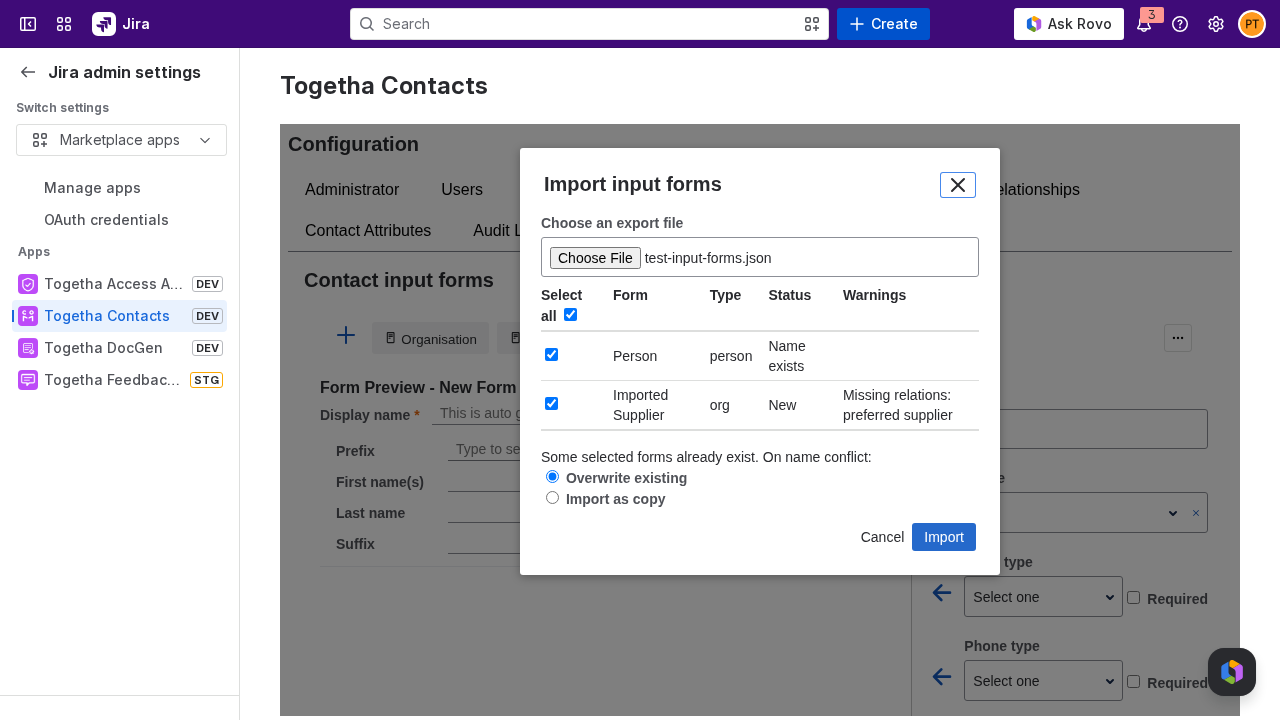
To import, open the kebab menu and choose **Import forms...** , then choose a JSON file you exported earlier. Each form in the file is listed with its name, type, a status of **New** or **Name exists**, and any warnings. A warning appears when a form uses a relationship that this site does not have, so you can add the missing relationship before people use the form.
All forms in the file are selected to start with. Clear the ones you do not want. When a selected form has the same name as one already on this site, choose how to resolve the clash:
* **Overwrite existing** replaces the current form with the imported one.
* **Import as copy** keeps both and saves the imported form under a new name.
Click **Import** to save the selected forms. Imported forms are saved straight away.
## Export Mappings
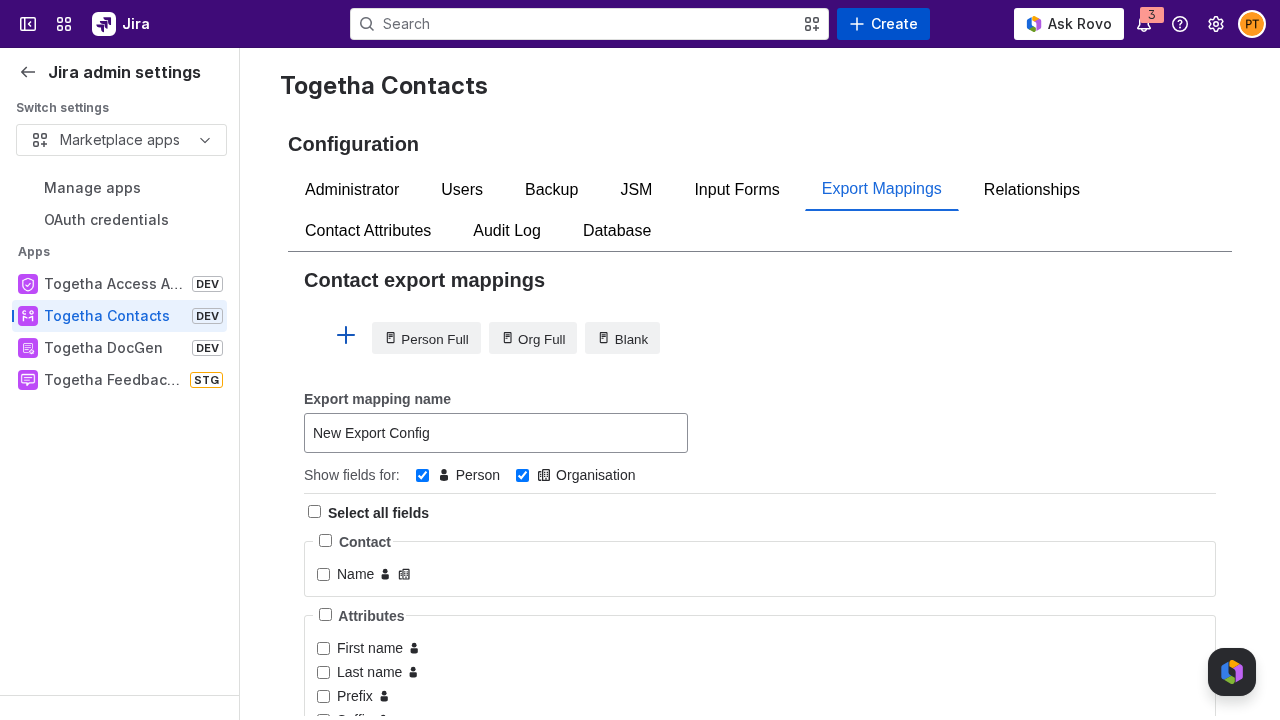
An export mapping is a saved set of fields for exporting contacts. Each one has a name and a list of fields. End users pick a mapping by name in the Export contacts dialog, so they can export a consistent set of columns without choosing fields by hand. See [Exporting contacts](https://docs.togetha.software/docs/exporting-contacts.md).
The tab lists your saved mappings as buttons across the top, with an add button to start a new one. Below the list are a name field and a field picker.
| Control | What it does |
|-------------------------|---------------------------------------------------------------------------------------|
| Add button | Starts a new mapping with an empty field list and the name **New Export Config**. |
| Mapping buttons | Click a saved mapping to load it for editing. The one you are editing is highlighted. |
| **Export mapping name** | The name end users see in the Export contacts dialog. |
| Field picker | The fields to include in the export. |
| **Save** | Saves the mapping. Saving over an existing name replaces it. |
| **Clear** | Discards the current edits and returns to a new, empty mapping. |
| Delete button | Removes the loaded mapping. |
To create an export mapping:
1. Click the add button to start a new mapping.
2. Type a name in **Export mapping name**.
3. Tick the fields to include in the picker.
4. Click **Save**. The mapping appears in the list and becomes available in the Export contacts dialog.
The field picker is the same one end users see when they export. Each field is tagged with a person icon, a building icon, or both, showing whether it applies to Person contacts, Organisation contacts, or both. Untick **Person** or **Organisation** at the top to narrow the list, then use a section's select-all, or the global select-all, to tick every field currently shown.
## Relationships
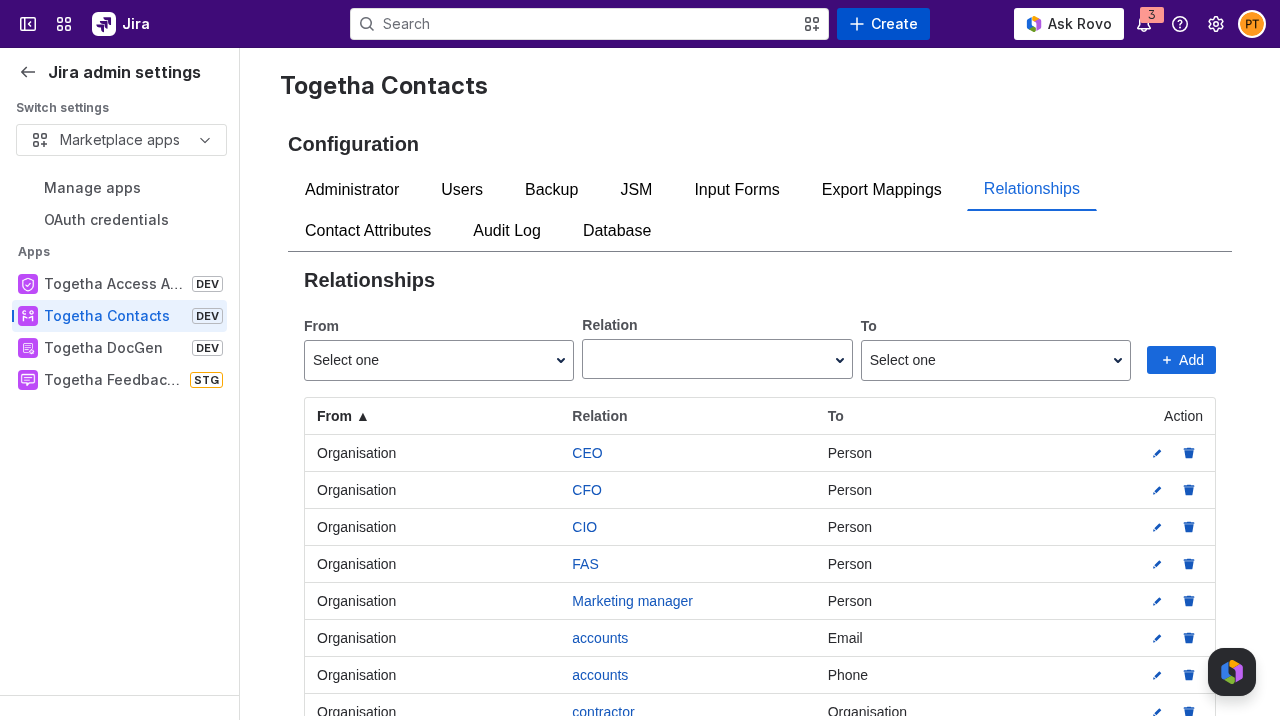
The Relationships tab controls which kinds of contacts and entities can be linked, and by which relation. A relationship type is a triple: a **From** entity type, a **relation** , and a **To** entity type. For example, *Person* --- *works for* --- *Organisation*. Contacts can only be linked in ways defined here.
The table lists every relationship type, with sortable **From** , **Relation** , and **To** columns. Click a column heading to sort by it.
To add a relationship type:
1. Under **From**, pick the entity type the relationship starts from. Only contact types (Person and Organisation) can be the start.
2. Under **Relation**, pick an existing relation, or type a new label to create one.
3. Under **To**, pick the entity type the relationship points to.
4. Click **Add**.
To rename a relation, click its name in the **Relation** column. The edit dialog lets you change the name and its detail fields. Renaming a relation changes how it appears for every contact that uses it.
To delete a relationship type, click the trash icon on its row. What happens next depends on whether the type is in use:
* If contacts are using the relationship type, deletion is blocked and a message shows how many relationships use it. Remove or re-link those relationships first, then try again.
* If it is not in use, confirm the deletion. If the underlying relation is then left unused, you are asked whether to delete the relation from the system entirely.
Default relationships are marked with a **system** badge. You can view them but not edit or delete them, because the app depends on them.
## Contact Attributes
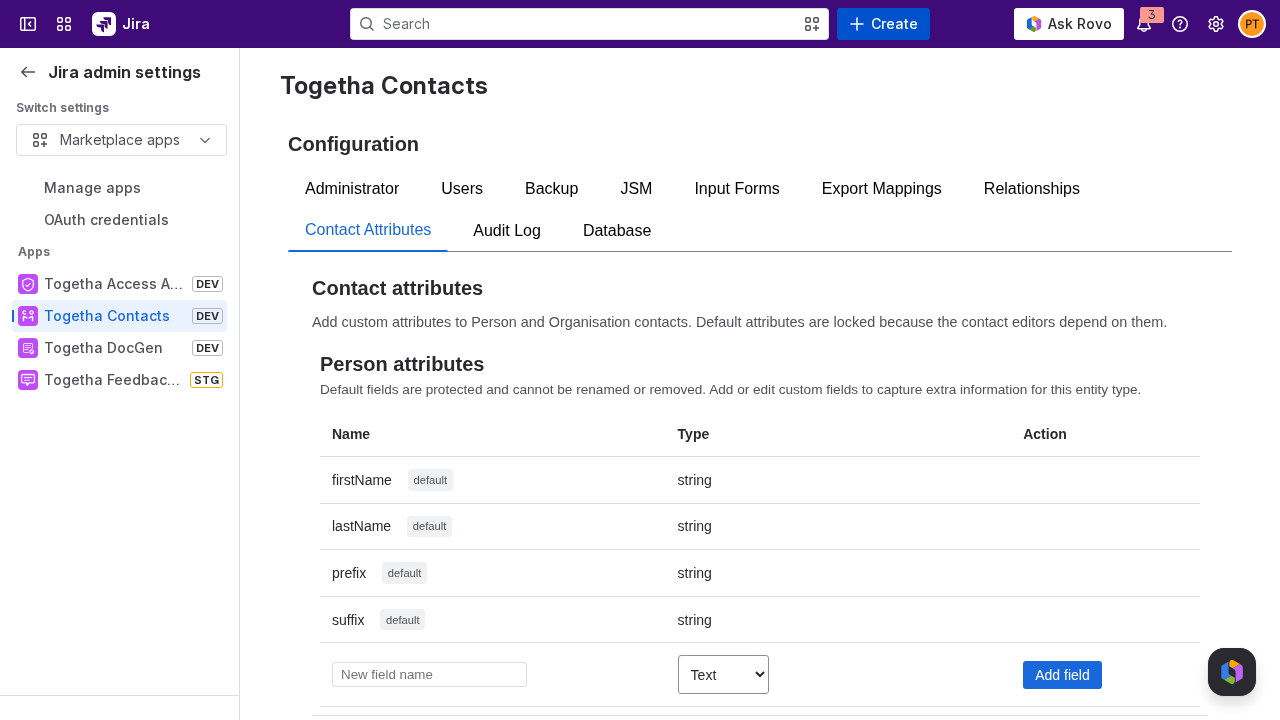
The Contact Attributes tab adds custom fields to **Person** and **Organisation** contacts, on top of the built-in fields. Each contact type has its own editor, listing every field with its name and type.
Default fields show a **default** badge. They are locked because the contact editors depend on them, so you cannot rename or remove them.
To add a custom field:
1. Type a name in **New field name**.
2. Choose a field type.
3. For a **Choice** field, enter the options as a comma-separated list, for example `red, green, blue`.
4. Click **Add field**.
The field types are:
| Type | Stores |
|----------|---------------------------------------------------------|
| Text | Free text. |
| Number | A numeric value. |
| Yes / No | A true or false value. |
| Date | A calendar date. |
| Choice | A single value from a fixed list of options you define. |
To change a custom field's type or options, click its edit icon, make the change, and click **Save**. To remove a custom field, click its delete button. Custom fields appear in the contact editor for that contact type.
## Audit Log
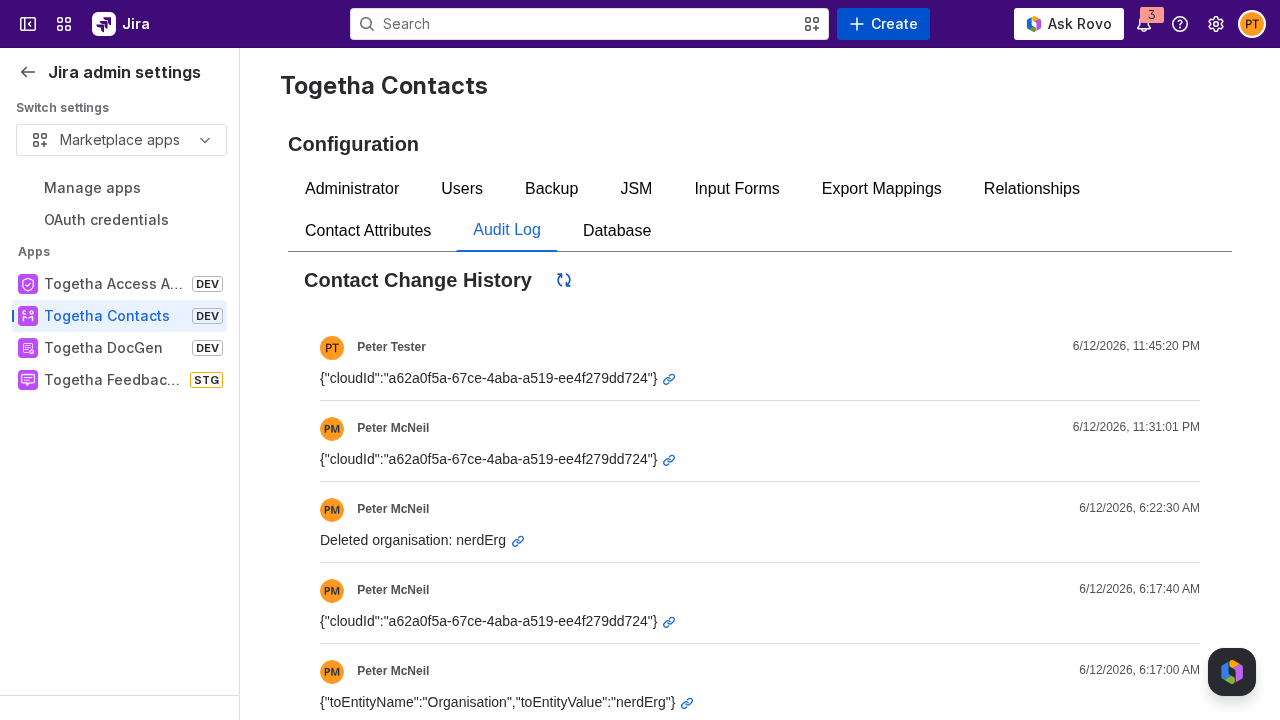
The Audit Log tab shows the site-wide history of contact changes across all users. Each entry lists the user who made the change, the date and time, a description of what changed, and a link to the affected contact.
The history records these change types:
| Change | Example description |
|----------------------|------------------------------------------|
| Contact created | Created person: Jane Doe |
| Contact updated | Updated contact: Jane Doe |
| Contact deleted | Deleted person: Jane Doe |
| Relationship added | Added work email jane@example.com |
| Relationship updated | Updated work email jane@example.com |
| Relationship removed | Removed work email jane@example.com |
| Type changed | Changed type from Person to Organisation |
The log shows 100 entries per page. Use **Previous** and **Next** to move between pages, and the refresh button next to the **Contact Change History** heading to reload the current page.
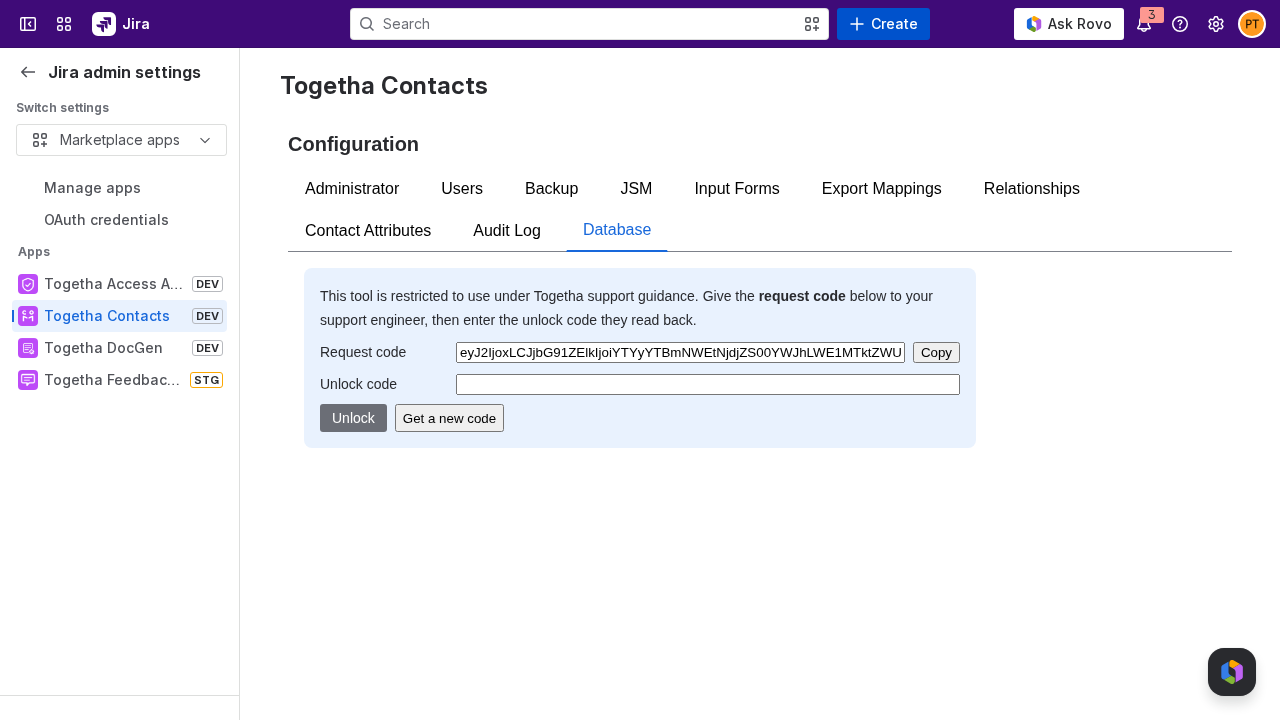
## Database
The Database tab is a raw SQL tool for the contacts database. It is restricted to use under Togetha support guidance and is locked by default.
To unlock it:
1. Open the **Database** tab. It shows a **request code**.
2. Contact Togetha support and read them the request code. Use **Copy** to copy it to your clipboard.
3. Support reads back an 8-digit **unlock code**.
4. Enter the unlock code and click **Unlock**.
While unlocked, a status bar shows how long access lasts (30 minutes) and counts down. Click **Lock now** to end the session early. When the time runs out, the tab re-locks automatically and you need a new code to continue.
A few things to know:
* Each request code works once. If a code expires before you use it, click **Get a new code**.
* The unlock code allows a limited number of attempts before you need a new request code.
* If support unlock has not been configured for your site, the tab reports that it is unavailable. Contact Togetha support.
This tool runs SQL directly against the live contacts database and can change or delete data. Only use it while working with Togetha support.
---
language: "en"
---
# Creating a contact
Create a person or organisation contact, either from the main Contacts page or from anywhere in Jira through the command palette.
## Prerequisites
* Togetha Contacts is installed on your Jira site.
* You can open the Contacts page from the Apps menu, or the **New Contact** command appears in your Jira command palette.
## Choose where to start
You can open the Add contact dialog from two places:
| Starting point | How to open |
|------------------|-----------------------------------------------------------------------------------------------------------------------------------------------------|
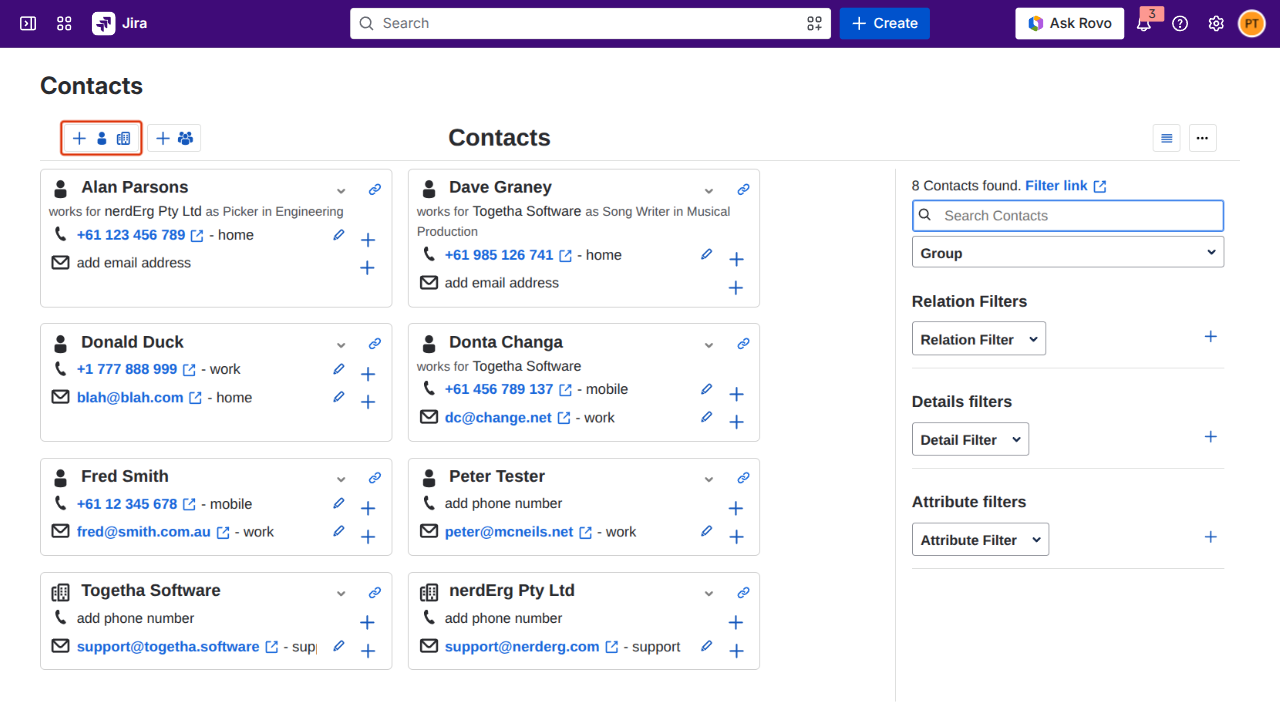
| Contacts page | Open the **Contacts** page from the Apps menu, then click the **Add contact** button in the top-left toolbar. |
| Anywhere in Jira | Press `Ctrl + K` (Windows/Linux) or `Cmd + K` (macOS) to open the Jira command palette, then use the `n c` shortcut, or search for **New Contact**. |
## Steps
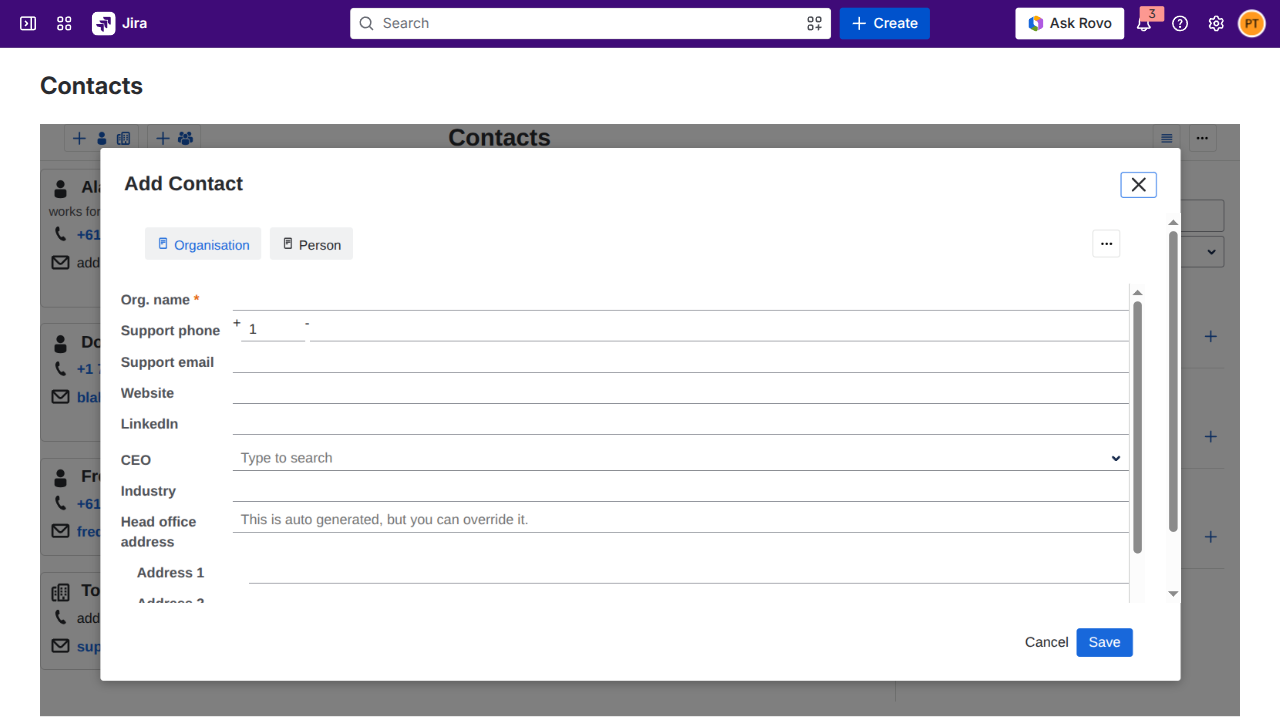
1. **Open the Add contact dialog** using one of the two methods above. The dialog shows the input form selector at the top and the form fields below.
2. **Pick a form.** The available forms are listed as buttons at the top of the dialog. **Default** creates a person with email, mobile, and an optional organisation relationship. Your admin may have added more forms for specific contact types.
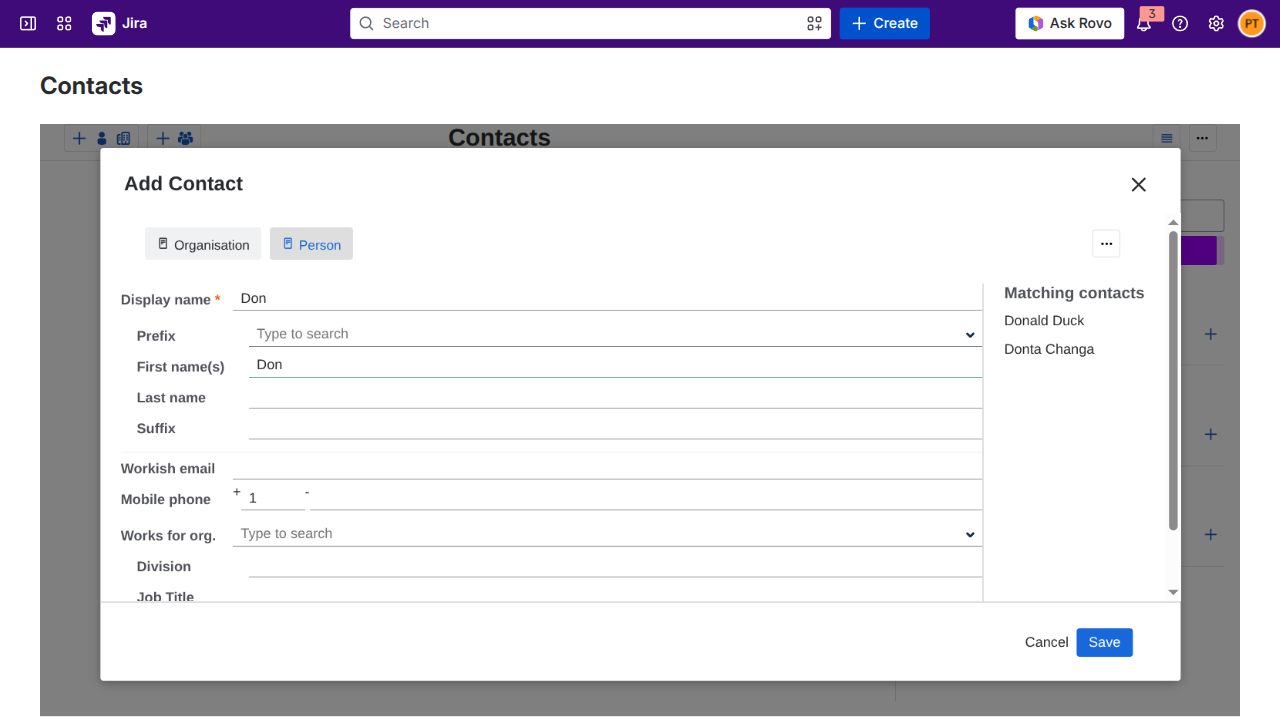
3. **Enter the name.** As you type, any contacts with a matching name appear in a **Matching contacts** panel to the right of the form. Click a match to open it in the contact details dialog so you can confirm whether the contact already exists, or carry on typing if your contact is new.
4. **Fill in the remaining fields.** Required fields are marked with an asterisk. Empty optional fields are skipped when the contact is saved.
5. **Link an organisation** (if the form includes the relationship). Start typing in the organisation field and pick an existing organisation from the suggestion list.
6. **Click Save.** The dialog closes and the new contact appears in your contact list. Validation errors, if any, display above the Save button.
## Result
The contact is saved against your account and appears in your list on the Contacts page. The contact is private to you until you share it with a group.
## Avoiding duplicates
The **Matching contacts** panel shows existing contacts that match the name you're typing. Before you save, check the panel and confirm the contact you're adding doesn't already exist. The panel only appears once the dialog is wide enough to show it side-by-side with the form.
Next:
* [Working with groups](https://docs.togetha.software/docs/working-with-groups.md): add your new contact to a shared group.
* [Linking contacts to work items](https://docs.togetha.software/docs/linking-contacts-to-work-items.md): attach this contact to a Jira Work item.
---
language: "en"
---
# Creating a feedback form
Forms are created from the **Forms** tab on the Feedback page (Jira **Apps → Feedback**).
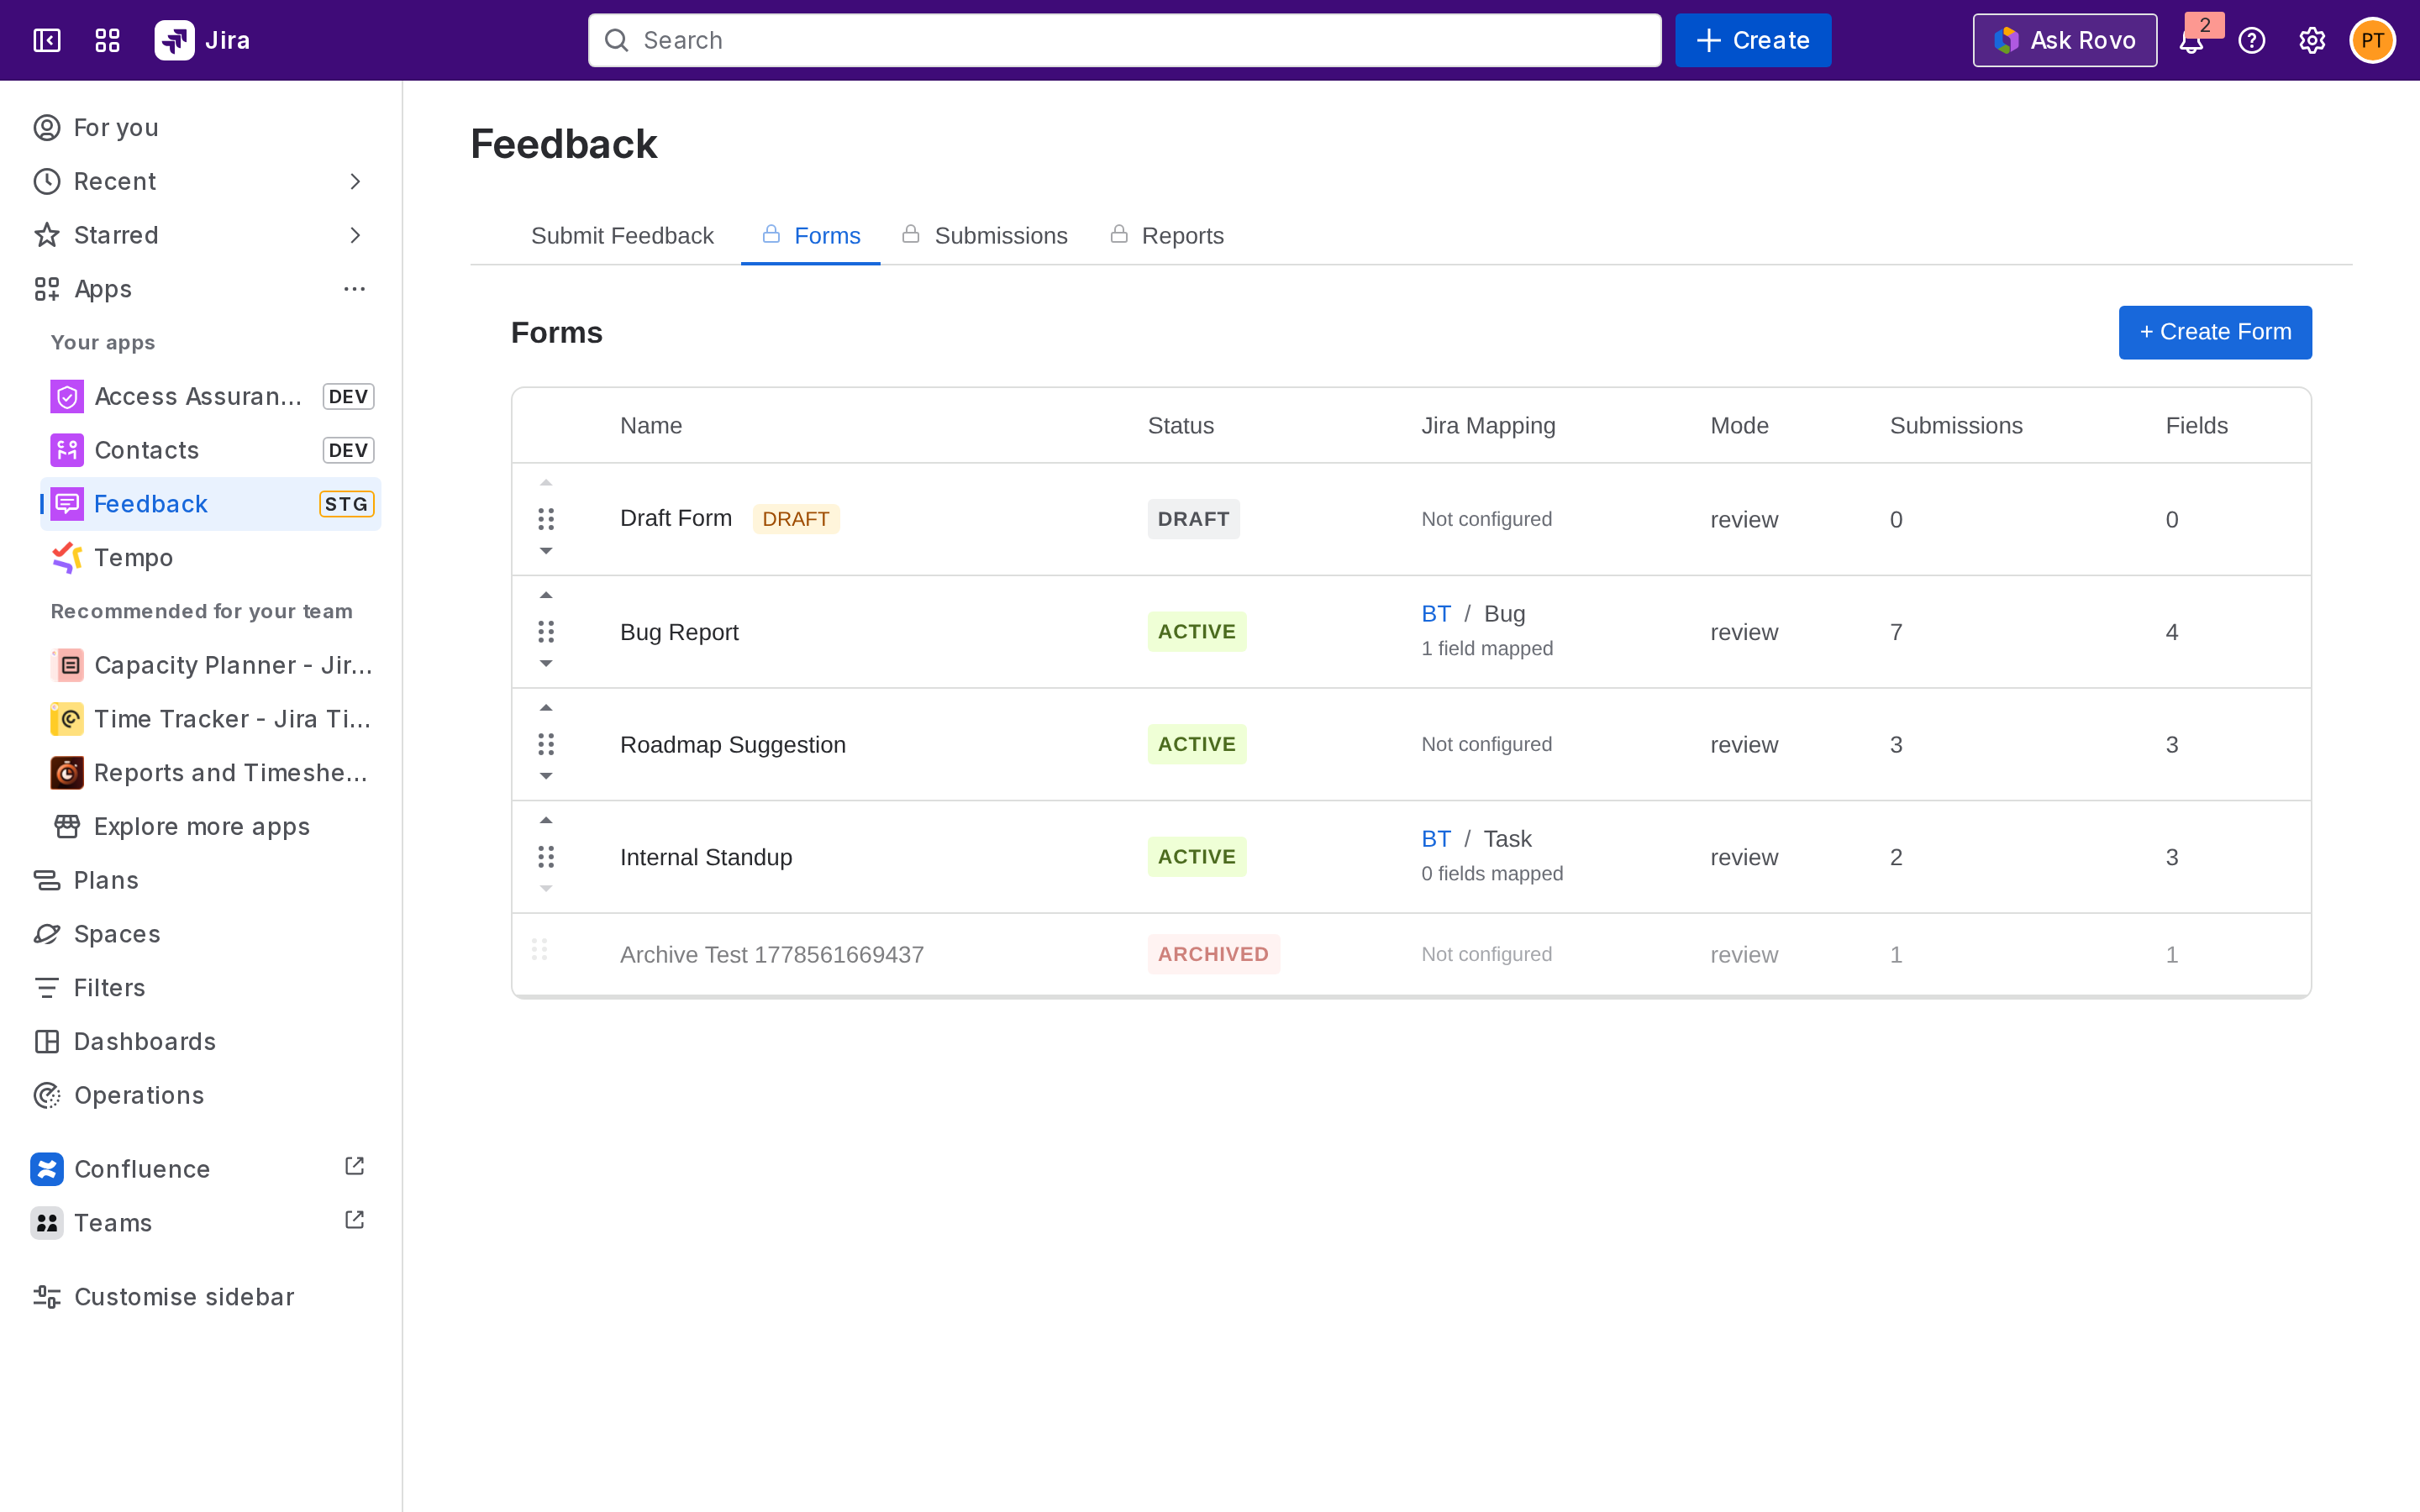
Click **+ Create Form**. The form builder opens as a 3-step wizard.
## Step 1 - Form Details
Give the form a **Name** and **Description**, then choose its visibility:
* **Allow anonymous submissions**: Submitters' account IDs are not stored. Use for sensitive or feedback-fatigue-heavy contexts.
* **Restrict to groups**: Only users in the selected Jira groups can see and submit the form. Leave empty to make the form visible to everyone with access to the Feedback page.
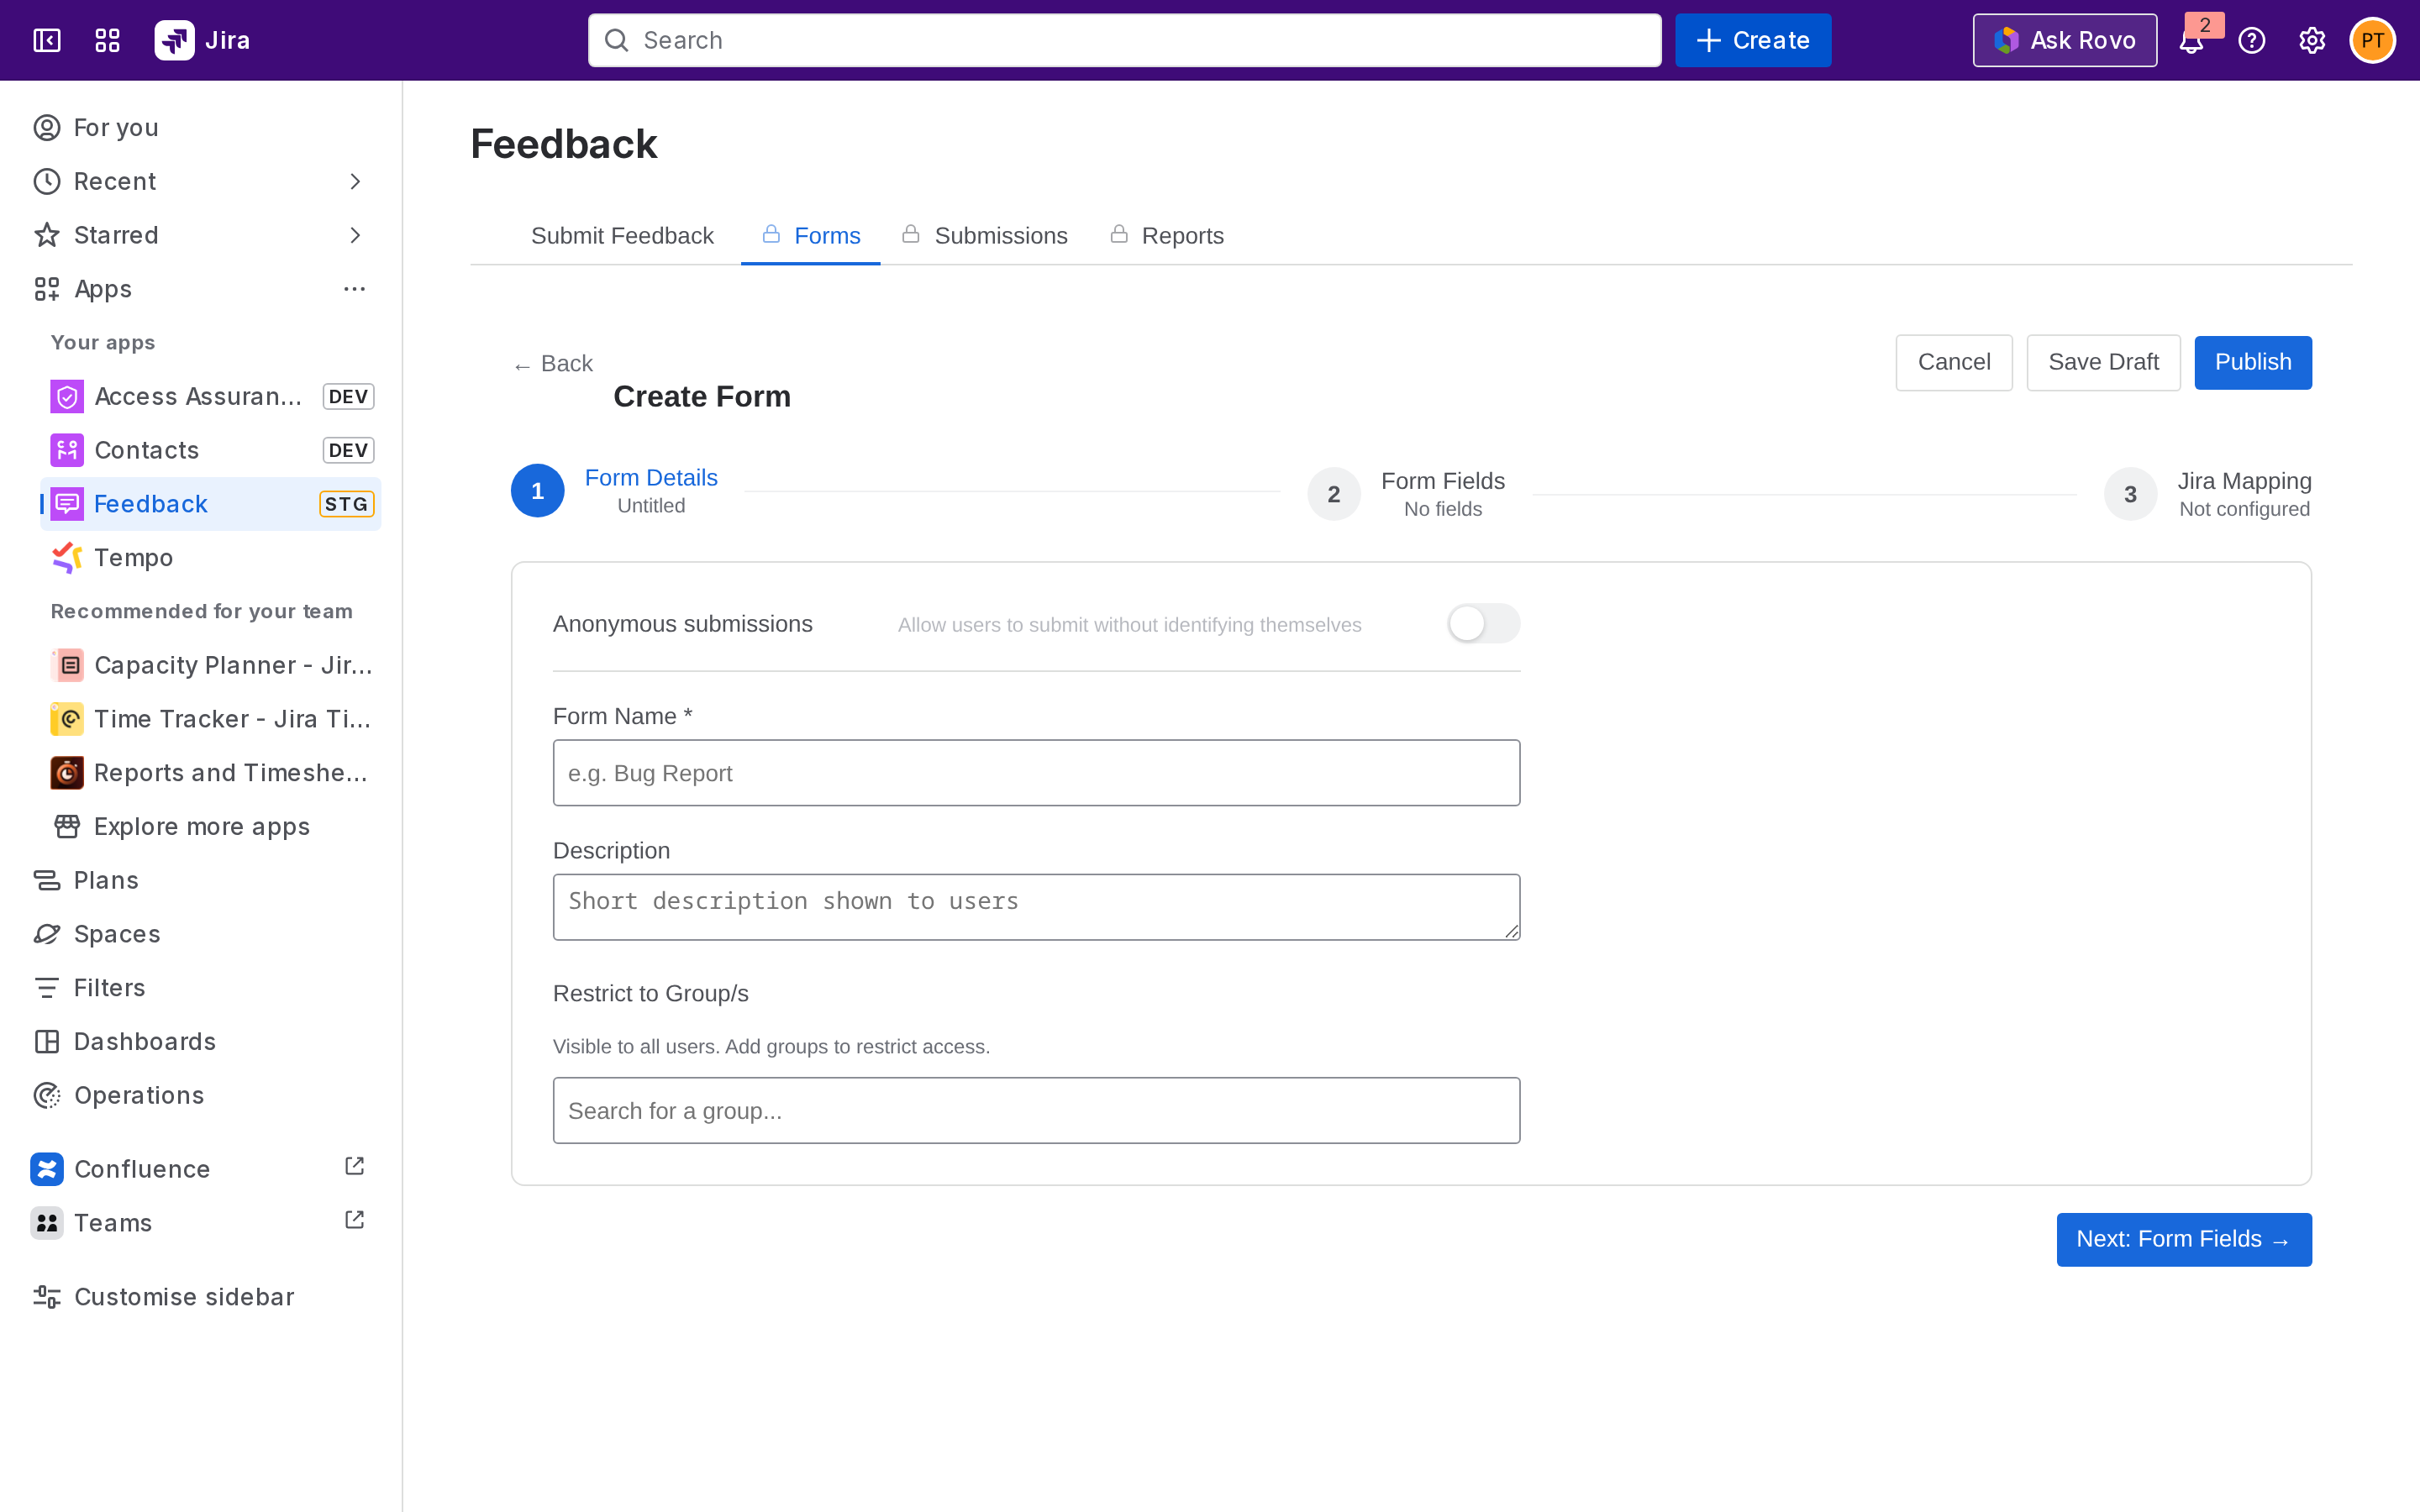
Click **Next** to move to Step 2.
## Step 2 - Form Fields
Click a field type from the palette to add it. Available types:
* **Short Text**
* **Rich Text Area**
* **Single Select** a dropdown with one choice.
* **Multi Select** a dropdown with multiple choices.
* **Checkbox**
* **Rating** a 1--5 scale.
* **Yes / No**
* **Date**
For each field, set the label, mark it required if needed, and reorder by dragging.
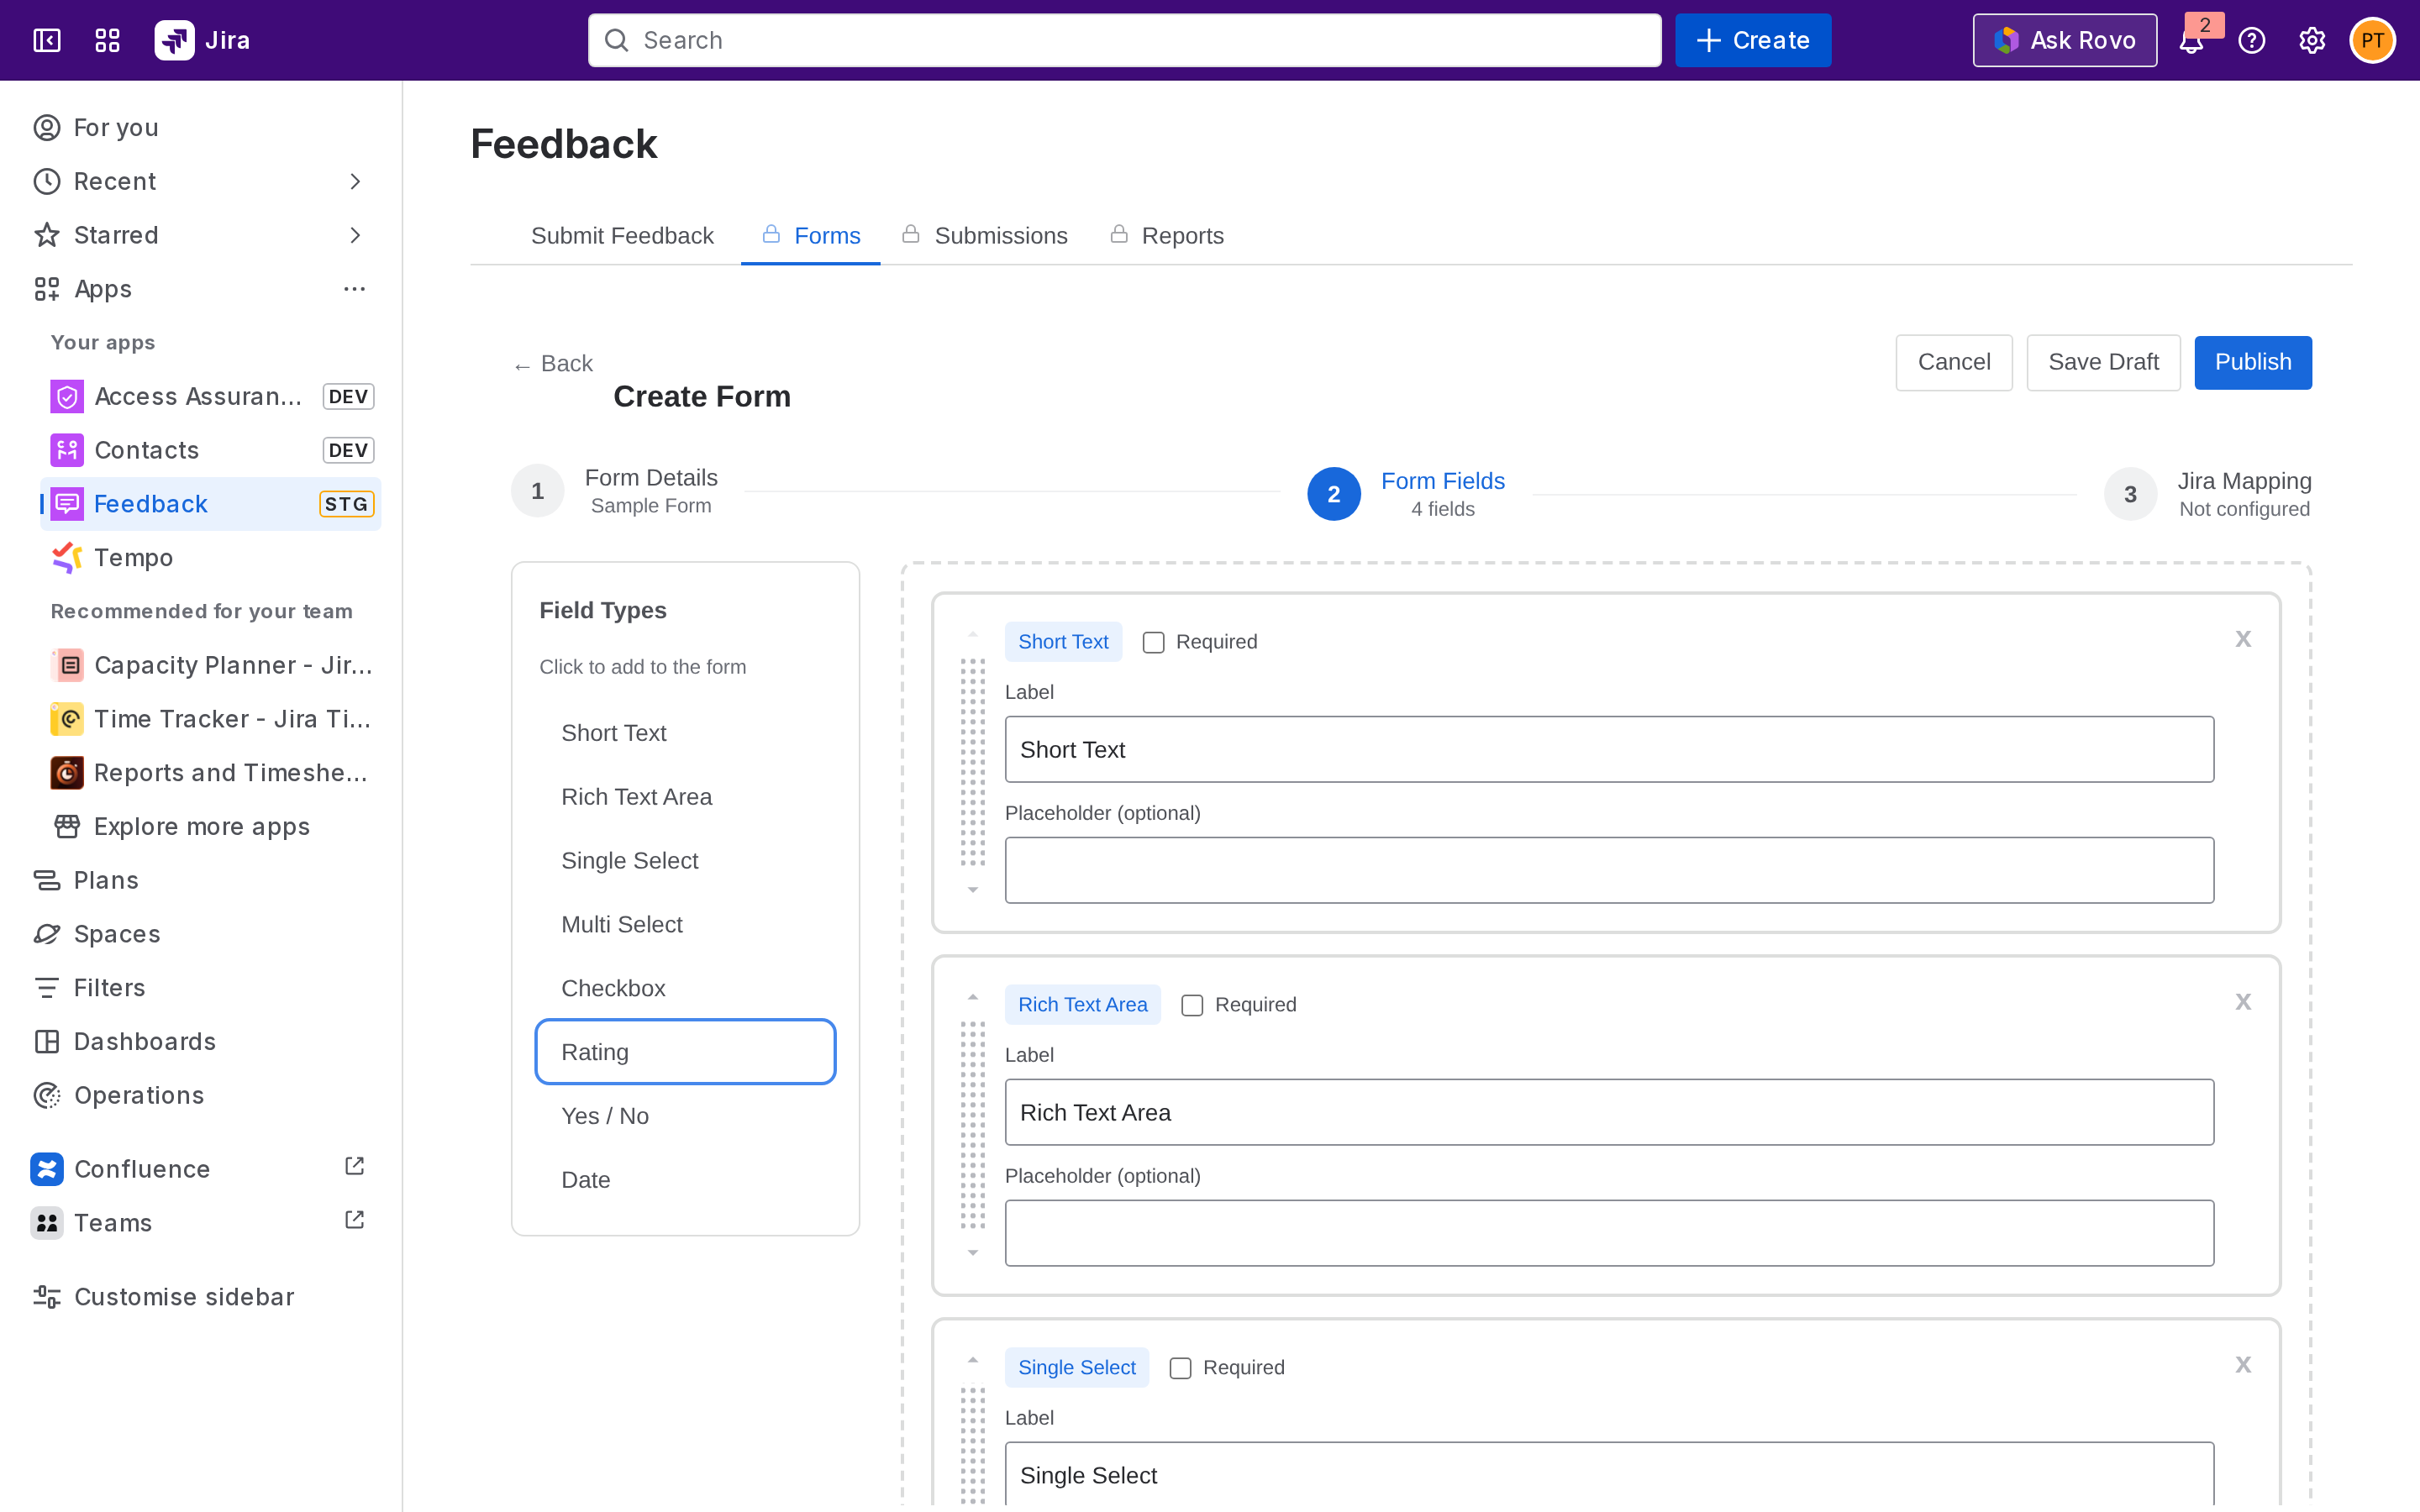
Click **Next** to move to Step 3.
## Step 3 - Jira Mapping (optional)
If you want submissions to become Jira work items, choose a target **Space** and **Work Item Type** , then map each form field to a Jira field. The full mapping workflow is covered in [Mapping form fields to Jira](https://docs.togetha.software/docs/mapping-form-fields-to-jira.md).
If you don't want to create Jira issues from this form's submissions, **skip this step**, submissions will still be captured and reviewable on the Submissions tab.
## Save Draft or Publish
* **Save Draft** keeps the form on the Forms list with status *Draft*. Drafts are not visible to submitters.
* **Publish** makes the form live and visible to its target audience.
After saving, you can **edit** , **archive** , or **delete** existing forms from the Forms tab.
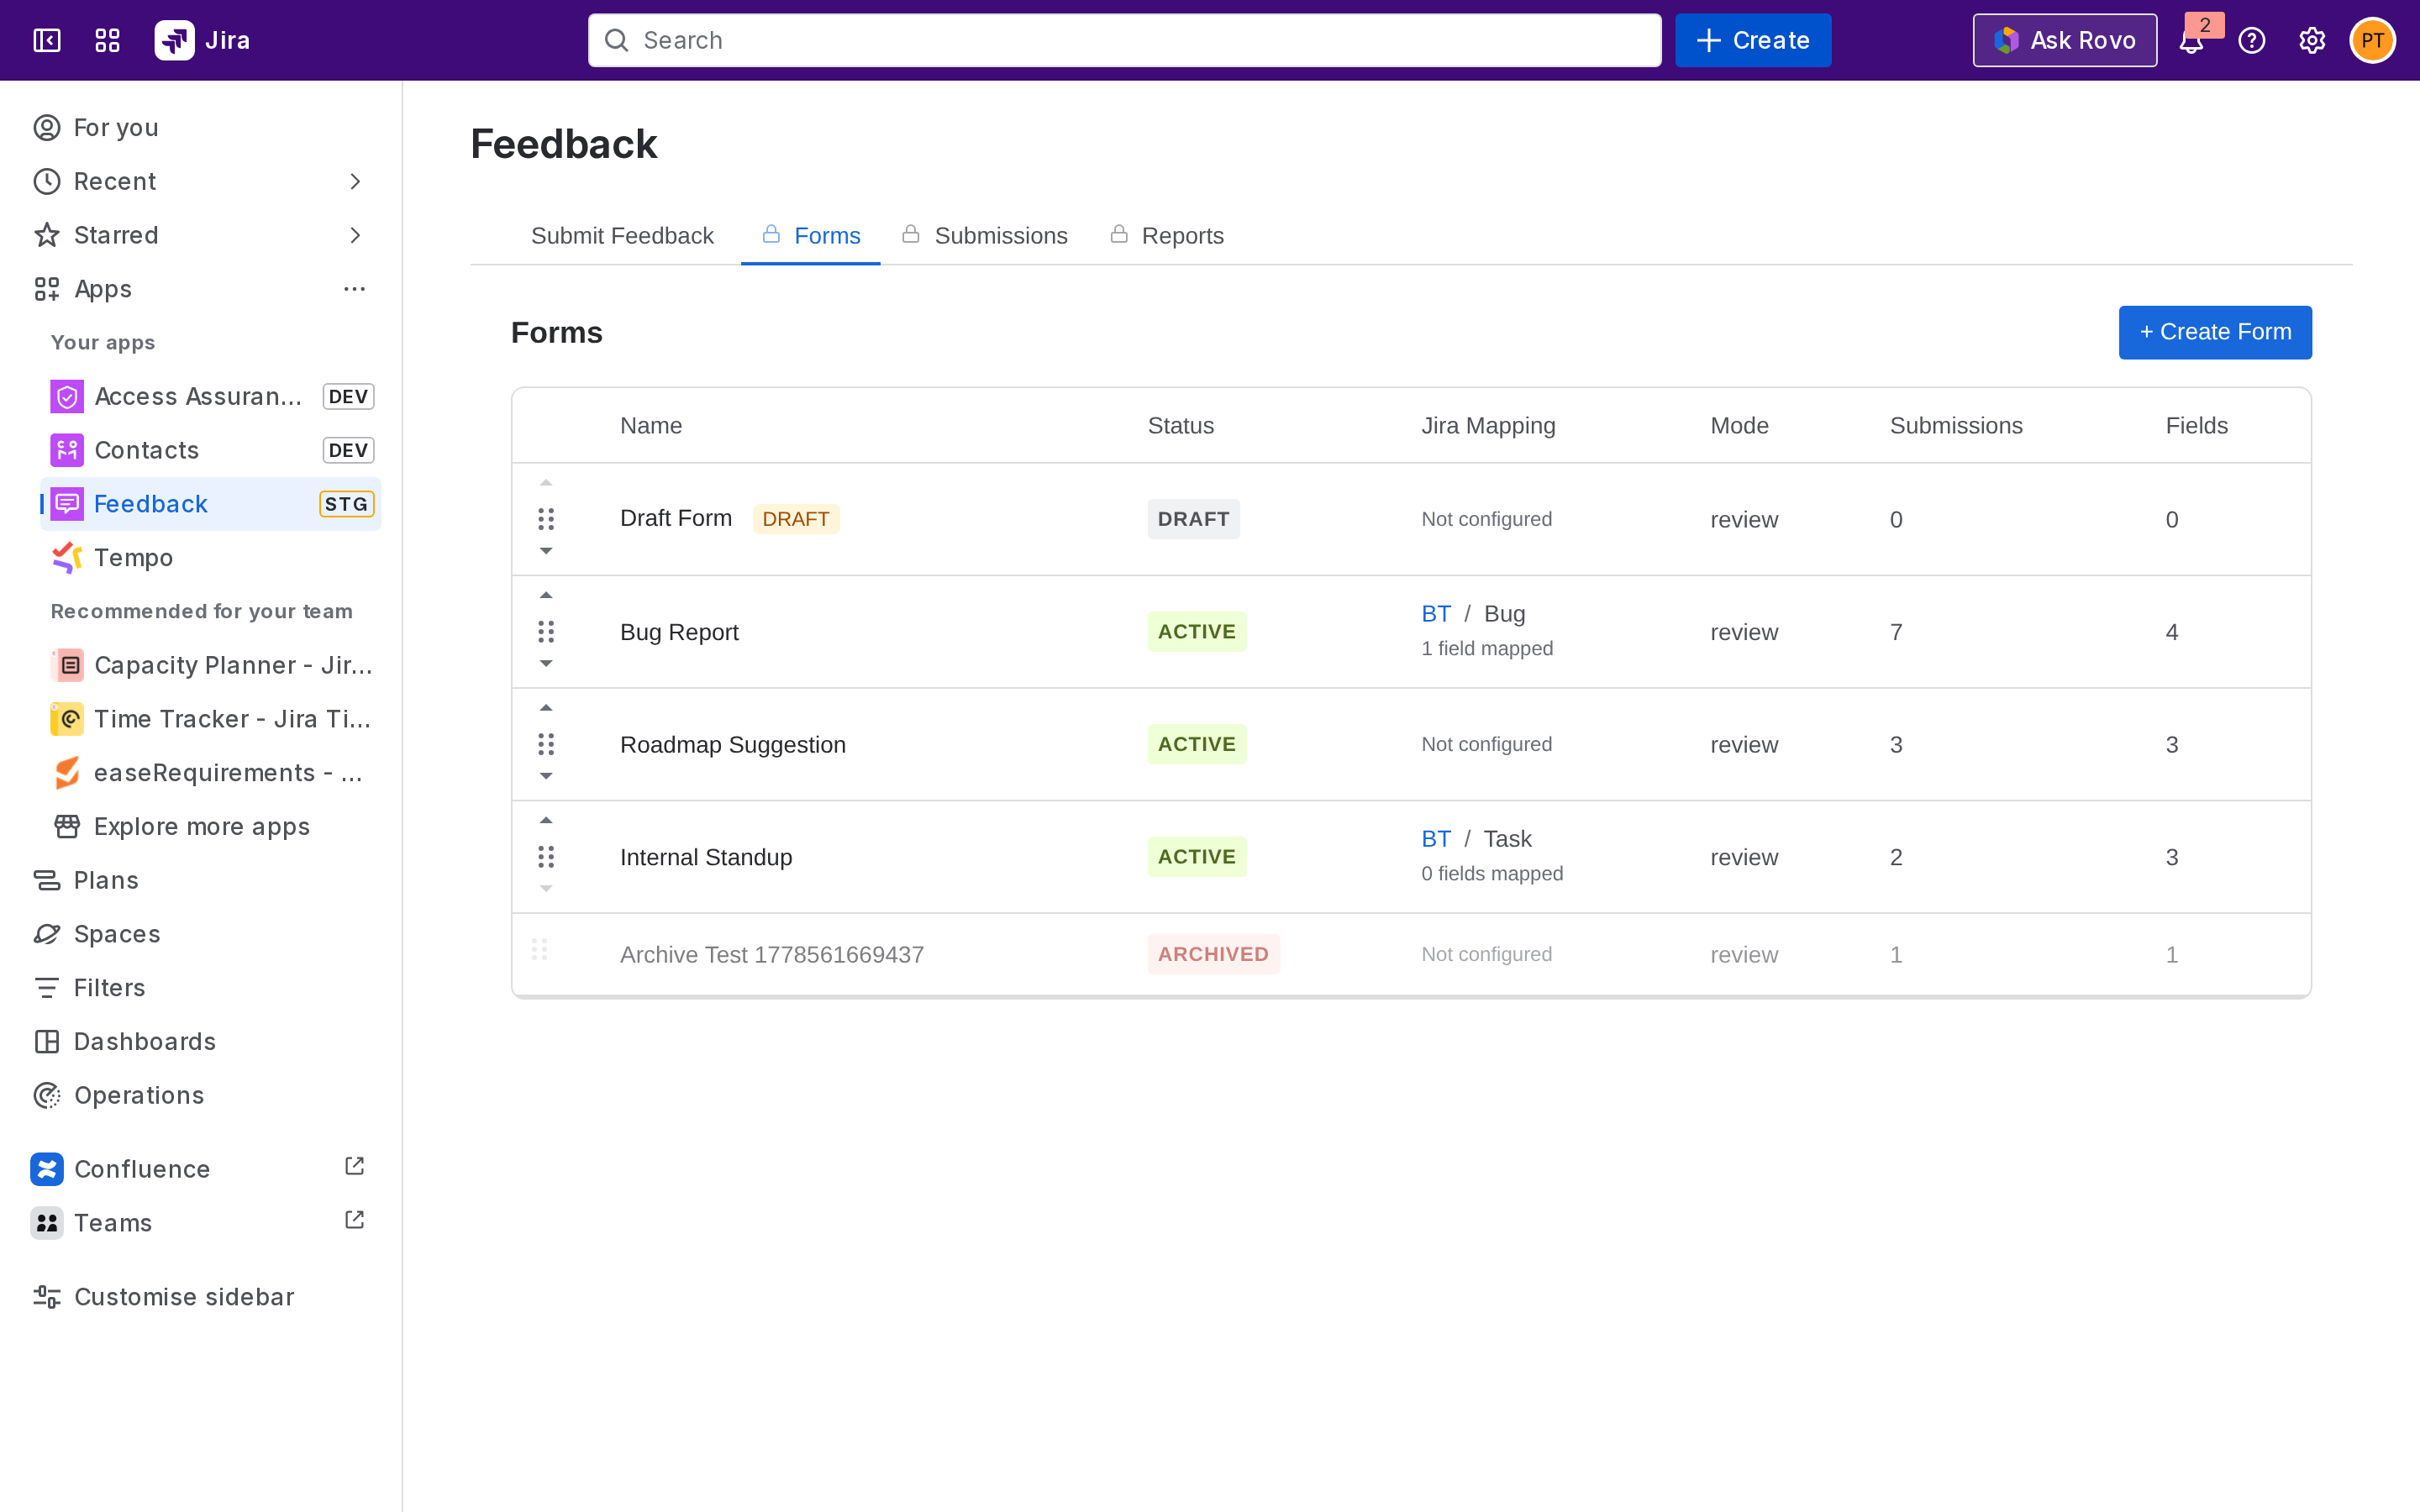
> Forms that have submissions cannot be deleted, **archive** them instead.
## Next step
[Mapping form fields to Jira](https://docs.togetha.software/docs/mapping-form-fields-to-jira.md) - turn submissions into Jira work items.
---
language: "en"
---
# Deleting contacts
Delete a contact when you no longer need it. Deleting moves the contact to your Trash group first, so you can restore it later or delete it for good.
## How deleting works
Deleting a contact doesn't remove it straight away. The contact moves to your **Trash** group and is taken out of your other groups, so it disappears from your normal contact list. Nothing is lost until you choose to delete it permanently.
| Action | What happens |
|--------------------|--------------------------------------------------------------------|
| Delete | Moves the contact to your Trash group. You can undo this. |
| Restore | Moves a trashed contact back into your contacts. |
| Delete permanently | Removes the contact and its details for good. You can't undo this. |
Your Trash group is private to you. Only the person who deleted a contact can see and restore it.
You can only delete or restore contacts you have write access to. Contacts shared with you read-only can't be deleted, and they're skipped during bulk actions.
## Prerequisites
* You can open the **Contacts** page from the Apps menu.
* You have write access to the contacts you want to delete (contacts you created, or contacts in a group shared with you with write access).
## Delete a contact
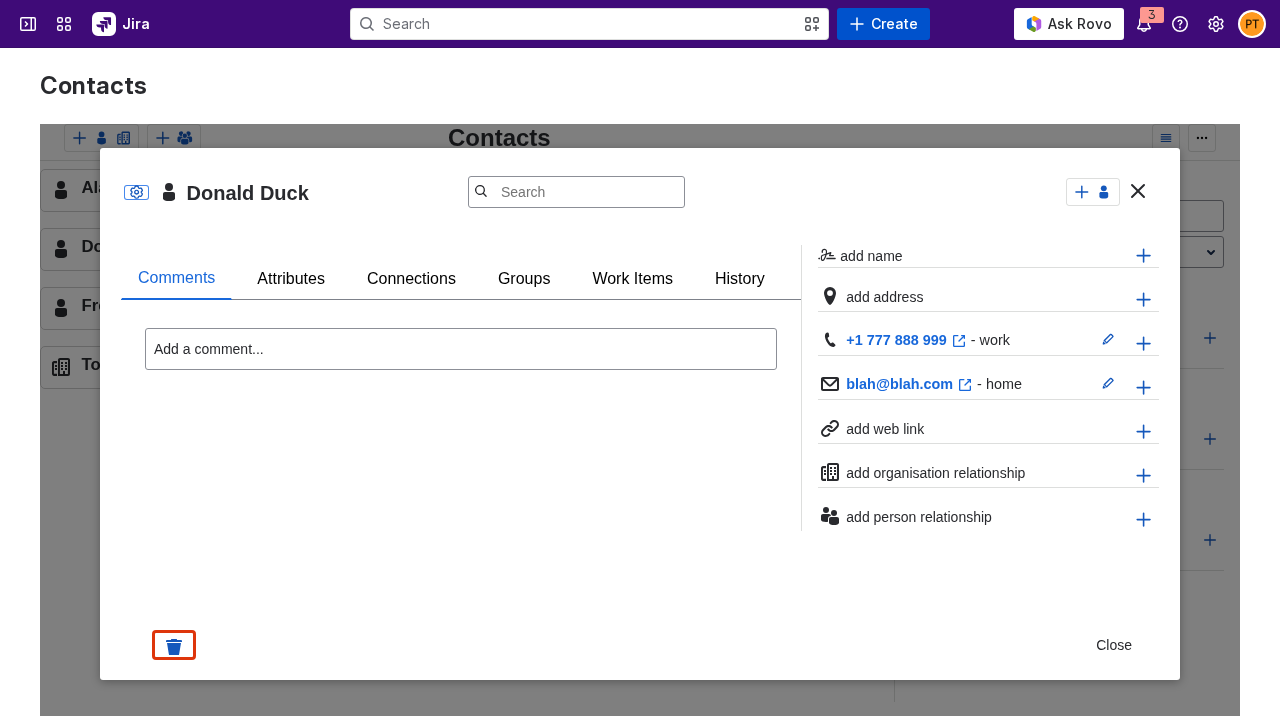
1. **Click the contact's name** to open the contact details dialog.
2. **Click the delete button** (the trashcan icon) at the bottom-left of the dialog. A **Delete?** prompt appears.
3. **Click the delete button again** within a few seconds to confirm. The contact moves to your Trash group and leaves your contact list.
## View contacts in the trash
Trashed contacts are hidden from your normal list. To see them, filter by the Trash group.
1. **Open the Contacts page.**
2. **Open the Group filter** in the side panel.
3. **Select trash.** The list shows only the contacts you've moved to the trash.
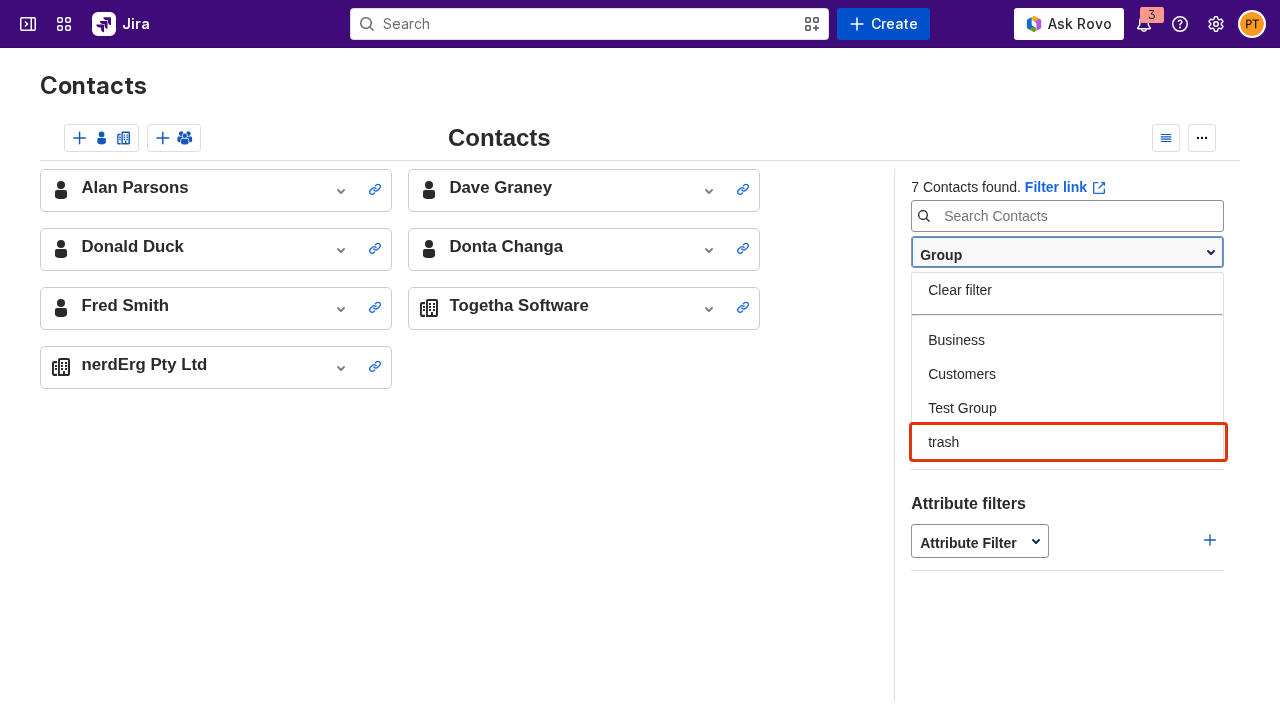
The **trash** entry appears in the Group filter after you delete your first contact. If you don't see it yet, refresh the page.
## Restore a contact
1. **Filter by the trash group** so the trashed contact appears.
2. **Click the contact's name** to open the contact details dialog.
3. **Click the Restore button.** The contact returns to your contacts and leaves the trash.
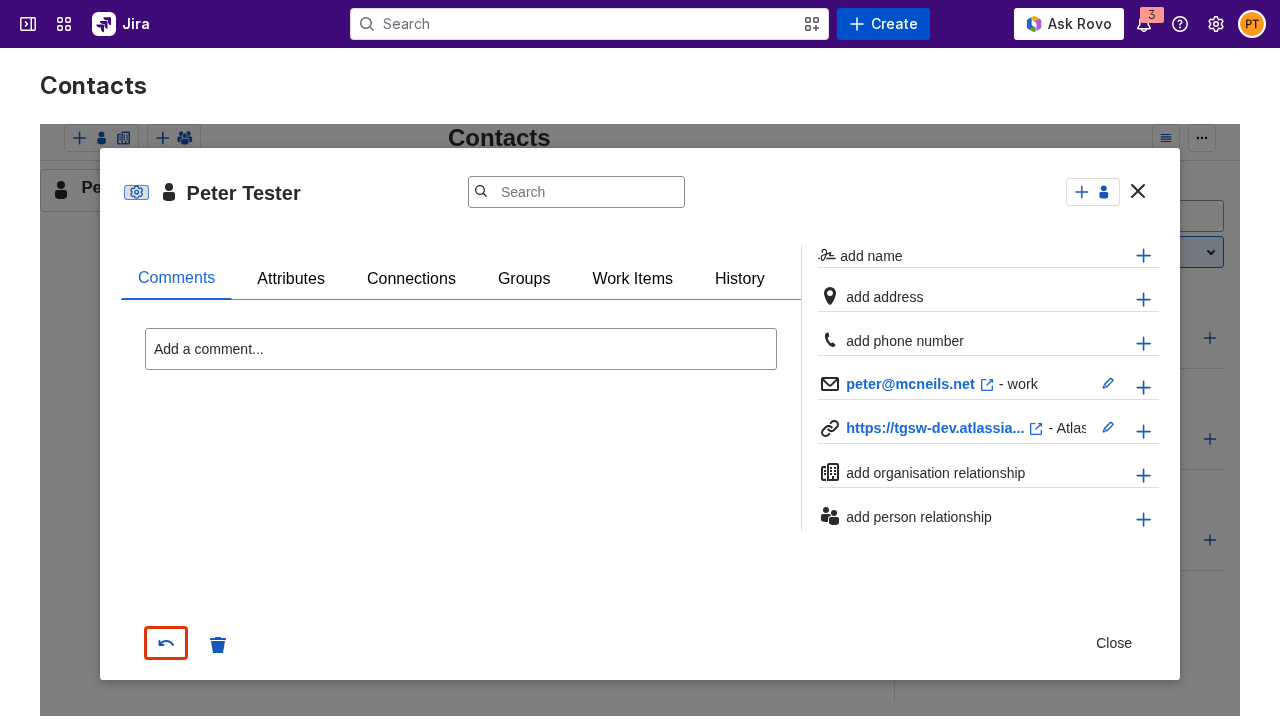
Restoring returns the contact to your default group. If the contact belonged to other groups before you deleted it, add it back to those groups (see [Working with groups](https://docs.togetha.software/docs/working-with-groups.md)).
## Delete a contact permanently
Permanent deletion can't be undone. It removes the contact and all its details, such as emails, phone numbers, and addresses.
1. **Filter by the trash group** and **click the trashed contact's name** to open the contact details dialog.
2. **Click the delete button** next to the Restore button. A **Delete?** prompt appears.
3. **Click it again** to confirm. The contact and its details are removed for good.
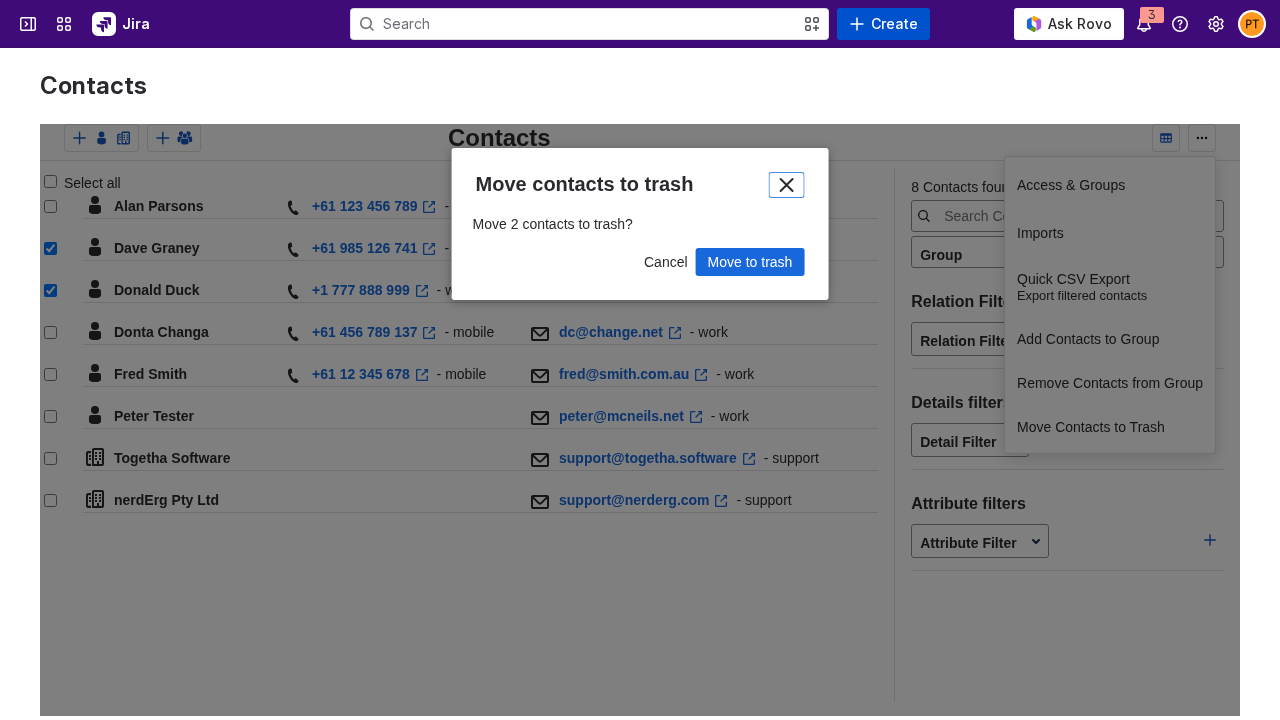
## Delete or restore several contacts at once
Use list view to act on many contacts in one step.
1. **Switch to list view** using the table icon on the right of the toolbar.
2. **Tick the checkbox** on each contact you want to act on.
3. **Open the kebab menu** (the three-dot menu on the right of the toolbar).
4. **Choose the action you need.** When you're viewing your normal contacts, the menu offers **Move Contacts to Trash** . When you're viewing the trash group, it offers **Restore Contacts from Trash** and **Delete Contacts Permanently** instead.
5. **Confirm in the dialog.** The dialog tells you how many contacts it will affect. Moving to trash and deleting permanently both ask you to confirm, and permanent delete reminds you it can't be undone.
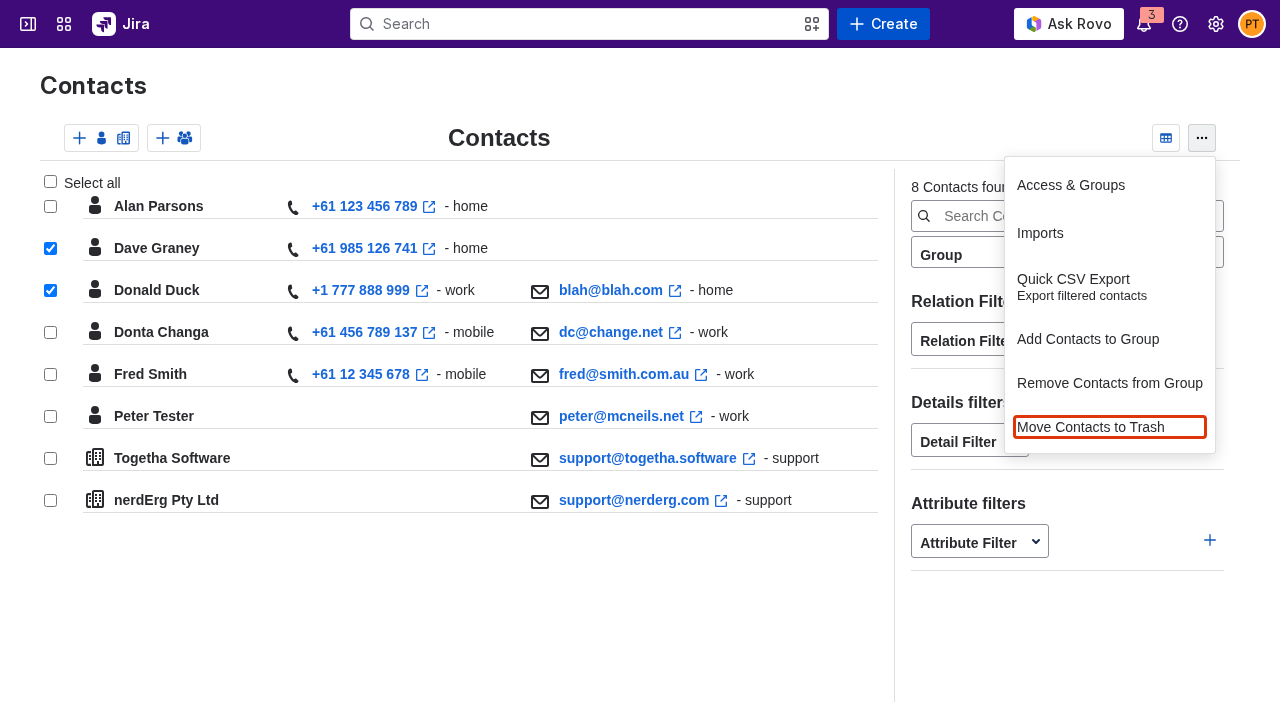
If any of the contacts you selected are read-only, the confirmation dialog tells you how many it will skip. Only the contacts you can write to are affected.
## Result
Deleted contacts sit in your Trash group, out of your normal list but available through the Group filter. You can restore them to your contacts, or delete them permanently once you're sure you don't need them.
Next:
* [Working with groups](https://docs.togetha.software/docs/working-with-groups.md): add a restored contact back to the groups it belonged to.
* [Creating a contact](https://docs.togetha.software/docs/creating-a-contact.md): add new contacts to your list.
---
language: "en"
---
# DPA
## Bonterms Data Protection Addendum (DPA)
(Version 1.0)

This Data Protection Addendum ("**DPA** ") is an Attachment to the **Agreement**. Customer and Provider enter into this DPA by executing a DPA Setup Page. Capitalized terms not defined in this DPA are defined in the Agreement or DPA Setup Page.
1. **Definitions**.
1.1. "**Agreement**" means the Agreement between Customer and Provider incorporating the Bonterms Cloud Terms which is specified on the DPA Setup Page.
1.2. "**Audit** " and "**Audit Parameters**" are defined in Section 9.3 below.
1.3. "**Audit Report**" is defined in Section 9.2 below.
1.4. "**Controller**" means the natural or legal person, public authority, agency or other body which, alone or jointly with others, determines the purposes and means of Processing of Personal Data.
1.5. "**Customer Instructions**" is defined in Section 3.1 below.
1.6. "**Customer Personal Data**" means Personal Data in Customer Data (as defined in the Agreement).
1.7. "**Data Protection Laws** " means all laws and regulations applicable to the Processing of Customer Personal Data under the Agreement, including, as applicable: (i) the California Consumer Privacy Act, as amended by the California Privacy Rights Act, and any binding regulations promulgated thereunder ("**CCPA** "), (ii) the General Data Protection Regulation (Regulation (EU) 2016/679) ("**EU GDPR** " or "**GDPR** "), (iii) the Swiss Federal Act on Data Protection ("**FADP** "), (iv) the EU GDPR as it forms part of the law of England and Wales by virtue of section 3 of the European Union (Withdrawal) Act 2018 (the "**UK GDPR**") and (v) the UK Data Protection Act 2018; in each case, as updated, amended or replaced from time to time.
1.8. "**Data Subject**" means the identified or identifiable natural person to whom Customer Personal Data relates.
1.9. "**DPA Effective Date**" is specified on the DPA Setup Page.
1.10. "**DPA Setup Page**" means a separate document executed by Customer and Provider which causes this DPA to become an Attachment to their Agreement.
1.11. "**EEA**" means European Economic Area.
1.12. "**Key Terms**" means Agreement, DPA Effective Date and Subprocessor List as specified by the parties on the DPA Setup Page.
1.13. "**Personal Data**" means information about an identified or identifiable natural person or which otherwise constitutes "personal data", "personal information", "personally identifiable information" or similar terms as defined in Data Protection Laws.
1.14. "**Processing**" and inflections thereof refer to any operation or set of operations that is performed on Personal Data or on sets of Personal Data, whether or not by automated means, such as collection, recording, organization, structuring, storage, adaptation or alteration, retrieval, consultation, use, disclosure by transmission, dissemination or otherwise making available, alignment or combination, restriction, erasure or destruction.
1.15. "**Processor**" means a natural or legal person, public authority, agency or other body which Processes Personal Data on behalf of the Controller.
1.16. "**Restricted Transfer**" means: (i) where EU GDPR applies, a transfer of Customer Personal Data from the EEA to a country outside the EEA that is not subject to an adequacy determination, (ii) where UK GDPR applies, a transfer of Customer Personal Data from the United Kingdom to any other country that is not subject to an adequacy determination or (iii) where FADP applies, a transfer of Customer Personal Data from Switzerland to any other country that is not subject to an adequacy determination.
1.17. "**Schedules**" means one or more schedules incorporated by the parties in their DPA Setup Page. The default Schedules for this DPA are:
|------------|------------------------------------------|
| Schedule 1 | Subject Matter and Details of Processing |
| Schedule 2 | Technical and Organisational Measures |
| Schedule 3 | Cross-Border Transfer Mechanisms |
| Schedule 4 | Region-Specific Terms |
1.18. "**Security Incident**" means any breach of security that leads to the accidental or unlawful destruction, loss, alteration, unauthorised disclosure of, or access to, Customer Personal Data being Processed by Provider.
1.19. "**Specified Notice Period**" is 48 hours.
1.20. "**Subprocessor**" means any third party authorised by Provider to Process any Customer Personal Data.
1.21. "**Subprocessor List**" means the list of Provider's Subprocessors as identified or linked to on the DPA Setup Page.
2. **Scope and Duration**.
2.1. ++Roles of the Parties++. This DPA applies to Provider as a Processor of Customer Personal Data and to Customer as a Controller or Processor of Customer Personal Data.
2.2. ++Scope of DPA++. This DPA applies to Provider's Processing of Customer Personal Data under the Agreement to the extent such Processing is subject to Data Protection Laws. This DPA is governed by the governing law of the Agreement unless otherwise required by Data Protection Laws.
2.3. ++Duration of DPA++ . This DPA commences on the **DPA Effective Date** and terminates upon expiration or termination of the Agreement (or, if later, the date on which Provider has ceased all Processing of Customer Personal Data).
2.4. ++Order of Precedence++ . In the event of any conflict or inconsistency among the following documents, the order of precedence will be: (1) any Standard Contractual Clauses or other measures to which the parties have agreed in ++Schedule 3++ (Cross-Border Transfer Mechanisms) or ++Schedule 4++ (Region-Specific Terms), (2) this DPA and (3) the Agreement. To the fullest extent permitted by Data Protection Laws, any claims brought in connection with this DPA (including its Schedules) will be subject to the terms and conditions, including, but not limited to, the exclusions and limitations, set forth in the Agreement.
3. **Processing of Personal Data**.
3.1. ++Customer Instructions++.
(a) Provider will Process Customer Personal Data as a Processor only: (i) in accordance with Customer Instructions or (ii) to comply with Provider's obligations under applicable laws, subject to any notice requirements under Data Protection Laws.
(b) "**Customer Instructions**" means: (i) Processing to provide the Cloud Service and perform Provider's obligations in the Agreement (including this DPA) and (ii) other reasonable documented instructions of Customer consistent with the terms of the Agreement.
(c) Details regarding the Processing of Customer Personal Data by Provider are set forth in ++Schedule 1++ (Subject Matter and Details of Processing).
(d) Provider will notify Customer if it receives an instruction that Provider reasonably determines infringes Data Protection Laws (but Provider has no obligation to actively monitor Customer's compliance with Data Protection Laws).
3.2. ++Confidentiality++.
(a) Provider will protect Customer Personal Data in accordance with its confidentiality obligations as set forth in the Agreement.
(b) Provider will ensure personnel who Process Customer Personal Data either enter into written confidentiality agreements or are subject to statutory obligations of confidentiality.
3.3. ++Compliance with Laws++.
(a) Provider and Customer will each comply with Data Protection Laws in their respective Processing of Customer Personal Data.
(b) Customer will comply with Data Protection Laws in its issuing of Customer Instructions to Provider. Customer will ensure that it has established all necessary lawful bases under Data Protection Laws to enable Provider to lawfully Process Customer Personal Data for the purposes contemplated by the Agreement (including this DPA), including, as applicable, by obtaining all necessary consents from, and giving all necessary notices to, Data Subjects.
3.4. ++Changes to Laws++. The parties will work together in good faith to negotiate an amendment to this DPA as either party reasonably considers necessary to address the requirements of Data Protection Laws from time to time.
4. **Subprocessors**.
4.1. ++Use of Subprocessors++.
(a) Customer generally authorises Provider to engage Subprocessors to Process Customer Personal Data. Customer further agrees that Provider may engage its Affiliates as Subprocessors.
(b) Provider will: (i) enter into a written agreement with each Subprocessor imposing data Processing and protection obligations substantially the same as those set out in this DPA and (ii) remain liable for compliance with the obligations of this DPA and for any acts or omissions of a Subprocessor that cause Provider to breach any of its obligations under this DPA.
4.2. ++Subprocessor List++ . Provider will maintain an up-to-date list of its Subprocessors, including their functions and locations, as specified in the **Subprocessor List**.
4.3. ++Notice of New Subprocessors++ . Provider may update the **Subprocessor List** from time to time. At least 30 days before any new Subprocessor Processes any Customer Personal Data, Provider will add such Subprocessor to the **Subprocessor List** and notify Customer through email or other means specified on the DPA Setup Page.
4.4. ++Objection to New Subprocessors++.
(a) If, within 30 days after notice of a new Subprocessor, Customer notifies Provider in writing that Customer objects to Provider's appointment of such new Subprocessor based on reasonable data protection concerns, the parties will discuss such concerns in good faith.
(b) If the parties are unable to reach a mutually agreeable resolution to Customer's objection to a new Subprocessor, Customer, as its sole and exclusive remedy, may terminate the Order for the affected Cloud Service for convenience and Provider will refund any prepaid, unused fees for the terminated portion of the Subscription Term.
5. **Security**.
5.1. ++Security Measures++ . Provider will implement and maintain reasonable and appropriate technical and organisational measures, procedures and practices, as appropriate to the nature of the Customer Personal Data, that are designed to protect the security, confidentiality, integrity and availability of Customer Personal Data and protect against Security Incidents, in accordance with Provider's Security Measures referenced in the Agreement and as further described in ++Schedule 2++ (Technical and Organisational Measures). Provider will regularly monitor its compliance with its Security Measures and ++Schedule 2++ (Technical and Organisational Measures).
5.2. ++Incident Notice and Response++.
(a) Provider will implement and follow procedures to detect and respond to Security Incidents.
(b) Provider will: (i) notify Customer without undue delay and, in any event, not later than the Specified Notice Period, after becoming aware of a Security Incident affecting Customer and (ii) make reasonable efforts to identify the cause of the Security Incident, mitigate the effects and remediate the cause to the extent within Provider's reasonable control.
(c) Upon Customer's request and taking into account the nature of the applicable Processing, Provider will assist Customer by providing, when available, information reasonably necessary for Customer to meet its Security Incident notification obligations under Data Protection Laws.
(d) Customer acknowledges that Provider's notification of a Security Incident is not an acknowledgement by Provider of its fault or liability.
(e) Security Incidents do not include unsuccessful attempts or activities that do not compromise the security of Customer Personal Data, including unsuccessful login attempts, pings, port scans, denial of service attacks or other network attacks on firewalls or networked systems.
5.3. ++Customer Responsibilities++.
(a) Customer is responsible for reviewing the information made available by Provider relating to data security and making an independent determination as to whether the Cloud Service meets Customer's requirements and legal obligations under Data Protection Laws.
(b) Customer is solely responsible for complying with Security Incident notification laws applicable to Customer and fulfilling any obligations to give notices to government authorities, affected individuals or others relating to any Security Incidents.
6. **Data Protection Impact Assessment**. Upon Customer's request and taking into account the nature of the applicable Processing, to the extent such information is available to Provider, Provider will assist Customer in fulfilling Customer's obligations under Data Protection Laws to carry out a data protection impact or similar risk assessment related to Customer's use of the Cloud Service, including, if required by Data Protection Laws, by assisting Customer in consultations with relevant government authorities.
7. **Data Subject Requests**.
7.1. ++Assisting Customer++. Upon Customer's request and taking into account the nature of the applicable Processing, Provider will assist Customer by appropriate technical and organisational measures, insofar as possible, in complying with Customer's obligations under Data Protection Laws to respond to requests from individuals to exercise their rights under Data Protection Laws, provided that Customer cannot reasonably fulfill such requests independently (including through use of the Cloud Service).
7.2. ++Data Subject Requests++. If Provider receives a request from a Data Subject in relation to the Data Subject's Customer Personal Data, Provider will notify Customer and advise the Data Subject to submit the request to Customer (but not otherwise communicate with the Data Subject regarding the request except as may be required by Data Protection Laws), and Customer will be responsible for responding to any such request.
8. **Data Return or Deletion**.
8.1. ++During Subscription Term++. During the Subscription Term, Customer may, through the features of the Cloud Service or such other means specified on the DPA Setup Page, access, return to itself or delete Customer Personal Data.
8.2. ++Post Termination++.
(a) Following termination or expiration of the Agreement, Provider will, in accordance with its obligations under the Agreement, delete all Customer Personal Data from Provider's systems.
(b) Deletion will be in accordance with industry-standard secure deletion practices. Provider will issue a certificate of deletion upon Customer's request.
(c) Notwithstanding the foregoing, Provider may retain Customer Personal Data: (i) as required by Data Protection Laws or (ii) in accordance with its standard backup or record retention policies, provided that, in either case, Provider will (x) maintain the confidentiality of, and otherwise comply with the applicable provisions of this DPA with respect to, retained Customer Personal Data and (y) not further Process retained Customer Personal Data except for such purpose(s) and duration specified in such applicable Data Protection Laws.
9. **Audits**.
9.1. ++Provider Records Generally++. Provider will keep records of its Processing in compliance with Data Protection Laws and, upon Customer's request, make available to Customer any records reasonably necessary to demonstrate compliance with Provider's obligations under this DPA and Data Protection Laws.
9.2. ++Third-Party Compliance Program++.
(a) Provider will describe its third-party audit and certification programs (if any) and make summary copies of its audit reports (each, an "**Audit Report**") available to Customer upon Customer's written request at reasonable intervals (subject to confidentiality obligations).
(b) Customer may share a copy of Audit Reports with relevant government authorities as required upon their request.
(c) Customer agrees that any audit rights granted by Data Protection Laws will be satisfied by Audit Reports and the procedures of Section 9.3 (Customer Audit) below.
9.3. ++Customer Audit++.
(a) Subject to the terms of this Section 9.3, Customer has the right, at Customer's expense, to conduct an audit of reasonable scope and duration pursuant to a mutually agreed-upon audit plan with Provider that is consistent with the Audit Parameters (an "**Audit**").
(b) Customer may exercise its Audit right: (i) to the extent Provider's provision of an Audit Report does not provide sufficient information for Customer to verify Provider's compliance with this DPA or the parties' compliance with Data Protection Laws, (ii) as necessary for Customer to respond to a government authority audit or (iii) in connection with a Security Incident.
(c) Each Audit must conform to the following parameters ("**Audit Parameters**"): (i) be conducted by an independent third party that will enter into a confidentiality agreement with Provider, (ii) be limited in scope to matters reasonably required for Customer to assess Provider's compliance with this DPA and the parties' compliance with Data Protection Laws, (iii) occur at a mutually agreed date and time and only during Provider's regular business hours, (iv) occur no more than once annually (unless required under Data Protection Laws or in connection with a Security Incident), (v) cover only facilities controlled by Provider, (vi) restrict findings to Customer Personal Data only and (vii) treat any results as confidential information to the fullest extent permitted by Data Protection Laws.
**10. Cross-Border Transfers/Region-Specific Terms**.
10.1. ++Cross-Border Data Transfers++.
(a) Provider (and its Affiliates) may Process and transfer Customer Personal Data globally as necessary to provide the Cloud Service.
(b) If Provider engages in a Restricted Transfer, it will comply with ++Schedule 3++ (Cross-Border Transfer Mechanisms).
10.2. ++Region-Specific Terms++ . To the extent that Provider Processes Customer Personal Data protected by Data Protection Laws in one of the regions listed in ++Schedule 4++ (Region-Specific Terms), then the terms specified therein with respect to the applicable jurisdiction(s) will apply in addition to the terms of this DPA.
Bonterms Data Protection Addendum (DPA) (Version 1.0)
© 2022 Bonterms, Inc. Free to use under [CC BY 4.0.](https://creativecommons.org/licenses/by/4.0/)
Learn more: [Bonterms](https://bonterms.com/)
**Bonterms does not provide legal advice, does not guarantee the enforceability or effect of these terms and has no liability relating to use of these terms.**
*** ** * ** ***
Attachments:
[DPA Setup page.pdf](https://docs.togetha.software/__attachments/a_0a6dbe87e3d18d7cd9bdccacbc967f723c2726517e9744b6ada2752df9ae5be1/DPA%2520Setup%2520page.pdf.md?cb=00f57720bd7ecfd063f9ec40303cb406)
[DPA Schedules.pdf](https://docs.togetha.software/__attachments/a_cce5880f132e213e58ee38d180abdba5e50126b0be651a9c057f4cf7d50b3efc/DPA%2520Schedules.pdf.md?cb=fd55f1615ca6051e23876584beb2f1eb)
---
language: "en"
---
# Email is evil - All hail email
2024-09-19 - 5 Minute read - By Peter McNeil
## Why do people like email?
TL:DR People like email because there are very few gatekeepers and it kinda just works.... But
### It just works
Email was the first communication tool on the internet and it shared the pioneering spirit of a shared knowledge world. It has survived even Microsoft, Google and Apples mucking with it. It is a standard and *people love it.*
Email, like snail mail, lets you send a message with all sorts of content (OK not perfectly) to *anybody* . what's more you can send the same thing to multiple people, immediately. You can reply and include some more people, and it *will work*. You don't need to wait for an administrator to allow you to send an email to someone new.
## But...
Email is interrupt driven, meaning it relies on the "You have mail" notifications to get peoples attention, and because you know this people expect a response straight away. Of course that doesn't happen with snail mail because it's delivered once a day and people don't expect a response for a week!
Email's openness and ease of use in a small groups or teams is quickly lost when you move to larger cross functional teams too, because you get interruptions from people you don't know and weren't expecting.
And when people send out an email to the whole organisation, and someone replies to the whole organisation, which prompts another response, you get interrupted each time for an email you weren't interested in or could have waited.
Each interruption creates a small cognitive load, a change of track in your brain that takes time to change back to... what was it you were doing?
Email then trains you into busy work or fire fighting, where you learn that the way you work is by hopping from one immediate work request to the next driven by the notification stream of email and now chat.
Email may be open (maybe too open?) but it actually hides information. Both the way emails have become formatted, and the way email clients and servers work, cause the *information* in email to be lost. The noise in a typical email chain and the evolution of the discussion along forked paths, split, changed and edited to's and cc's, all make it hard to find the essence of the discussion and the actual information. Often various versions of a Word document are attached, some in sharepoint, some saved locally and attached to emails, and all with different comments/edits. These word documents point to the fact that documentation is required.
Email servers and clients, as well as the sheer number of emails (mostly noise), do not help in finding that needle in the email chain haystack. Often you can't find the haystack, email search can be tricky at best.
You can (many do) organise your email into folders, but the almost complete removal of automatic email filtering in Outlook points to the notion that filtering is too hard for most, and manual moving of emails into the various folders is a chore that is left for too long, due to all the fires being put out and trying to understand the last email chain. Indeed the "New" Outlook initially had no way to drag emails from you inbox into another folder or into a directory.
## Is there an answer?
No, not *one* answer for everything you use email for, but you can fix some of it...
### Train yourself and teach others
Check your email a couple of times a day and turn off the notifications. This lets you focus on doing actual work (which may involve sending an email) and teaches others that you will respond as soon as you are ready to give it your attention. If it's urgent, they can ring you (or send a chat message, but you know where that ends).
### Use a collaborative tool
Word is a tool that has tried to become collaborative, but is really just a busy work maker (how many hours have you spent just trying to get the damn numbering to work)... No you need a real collaborative tool, like a wiki, for example [Confluence](https://www.atlassian.com/software/confluence). Confluence lets you create shared readable versioned documents with the ability to comment, collaboratively edit and control access as needed. And it's always in the same place. The organisation of information is shared, you can create and control the way information is filed AND it is searchable.
Sometimes you get an innocent email that turns into something that should be a document, documentation, or a format that allows collaborators input. When this happens you need to be proactive and move it to your wiki. Indeed [Togetha Software](https://docs.togetha.software/) have an app for that called [MailDrop for Confluence](https://marketplace.atlassian.com/1235139), just drag the email into confluence and the content is turned into a page ready to edit and clean up. In my experience you will need to do this a couple of times for the stragglers, but the sooner you shutdown the email trail the better. Put the information in a wiki where it can be found and discussed and the *information*is front and centre.
A side benefit of Confluence is that it is content focused and not format focused, you can export to word or PDF from confluence to send out to clients or others without access to your collaborative space.
### Could I use chat for that?
Ask could or should I use chat for that. Email is used for external communications, so you end up with advertising (footer banners), contact details, disclaimers etc etc in the "signature". A signature really is a relic of the olden days of typed out letters that email replaced. The reader knows who sent the email, it is in the *From* field. So sending an email asking Joe to call Fred with three images and 20 lines of disclaimer/signature is a noisy waste of disk space and mental real-estate.
The answer is simple if you haven't already discovered it, chat.
Chat lets you have a conversation asynchronously, and removes a lot of noise from email.
Beware that Microsoft is cluttering up chat the way it does everything in a bid to use featuritis to make it a "no brainer" to use Teams. With multiple paradigms making it a confusing mess of what channel should I use and making forays into the wiki space but reverting to form with Word -- editors. Don't get me wrong, *currently* Teams is better than email if you want to ask Joe to call Fred, but beware the confused bloat-ware child is evolving. Simpler chat tools are better for productivity. Turn off chat notification while trying to do work, or it's just another email.
## All hail email?
Yeah, Nah as we say here in Aus. Email has its uses, and with Phishing, Spam, Newsletters, filling up the useful space, communicating with people outside your organisation is the sweet spot. Oh and sending password resets.
---
language: "en"
---
# License Agreement
## Bonterms Standard Agreement for Marketplace Transactions
(Version 1.0)

Togetha Software has adopted the [Bonterms Standard Agreement for Marketplace Transactions V 1.0](https://bonterms.com/standard/marketplace-transactions-v1/). The Agreement is is linked above, as well as in the **Resources** section of the Marketplace Listing. Our provider specific terms are listed below.
MailDrop for Confluence is a "Cloud Service" under the Standard Agreement.
## Provider-Specific Terms
With regard to Clause 1. a) ii) and 19. b) ii) the "**Governing Law** " is the laws of the Australian Capital Territory, Australia and the "**Courts**" are the Supreme Court, Court of Appeal and Magistrates Court of the Australian Capital Territory, Australia.
---
language: "en"
---
# Exporting contacts
Export your contacts to a CSV or Excel file. You choose which fields to include, so you can produce anything from a simple name-and-email list to a full export of every attribute and related entity.
## How exporting works
Exporting reads your contacts and writes the fields you pick into a single file, one contact per row. It doesn't change or remove any contacts, so you can export as often as you like.
You control three things in the export dialog:
| Choice | What it does |
|----------------|------------------------------------------------------------------------------------------------|
| Format | CSV (opens in any spreadsheet or text editor) or Excel (an `.xlsx` file). |
| Export mapping | An optional saved set of fields, set up by an admin, so you don't have to pick fields by hand. |
| Fields | The columns to include, such as Name, Groups, emails, phone numbers, and addresses. |
When a contact has more than one value for a field, such as two email addresses, the values share one cell, separated by a pipe character and a line break.
## Prerequisites
* You can open the **Contacts** page from the Apps menu.
* You have at least one contact to export.
## Choose which contacts to export
Export acts on the contacts you select. If you don't select any, it exports every contact currently shown by your filters.
1. **Open the Contacts page.**
2. **Apply a Group filter or search** if you want to narrow the list first.
3. **Switch to list view** using the table icon on the right of the toolbar, then **tick the checkbox** on each contact you want to export. Skip this step to export the whole filtered list.
## Export your contacts
1. **Open the kebab menu** (the three-dot menu on the right of the toolbar) and **choose Export**.
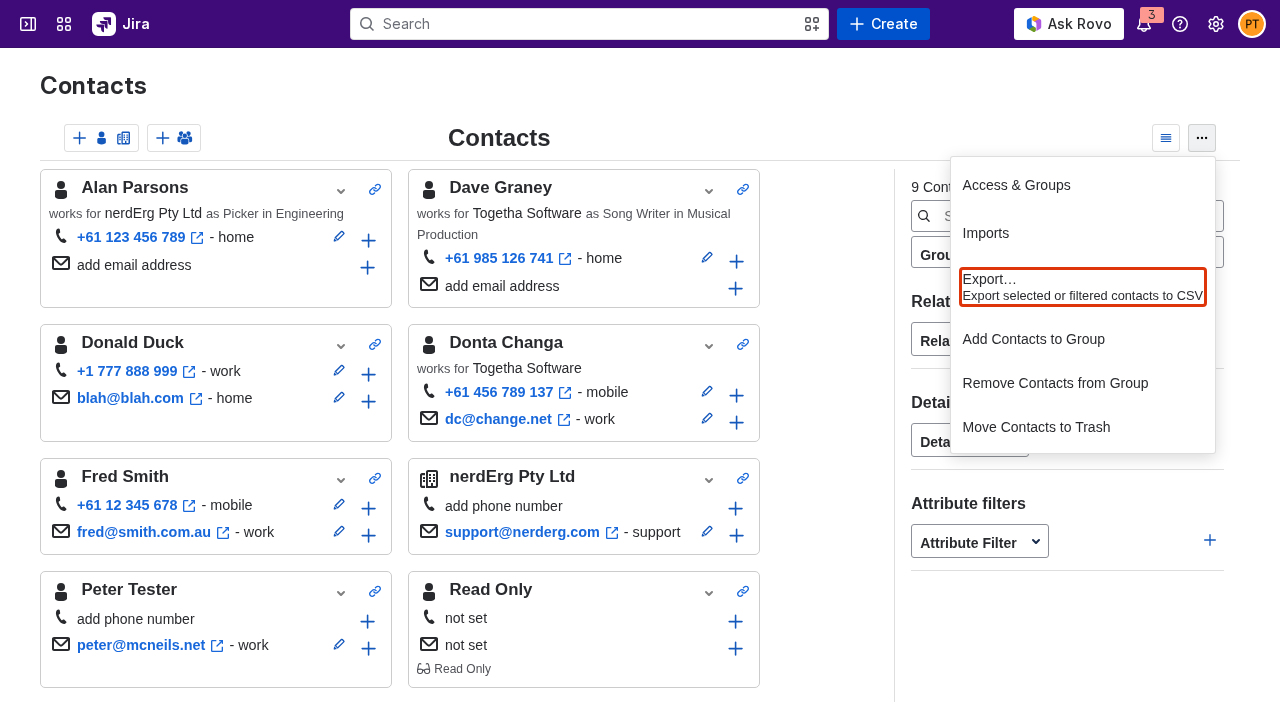
1. **Check the contact count.** The dialog opens with the heading **Export contacts** and tells you how many contacts it will export.
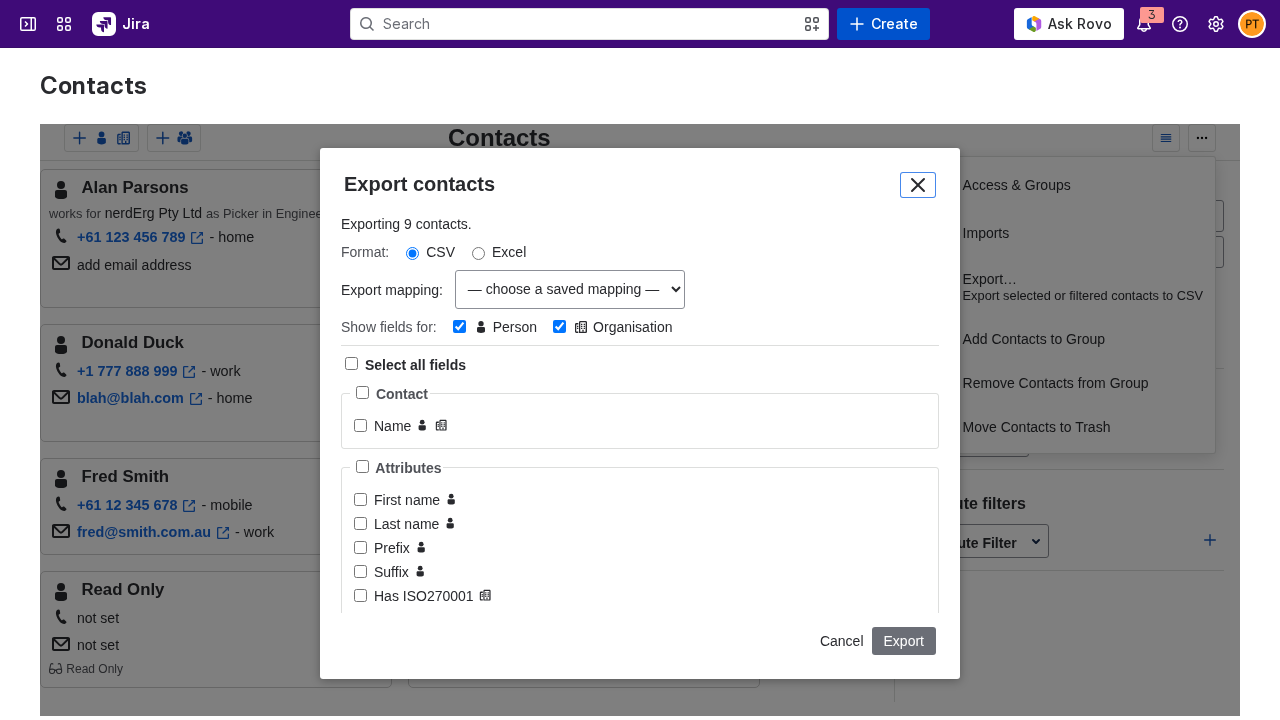
1. **Choose a format.** Select **CSV** or **Excel**.
2. **Choose an export mapping** (optional). If an admin has saved any mappings, pick one from the **Export mapping** list to fill in the fields for you. You can still adjust the selected fields afterward.
3. **Pick the fields to include.** Tick the fields you want in the field picker. Use a section's select-all, or the global select-all, to tick several at once.
4. **Click Export.** Once the file is ready, the button changes to a **Download** button.
5. **Click Download** to save the file. CSV files are named `contacts-export-.csv` and Excel files `contacts-export-.xlsx`.
## Narrow the field picker to people or organisations
The field picker groups fields into sections and tags each field with a person icon, a building (organisation) icon, or both, showing which kind of contact the field applies to.
1. **Use the Person and Organisation checkboxes** at the top of the picker. Both are ticked by default.
2. **Untick Organisation** to show only fields that apply to people, or **untick Person** to show only fields that apply to organisations.
3. **Click select-all** to tick every field currently shown. Select-all acts only on the fields visible under the current filter, so you can quickly build a people-only or organisations-only export.
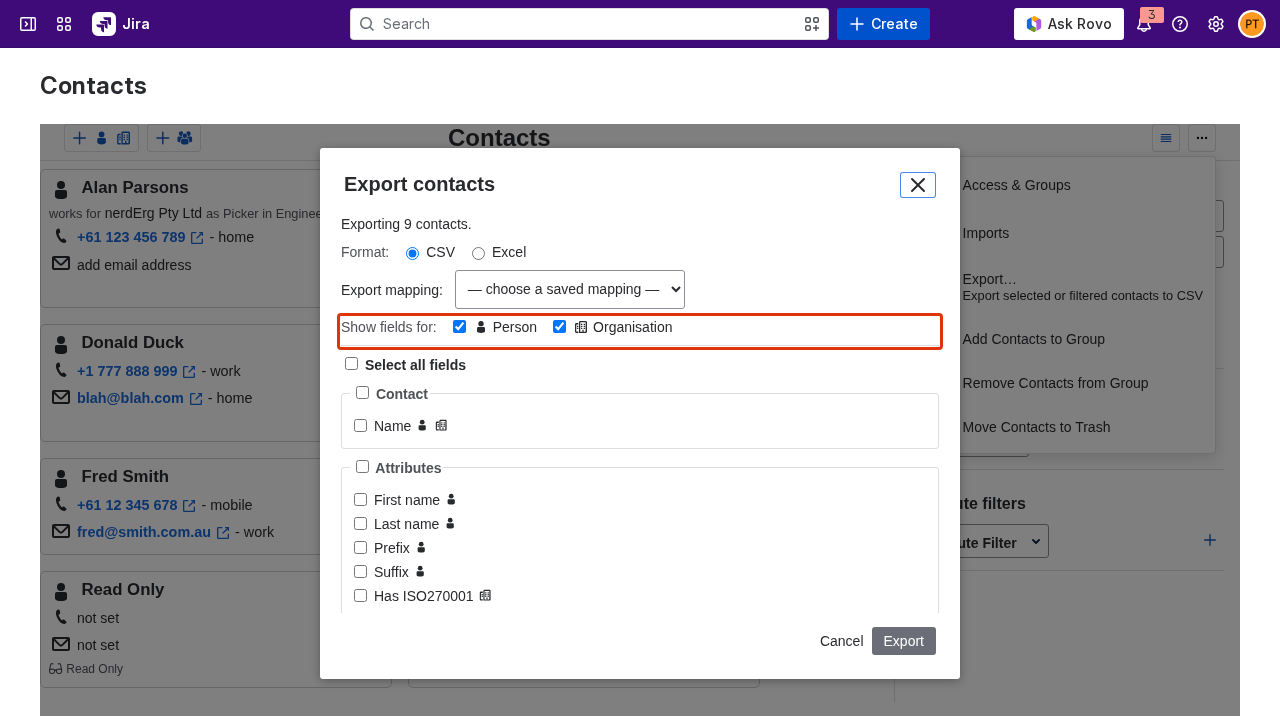
## Result
Your contacts download as a CSV or Excel file containing the fields you chose, one contact per row. The columns always follow a fixed order, starting with Name, then attributes and groups, then any related fields such as emails, phone numbers, and addresses.
Next:
* [Importing contacts from CSV](https://docs.togetha.software/docs/importing-contacts-from-csv.md): bring contacts back in from a spreadsheet.
* [Working with groups](https://docs.togetha.software/docs/working-with-groups.md): filter your contacts before exporting.
---
language: "en"
---
# Filtering contacts
Narrow the contact list to the contacts you want using the filters in the side panel on the Contacts page.
## Prerequisites
* You can open the **Contacts** page from the Apps menu.
* You have contacts in your list to filter.
## The filter panel
The side panel on the Contacts page holds all the filters, stacked from the top:
* A count of how many contacts match, and a **Filter link**.
* A **search box** that matches on the contact's name.
* A **contact-type filter** (**All** , **People** , **Organisation**).
* A **Group filters** section, where you can stack group conditions and combine them with AND or OR.
* **Relation filters** , **Details filters** , and **Attribute filters**.
The filter kinds combine: a contact has to match the search, the contact type, the group filters, and every relation, detail, and attribute filter to appear. Within the **Group filters** section you choose AND or OR between the rows (see below). When nothing is selected, the list shows every contact you can see.
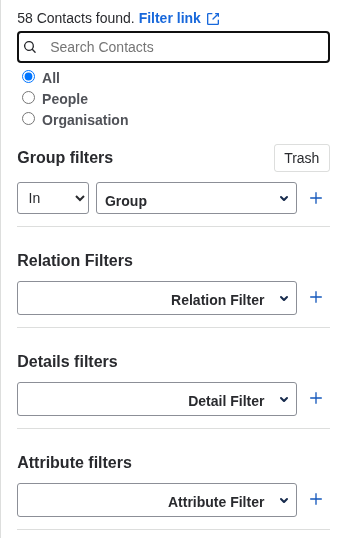
## Searching by name
Type in the **Search Contacts** box at the top of the panel. The list updates as you type and keeps only the contacts whose name matches what you typed.
## Filtering by contact type
The contact-type filter sits above the **Group filters** section and limits the list to a single kind of contact. It has three options:
| Option | What you see |
|------------------|--------------------------------------------------------------------|
| **All** | Every contact, both people and organisations. This is the default. |
| **People** | Only person contacts. |
| **Organisation** | Only organisation contacts. |
Pick an option and the list updates straight away. Choose **All** again to clear the restriction.
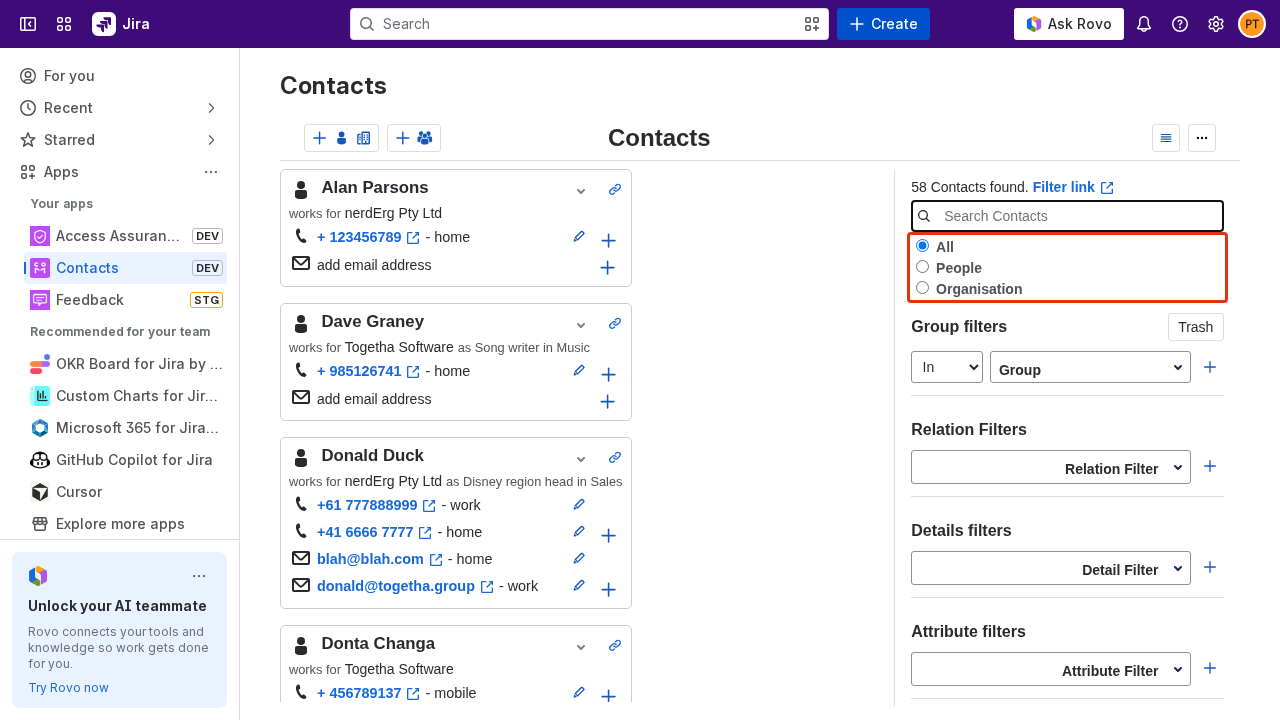
## Filtering by group
The **Group filters** section limits the list by group membership. You can stack several group conditions and choose how they combine, so you can build views like "in Sales but not in Archived" or "in Sales or in VIP".
Each row has an operator and a group. The first row keeps it short; later rows add a join word so you can say how that row combines with the rows above it:
* The **first row** uses **In** or **Not in**.
* **Every row after the first** uses **AND in** , **OR in** , **AND NOT in** , or **OR NOT in**.
To build a group filter:
1. **Pick an operator and a group** on the first row. The list updates straight away.
2. **Add another row** with the **+** button, then choose its operator and group.
3. **Remove a row** with the delete button next to it.
**My Contacts** is available as a group and keeps only the contacts you own. For the full details of groups and **My Contacts** , see [Working with groups](https://docs.togetha.software/docs/working-with-groups.md).
The **Trash** button at the top of the section is a separate view. Turn it on to show only your trashed contacts; the group rows are disabled while it is on. See [Deleting contacts](https://docs.togetha.software/docs/deleting-contacts.md).
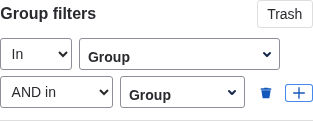
### How AND and OR combine
Each operator either narrows or widens the list, and the rows are read from top to bottom. Each row changes the result built up by the rows above it:
* **AND** makes the filter stricter. A contact is kept only if it matches this row as well as what came before. AND can only ever keep fewer contacts.
* **OR** makes the filter wider. A contact is kept if it matches this row, even if it failed the rows above. OR can only ever keep more contacts.
* **Not in** flips a row to mean "is not a member of this group".
Here is what each operator keeps:
| Operator | Keeps a contact when |
|----------------|-------------------------------------------------|
| **In** | it is in the group |
| **Not in** | it is not in the group |
| **AND in** | it was kept so far, and it is in this group |
| **OR in** | it was kept so far, or it is in this group |
| **AND NOT in** | it was kept so far, and it is not in this group |
| **OR NOT in** | it was kept so far, or it is not in this group |
**Example: AND narrows the list**
* Row 1: **In** Sales
* Row 2: **AND in** VIP
This keeps only the contacts who are in Sales and also in VIP.
**Example: OR widens the list**
* Row 1: **In** Sales
* Row 2: **OR in** VIP
This keeps the contacts who are in Sales, plus the contacts who are in VIP. A contact in either group is kept.
**Example: NOT excludes a group**
* Row 1: **In** Sales
* Row 2: **AND NOT in** Archived
This keeps the contacts who are in Sales and are not in Archived.
**Example: mixing AND and OR**
* Row 1: **In** Sales
* Row 2: **OR in** VIP
* Row 3: **AND NOT in** Archived
Reading top to bottom: start with the Sales contacts, widen to also include the VIP contacts, then apply the last row to everyone kept so far, which removes anyone in Archived. The result is the contacts who are in Sales or VIP and are not in Archived.
Each row applies to the result so far, so the order of your rows matters when you mix AND and OR. Move a row up or down to change how it combines.
## Filtering by relation, detail, or attribute
Below the group filters are three sets of filters that match on a contact's data. They work the same way: pick what to match on, then type the value to look for.
* **Relation filters** match contacts by a relationship to another person or organisation, such as who they work for.
* **Details filters** match contacts by one of their detail fields, such as email, phone, address, name, link, or comment.
* **Attribute filters** match contacts by a custom attribute defined on the contact type.
To add one:
1. **Click the picker** (for example **Relation Filter**) and choose what to match on from the dropdown.
2. **Type a value** in the search box that appears next to your choice. The list narrows to contacts whose matching value contains your text.
3. **Add another row** with the **+** button to apply more than one filter of the same kind.
4. **Remove a row** with the delete button next to it, or choose **Clear filter** in the picker dropdown to clear your selection.

## Sharing a filtered view
The **Filter link** at the top of the panel always points at the current view, with every active filter captured in the link, including the contact-type filter and every group row with its operator. Copy it to bookmark a filtered view or share it with a teammate. When someone opens the link, the Contacts page loads with the same filters already applied.
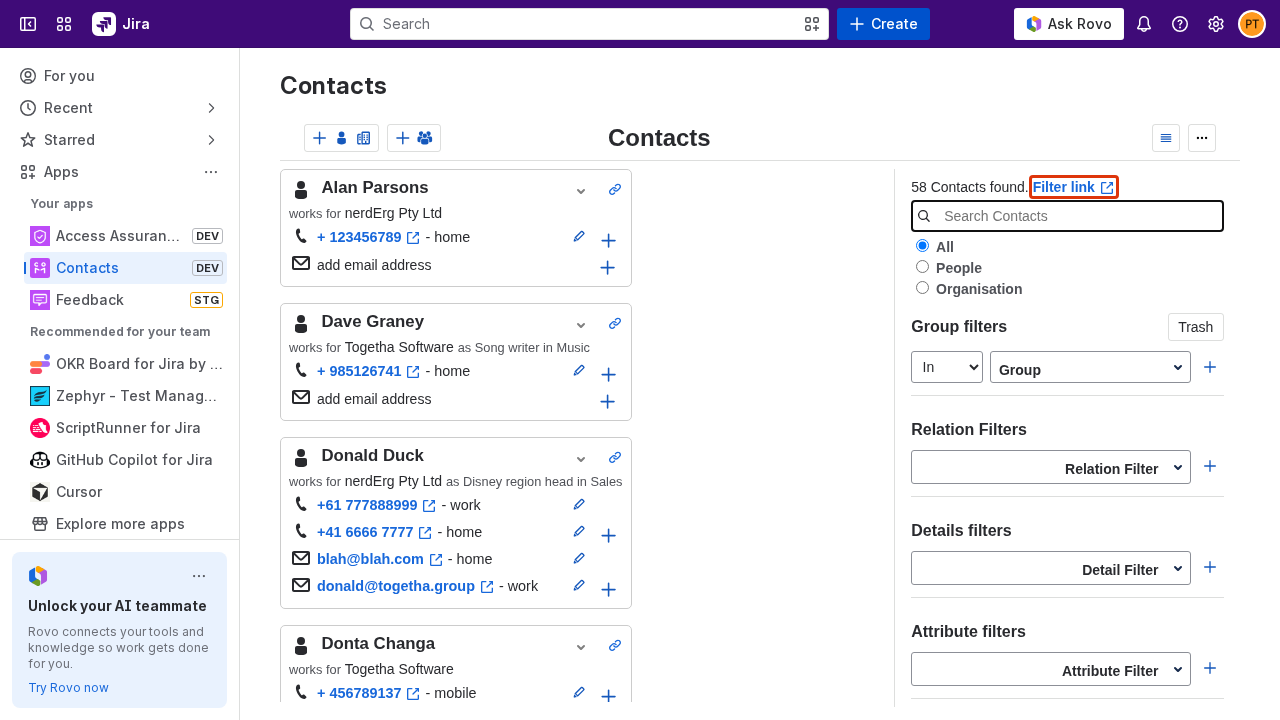
## Result
The contact list shows only the contacts that match your filters. Clear each filter to widen the list again, or copy the **Filter link** to return to the same view later.
Next:
* [Working with groups](https://docs.togetha.software/docs/working-with-groups.md): organise contacts into groups and share them with your team.
* [Exporting contacts](https://docs.togetha.software/docs/exporting-contacts.md): export the contacts currently in your filtered list.
---
language: "en"
---
# How to auto-generate a document from your Jira work items
Once you have created your Word document template, you will then need to upload your template into your space so you can start to auto-generate a document from your Jira work items. (See how to create your Word document template [here](https://docs.togetha.software/docs/how-to-create-your-template-using-placeholders.md).)
## Uploading your template
Upload your Word template by going to the DocGen configuration page. This is generally restricted to administrators, so if you can't get there you may need to ask your administrator to do this.
To open the DocGen configuration page click the cog icon. Then select **Marketplace Apps**.
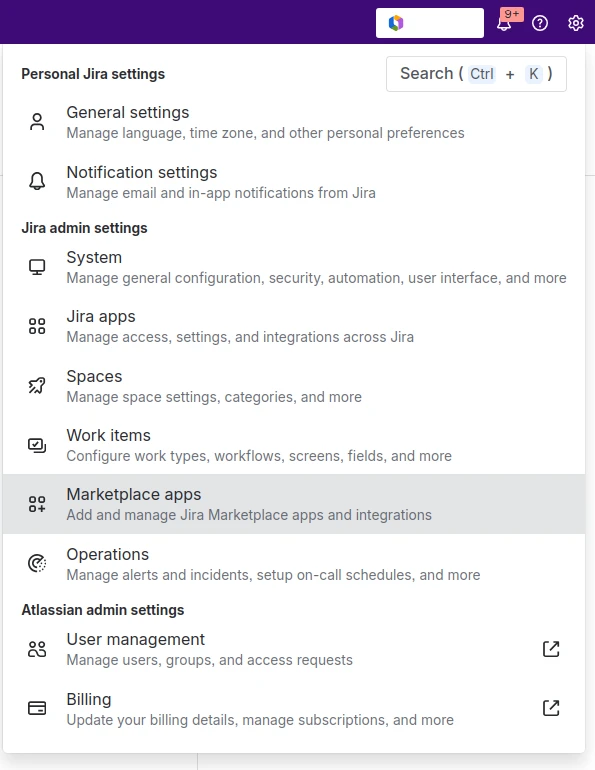
Then click **Togetha DocGen** from the menu on the left of screen.
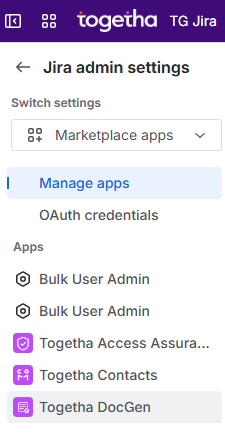
On the Admin page click the **Choose Files** button and select the document you want to upload, then hit **Upload**. Make sure you give the file a meaningful name so you can find which template you want later.
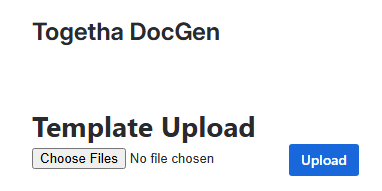
## Creating an automation rule to run the DocGen action
Now you want to create an automation rule that will call DocGen to create your document when a trigger is activated, e.g. when the work item status changes.
In the left sidebar find your space and click the three dots next to its name to find the **Space settings**.
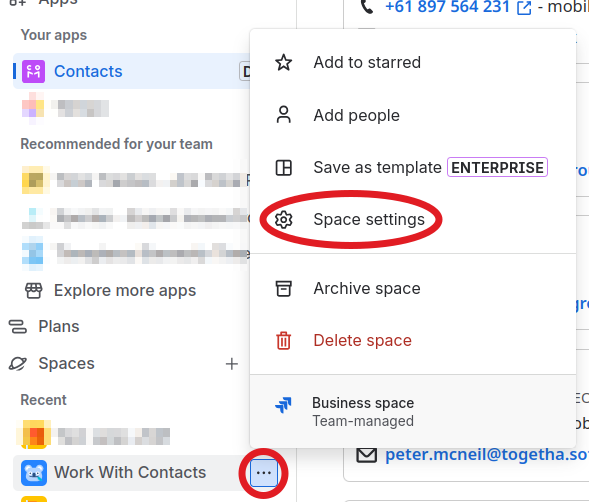
On the Space settings page click **Automation**.
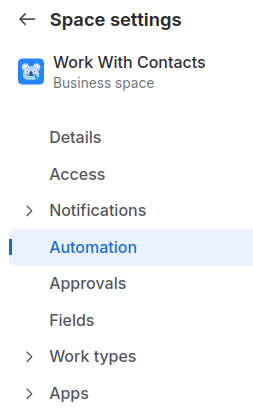
Then select the **Rules** tab. Click **Create rule** and select **Create from scratch** which will open the rule editor.
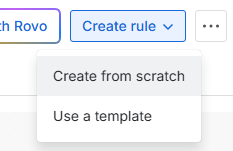
First we need to create a trigger. We'll use a "manual trigger" here as a demo, but you can use any trigger.
Click **Manual trigger from work item** , then click **Next**.
Now click **THEN: Add an action**.

Type **DocGen** in the search box to find the DocGen action and click on it.
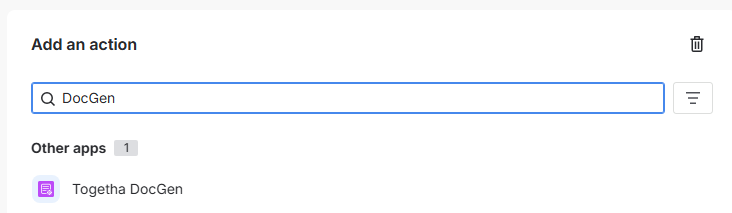
Click the blue **Connect**button, which will connect this action to your user.
Now you will see a short form, which allows you to set the issue key (the identifier for a Jira work item) to provide the Jira data, and the template you want the data added to.
You most likely want to use {{issue.key}} in the Issue key field so the Work Item that triggers the automation will be used to fill in your document. In more complex automations, you may wish to pass in a different Work Item key.
Select the Word template you want to use from the dropdown.
Select the Output Format of either DOCX (Word Doc) or PDF.
If you want to provide the attachment to a JSM customer via the Portal tick **Add document to the portal with a comment** and fill in the Portal comment message.
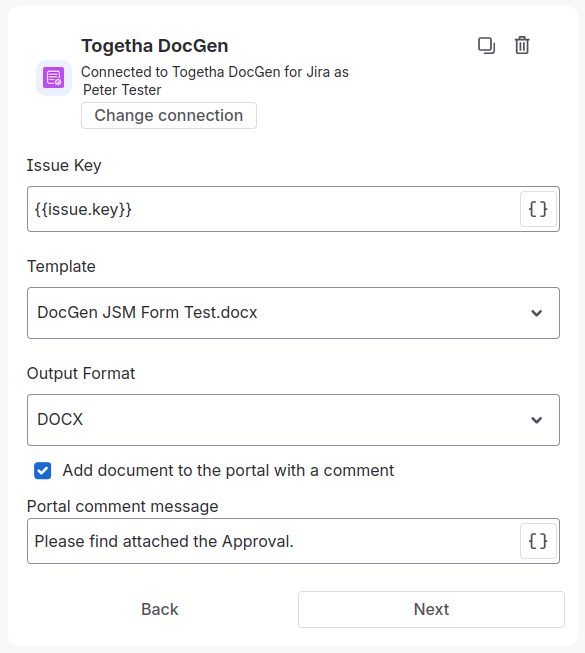
Select **Next** , then click **Turn on rule**.
This will open a new form, where you can give the rule a name and specify who can edit it.
Once you have done this, click the big **Turn on rule**button.
You should now see something like this:
If you do, you're ready to try it out!
## Generating your document
Go to a Jira work item and fill in the fields that are represented in your template, such as the Summary and Assignee fields.
Now click the automation button to the right of the work item status  and select your rule
**Note that you only have to do this if you use a manual trigger.** If you've used a trigger like "Work item created" or "Work item transitioned", the rule will run as soon as those triggers are activated.
Togetha DocGen will fill in the template you chose with the field values in the work item and produce a PDF or Word document (depending on what you selected when creating the Automation).The document will be attached to the work item, ready for you to view or download. A comment by Togetha DocGen for Jira will be added to the comments section at the same time.
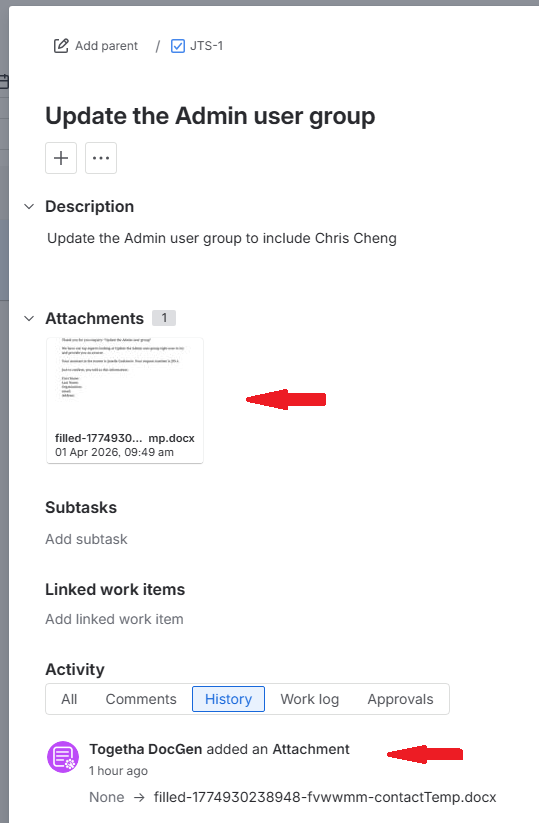
---
language: "en"
---
# How to create your template using placeholders
Togetha DocGen uses a Word document as a template for making your final document, so the first thing to do is to create your Word document template.
## Creating your template
Togetha DocGen uses a Word document as a template. Word has the concept of templates, but you can just use a plain Word document.
Create your Word document, add your branding, terms and conditions, and any details you want the document to include.
Then you need to add **placeholders** for your fields in Jira. If you have used automations before, you'll be familiar with [++**smart values**++](https://support.atlassian.com/cloud-automation/docs/jira-smart-values-issues/) like `{{issue.description}}`.
Simply place a smart value in your Word document where you want that value substituted (see the attached example Template and Placeholder examples)
### Placeholder examples
Your placeholders will be different depending on whether you are using standard Jira issue fields, Jira custom fields or JSM form fields. Custom fields will need a 'cf.' added at the beginning of the smart value and Form fields will need an 'f.' This will trigger the placeholders to be replaced by the correct data from the work item.
| **Placeholder** | **Example** | **Source** |
|-----------------------|-----------------------------------------------------------|----------------------------|
| Standard smart values | `{{issue.summary}}` | Jira issue fields |
| Custom fields | `{{cf.My Custom Field}}` | Jira custom fields by name |
| JSM form answers | `{{f.Question Label}}` or `{{forms.last.Question Label}}` | JSM form answers |
### Fallback options for empty values
If you have a smart value placeholder in your template and there is not a corresponding field in your work item, you can define in your template how you would like this to be handled by using Fallbacks.
Use `|` to define ordered fallbacks and the first non-empty value will be added to the document.
{{issue.duedate | issue.created | 'date not available'}}
### Method calls
The table below shows examples of how you can add methods to your smart values to get a more detailed result eg text showing in UPPERCASE or lowercase, or how to format the dates differently. Please note that the supported date tokens are `dd` (day), `mm` (month), `yyyy` (4-digit year), `yy` (2-digit year).
| Method | Example | Result |
|-------------------------|------------------------------------------|--------------------------------|
| `.upper()` | `{{issue.summary.upper()}}` | Uppercase string |
| `.lower()` | `{{issue.summary.lower()}}` | Lowercase string |
| `.format('dd/mm/yyyy')` | `{{issue.duedate.format('dd/mm/yyyy')}}` | Date formatted as `17/03/2026` |
| `.join(', ')` | `{{issue.labels.join(', ')}}` | Array joined as string |
### Example word document Template
[Software Request Template.docx](https://docs.togetha.software/__attachments/a_8f15b392e0f10d177361d9bc1aab05781bf00a347f084fd1f98352ce86590905/Software%2520Request%2520Template.docx.md?cb=43c85f5888093d5b86e2426f72f994a0)
### Placeholder examples
[Placeholder examples-FINAL (1).docx](https://docs.togetha.software/__attachments/a_a0e030278a29a3b2597ea3609431f7cadb2d8c0b63745e28e9733c7a53a2f1a3/Placeholder%2520examples-FINAL%2520(1).docx.md?cb=1093497079e88589f4d043d5fc596344)
---
language: "en"
---
# How to import an email to a Confluence page
## Saving an email file and adding it to Confluence
Most email clients require you to save your email as a file on your computer. Then you can drag and drop that file into Confluence with Togetha MailDrop.
Once the file is dropped, the contents of your email will be inserted into the page, along with any attachments listed at the bottom.
The steps are slightly different depending on whether you're adding your email to a Confluence page, blog, or a live doc.
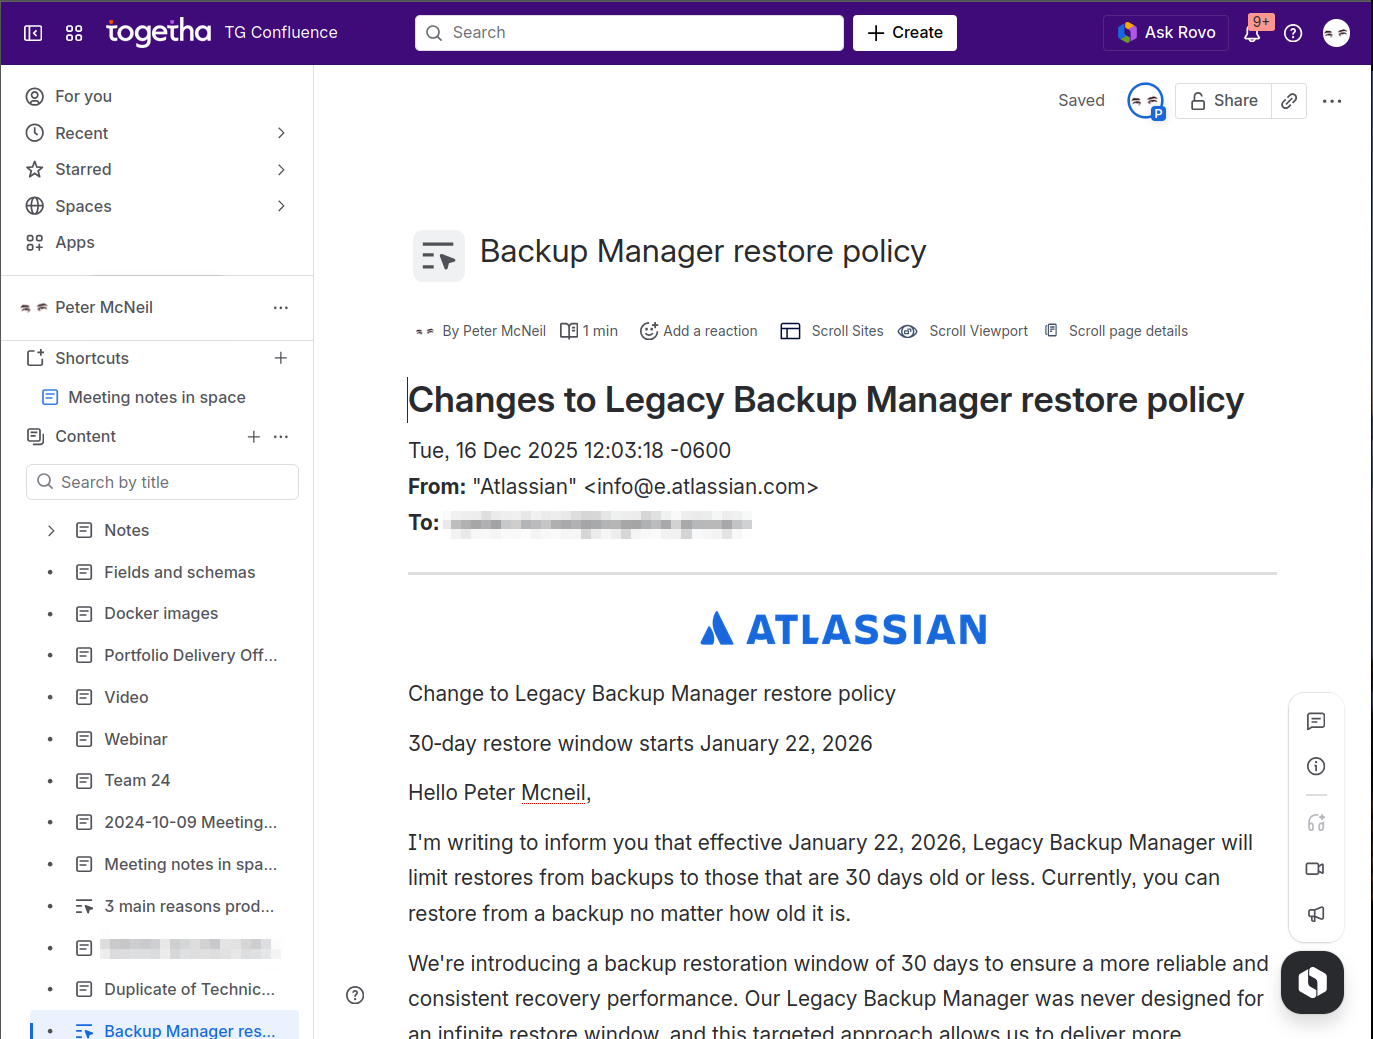
### Adding an email to a Confluence page or blog
1. Go to the email you want to import and **download/save** it to your computer.
2. **Create**a new page or blog in Confluence.
3. **Publish**the page/blog.
4. **Edit**the page.
5. **Drop**the email file onto the page.
6. **Update**to share the email's contents.
### Adding an email to a Confluence live doc
1. Go to the email you want to import and **download/save** it to your computer.
2. **Create**a live doc in Confluence.
3. **Drop**the email file into the live doc.
**TOP TIP:**
If you want to use pages, not live docs, it's actually faster to use the live doc method, then convert to a page. So, create a live doc, add your email to that, then click the **More actions** button and select **Convert to page**.
This way, you avoid the hassle of having to publish the page, edit it again, drop the email, and hit update before your email can be shared.
### Example: Gmail
### Example: Mail on Mac
## Dragging an email directly
Most email clients require you to save your email as a file before dragging and dropping into Confluence.
Some, like Thunderbird, let you drag the email directly from your email client.
### Example: Thunderbird
**Access restrictions**
If your space or page has access restrictions, Togetha MailDrop may not be allowed to edit your page. Togetha MailDrop is the same as a co-worker editing your page, so it needs permission.
You can give Togetha MailDrop permission by:
* Clicking the padlock icon
* Adding Togetha MailDrop for Confluence as a user that can edit the page.
You may need an admin to change space permissions.
**Formatting limitations**
Togetha MailDrop for Confluence will do its best correcting any formatting and layout issues. However, your email may contain some HTML that's hard to display properly in Confluence, requiring you to do a little cleaning up afterwards.
Also note that Confluence doesn't support much CSS styling, e.g. links made to look like buttons. So we provide a text link.
Background colours from emails are lost, which means any light-coloured text may not show up well. You'll need to highlight the text and change the colour.
Finally, Confluence may not display images linked to certain web servers (external images). This may be because Confluence doesn't trust them, or the external service doesn't trust Confluence, or the browser has tracking protection.
---
language: "en"
---
# How to use DocGen for Jira
---
language: "en"
---
# Importing contacts from CSV
Load contacts in bulk from a CSV file using the import wizard. You build a visual map of how each CSV column becomes a contact, an email, a phone number, an address, an attribute, or a relationship to another contact, then run the import.
## Prerequisites
* A CSV file with a header row. The header names are what you drag onto the map, so pick readable names (for example **Full Name** , **Email** , **Company** , **Mobile**).
* A contact group to receive the imported contacts. Create one first if you don't have one. See [Working with groups](https://docs.togetha.software/docs/working-with-groups.md). Every import is saved into a group you choose.
## Open the import wizard
1. **Open the Contacts page.**
2. **Open the kebab menu** in the top-right toolbar and **click Imports.** The wizard opens with 3 tabs: **Map** , **Review** , and **Confirm.** You can move between tabs while you set things up.
## Step 1: Map your CSV
The **Map** tab is a canvas. On the left is a rail listing every column from your file. On the right you add **cards** for the things each row should create (a person, an organisation), then drag columns from the rail onto the fields of those cards.
1. **Click Choose a CSV File** and pick your file. The column rail fills with your headers, grouped by kind (names, organisation, email, phone, address, links).
2. **Add a card.** Click **+ Person** or **+ Organisation** . The first card you add is the **root** card, the main contact each row creates.
3. **Map the name.** Drag the column holding the contact's name from the rail onto the card's **Name** field. A mapped drop zone turns green and shows a column marker.
4. **Add more fields.** On the card, use **+ field** for an email, phone, address, link, or comment, **+ attribute** for a stored attribute (for example an external ID), and **+ relationship** to link to another contact. Each one adds a row to the card.
5. **Map each field** by dragging the matching column onto its drop zone.
6. **Set match and overwrite** where you need them. See [Matching and updating existing contacts](#).
7. **Open the Review tab** when the map looks right.
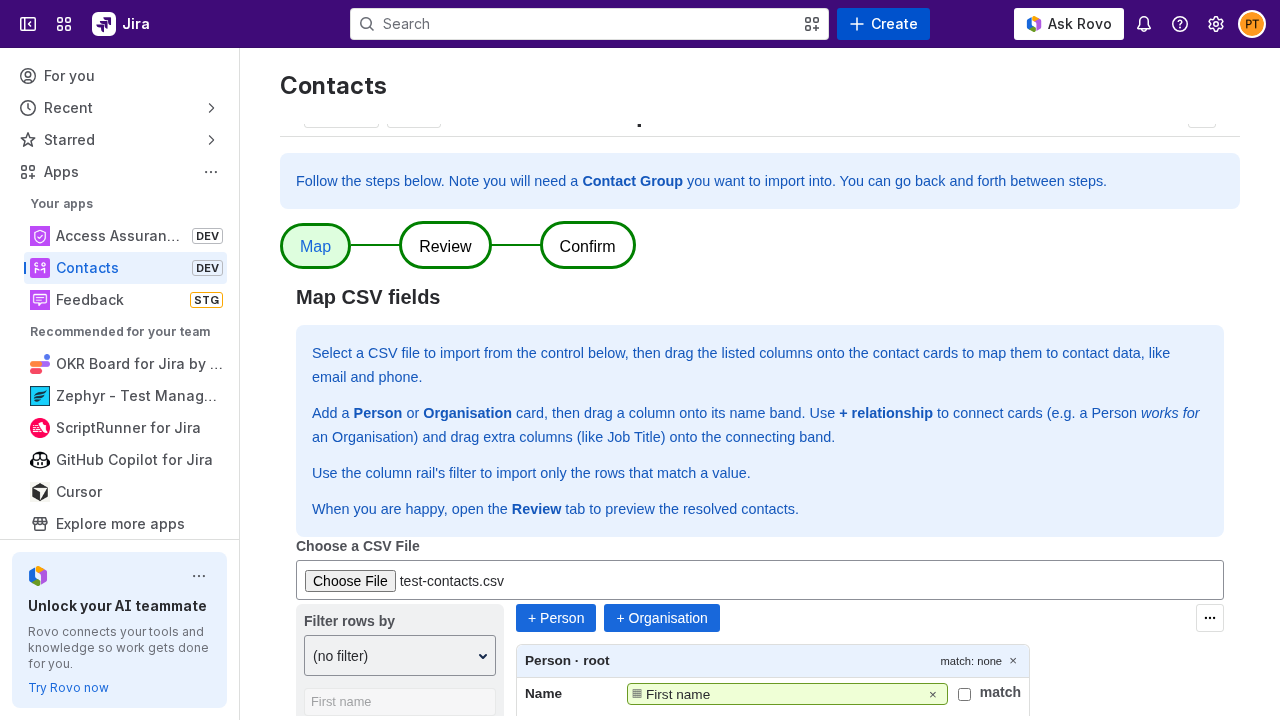
### Card rows at a glance
Each row on a card has a drop zone and, for fields, two checkboxes.
| Control | Purpose |
|---------------|-----------------------------------------------------------------------------------------------------------------------------------------------|
| **Drop zone** | Drag a column here, or click and type a fixed value. Green with a column marker means a column is mapped; a quote marker means a fixed value. |
| **match** | Tick to use this value to identify an existing contact. See [Matching and updating existing contacts](#). |
| **overwrite** | Tick to replace an existing value on a matched contact instead of adding alongside it. |
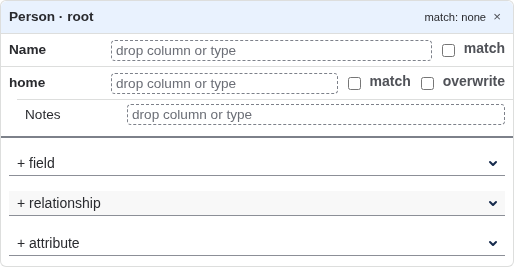
### Typing a fixed value instead of a column
Some information is carried by the column name rather than its data. For example a **Manager** column holds the manager's name, and you want the job title to read "Manager". Click a drop zone and start typing to enter a **fixed value** that applies to every row. A fixed value shows a quote marker; a mapped column shows a column marker. Drag a column onto the same drop zone to switch back to a column.
### Relationships to other contacts
Use **+ relationship** to connect a card to another contact, for example a person who **works for** an organisation. Adding a relationship does 2 things:
* It adds a **relationship band** beside the card. Drag columns onto the band to fill relationship details, for example **Job Title** and **Division** on a works-for link.
* It adds a **related card** for the contact at the other end. Map its name and fields the same way. A connecting line links the band to the related card.
Related contacts are matched against the contacts you can already see, and created if they don't exist. The related card's match fields decide what counts as the same contact.
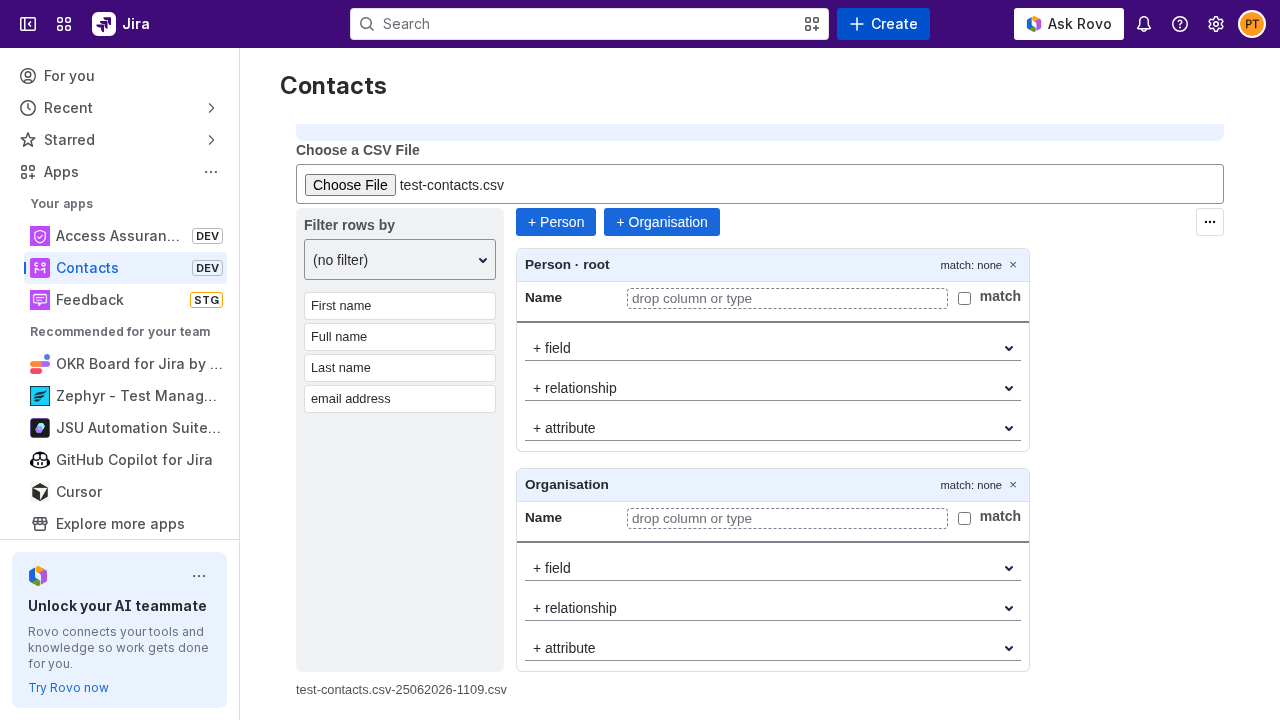
### Matching and updating existing contacts
By default every row creates new contacts. To update contacts you already have instead of duplicating them, tick **match** on the fields that identify a contact, for example an email or an external-ID attribute. When every ticked match field equals an existing visible contact, that contact is updated rather than created.
For each related field you can also tick **overwrite**:
* **overwrite off:** the imported value is added alongside any existing values.
* **overwrite on:** the imported value replaces the matching value, which keeps a single current value such as one work email.
Attributes are always overwritten on a matched contact.
### Importing only some rows
To import a subset of your file, use the **Filter rows by** control at the top of the column rail. Pick a column, then tick the values to include. Only rows whose value in that column is ticked are imported. This is how you import, for example, only the rows whose **Type** column is **Organisation**.
## Step 2: Review
The **Review** tab shows what the import will do.
1. **Read the counts** at the top: how many contacts will be **created** , **updated** , and **skipped** . A **skip** is a duplicate within the file, or an existing contact left untouched when skip matching is on.
2. **Check the resolved contacts** listed by type below the counts, each tagged **create** , **update** , or **skip**. For a large file only the first contacts of each type are shown; the counts still cover the whole file.
3. **Untick any contact you don't want to import.**
4. **Go back to Map** to fix anything. The preview rebuilds each time you open the tab.
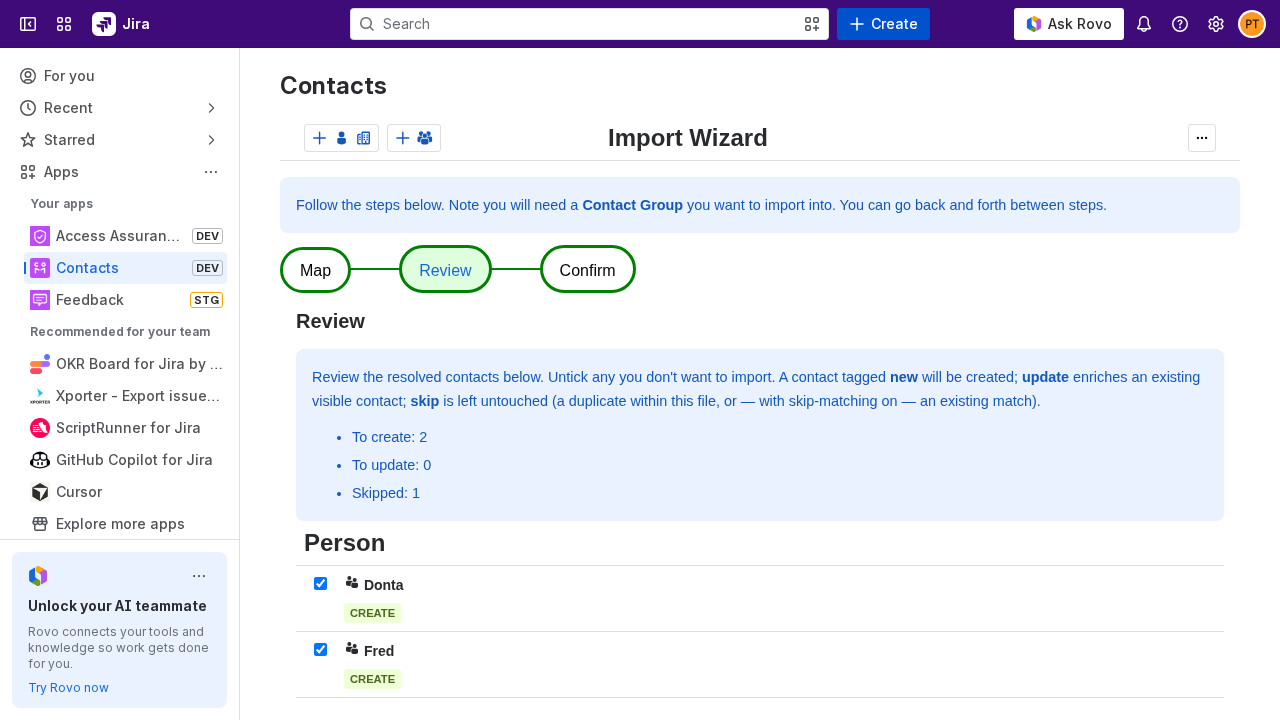
## Step 3: Confirm and run the import
1. **Check the Unique import ID.** The wizard prefills one. Edit it if you want a memorable label, but keep it unique. Note it down if you want to find the batch later.
2. **Pick a group** from the **Select a group to import into** dropdown. Only groups you can write to appear here.
3. **Set Skip matching** if you want to protect existing contacts. With it on, any row that matches an existing contact is left untouched and only new contacts are created.
4. **Click Do Import.** The wizard creates and updates contacts in batches. When it finishes you're returned to the Contacts page.
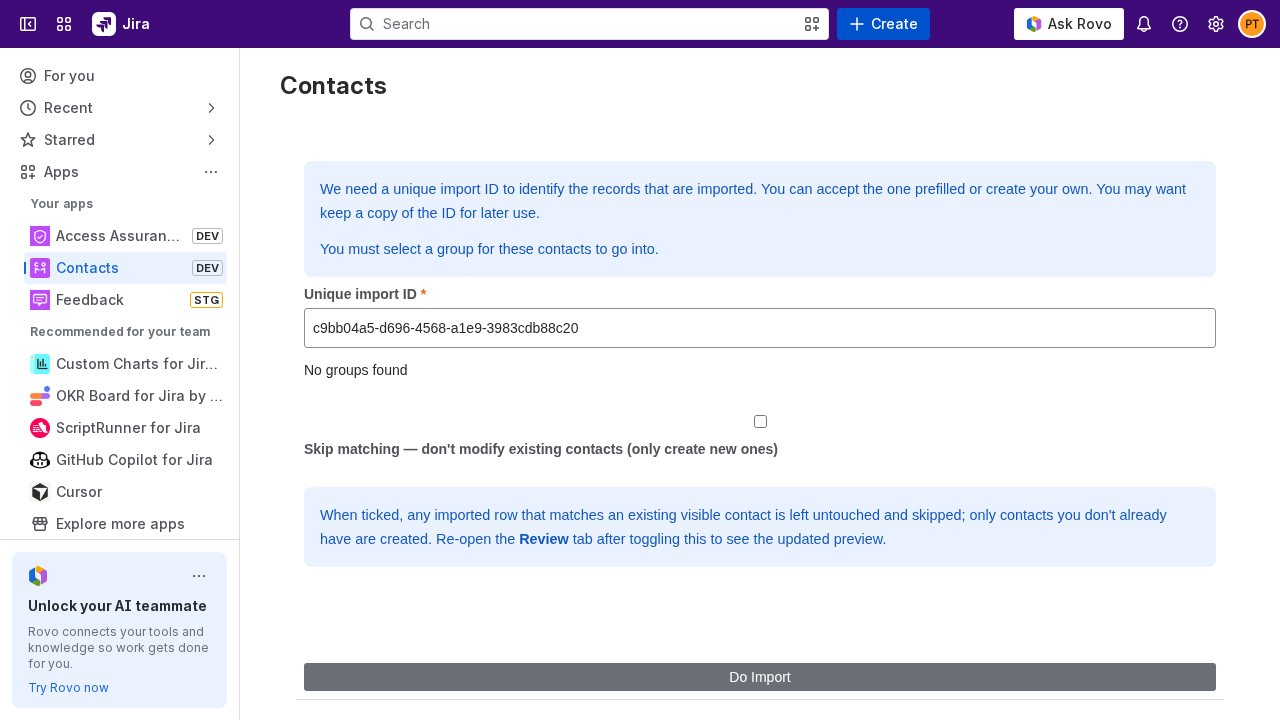
## Reusing a mapping
If you import the same file format often, save the map so you don't rebuild it each time. Open the kebab menu in the Map tab toolbar:
* **Export mapping** downloads your current map as a JSON file you can keep and share.
* **Load mapping from file** loads a map from a JSON file and applies it to the current CSV. Any columns the map expects but your file doesn't have are reported as unmapped.
* **Save as system mapping** (admins only) saves the map for everyone on your site. It then appears in the same menu, labelled **Load:** followed by the name you gave it.
To hand a map to an admin, export it to a file and send them the file. They can load it and save it as a system mapping for the whole site.
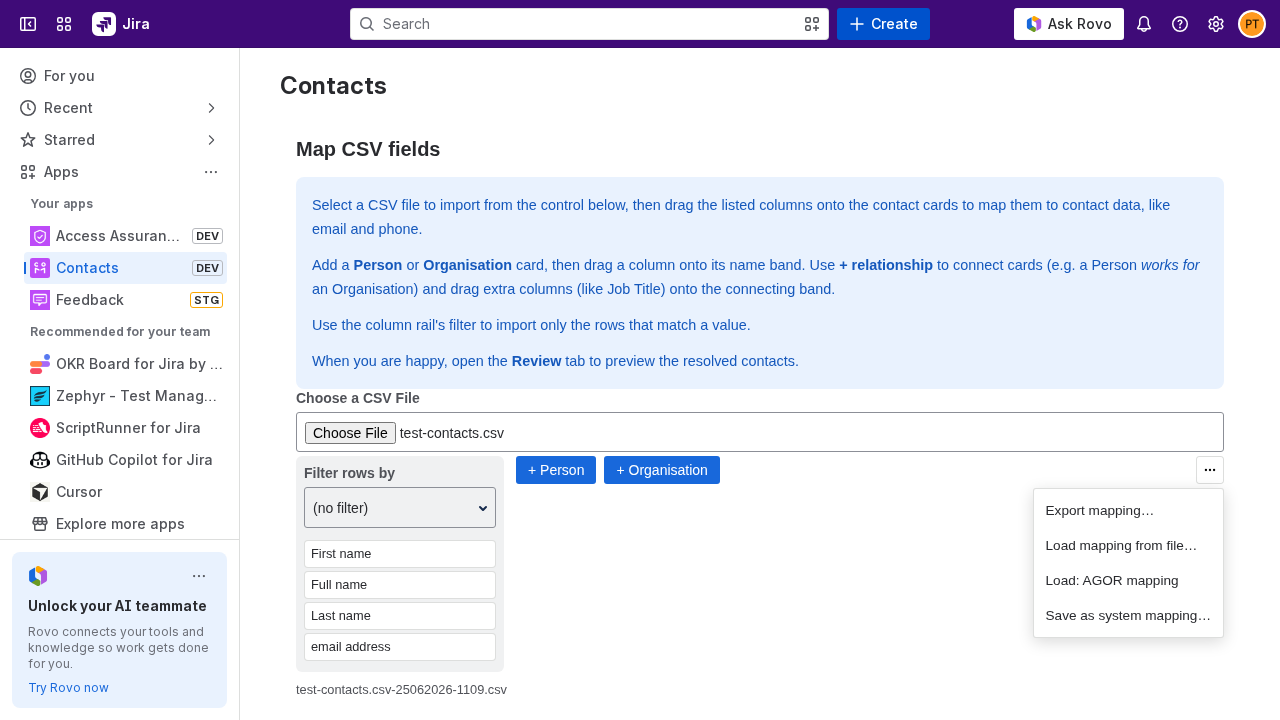
## Result
The imported contacts appear in your contact list, in the group you chose on **Confirm**, so anyone with access to that group can see them. Click a contact's name to open the contact details dialog and check the values landed in the right fields.
Next:
* [Working with groups](https://docs.togetha.software/docs/working-with-groups.md): share the new contacts by adding the import group to an access group.
* [Linking contacts to work items](https://docs.togetha.software/docs/linking-contacts-to-work-items.md): attach an imported contact to a Jira Work item.
---
language: "en"
---
# Initial configuration
Before users can submit feedback, an administrator needs to set the **Admin Group** and (optionally) configure the JSM Help Center prompt.
## Open the Admin page
From Jira's top navigation, open **Apps → Manage apps** , then click **Togetha Feedback Admin** (also reachable directly from the Jira admin cog if you're a site admin).
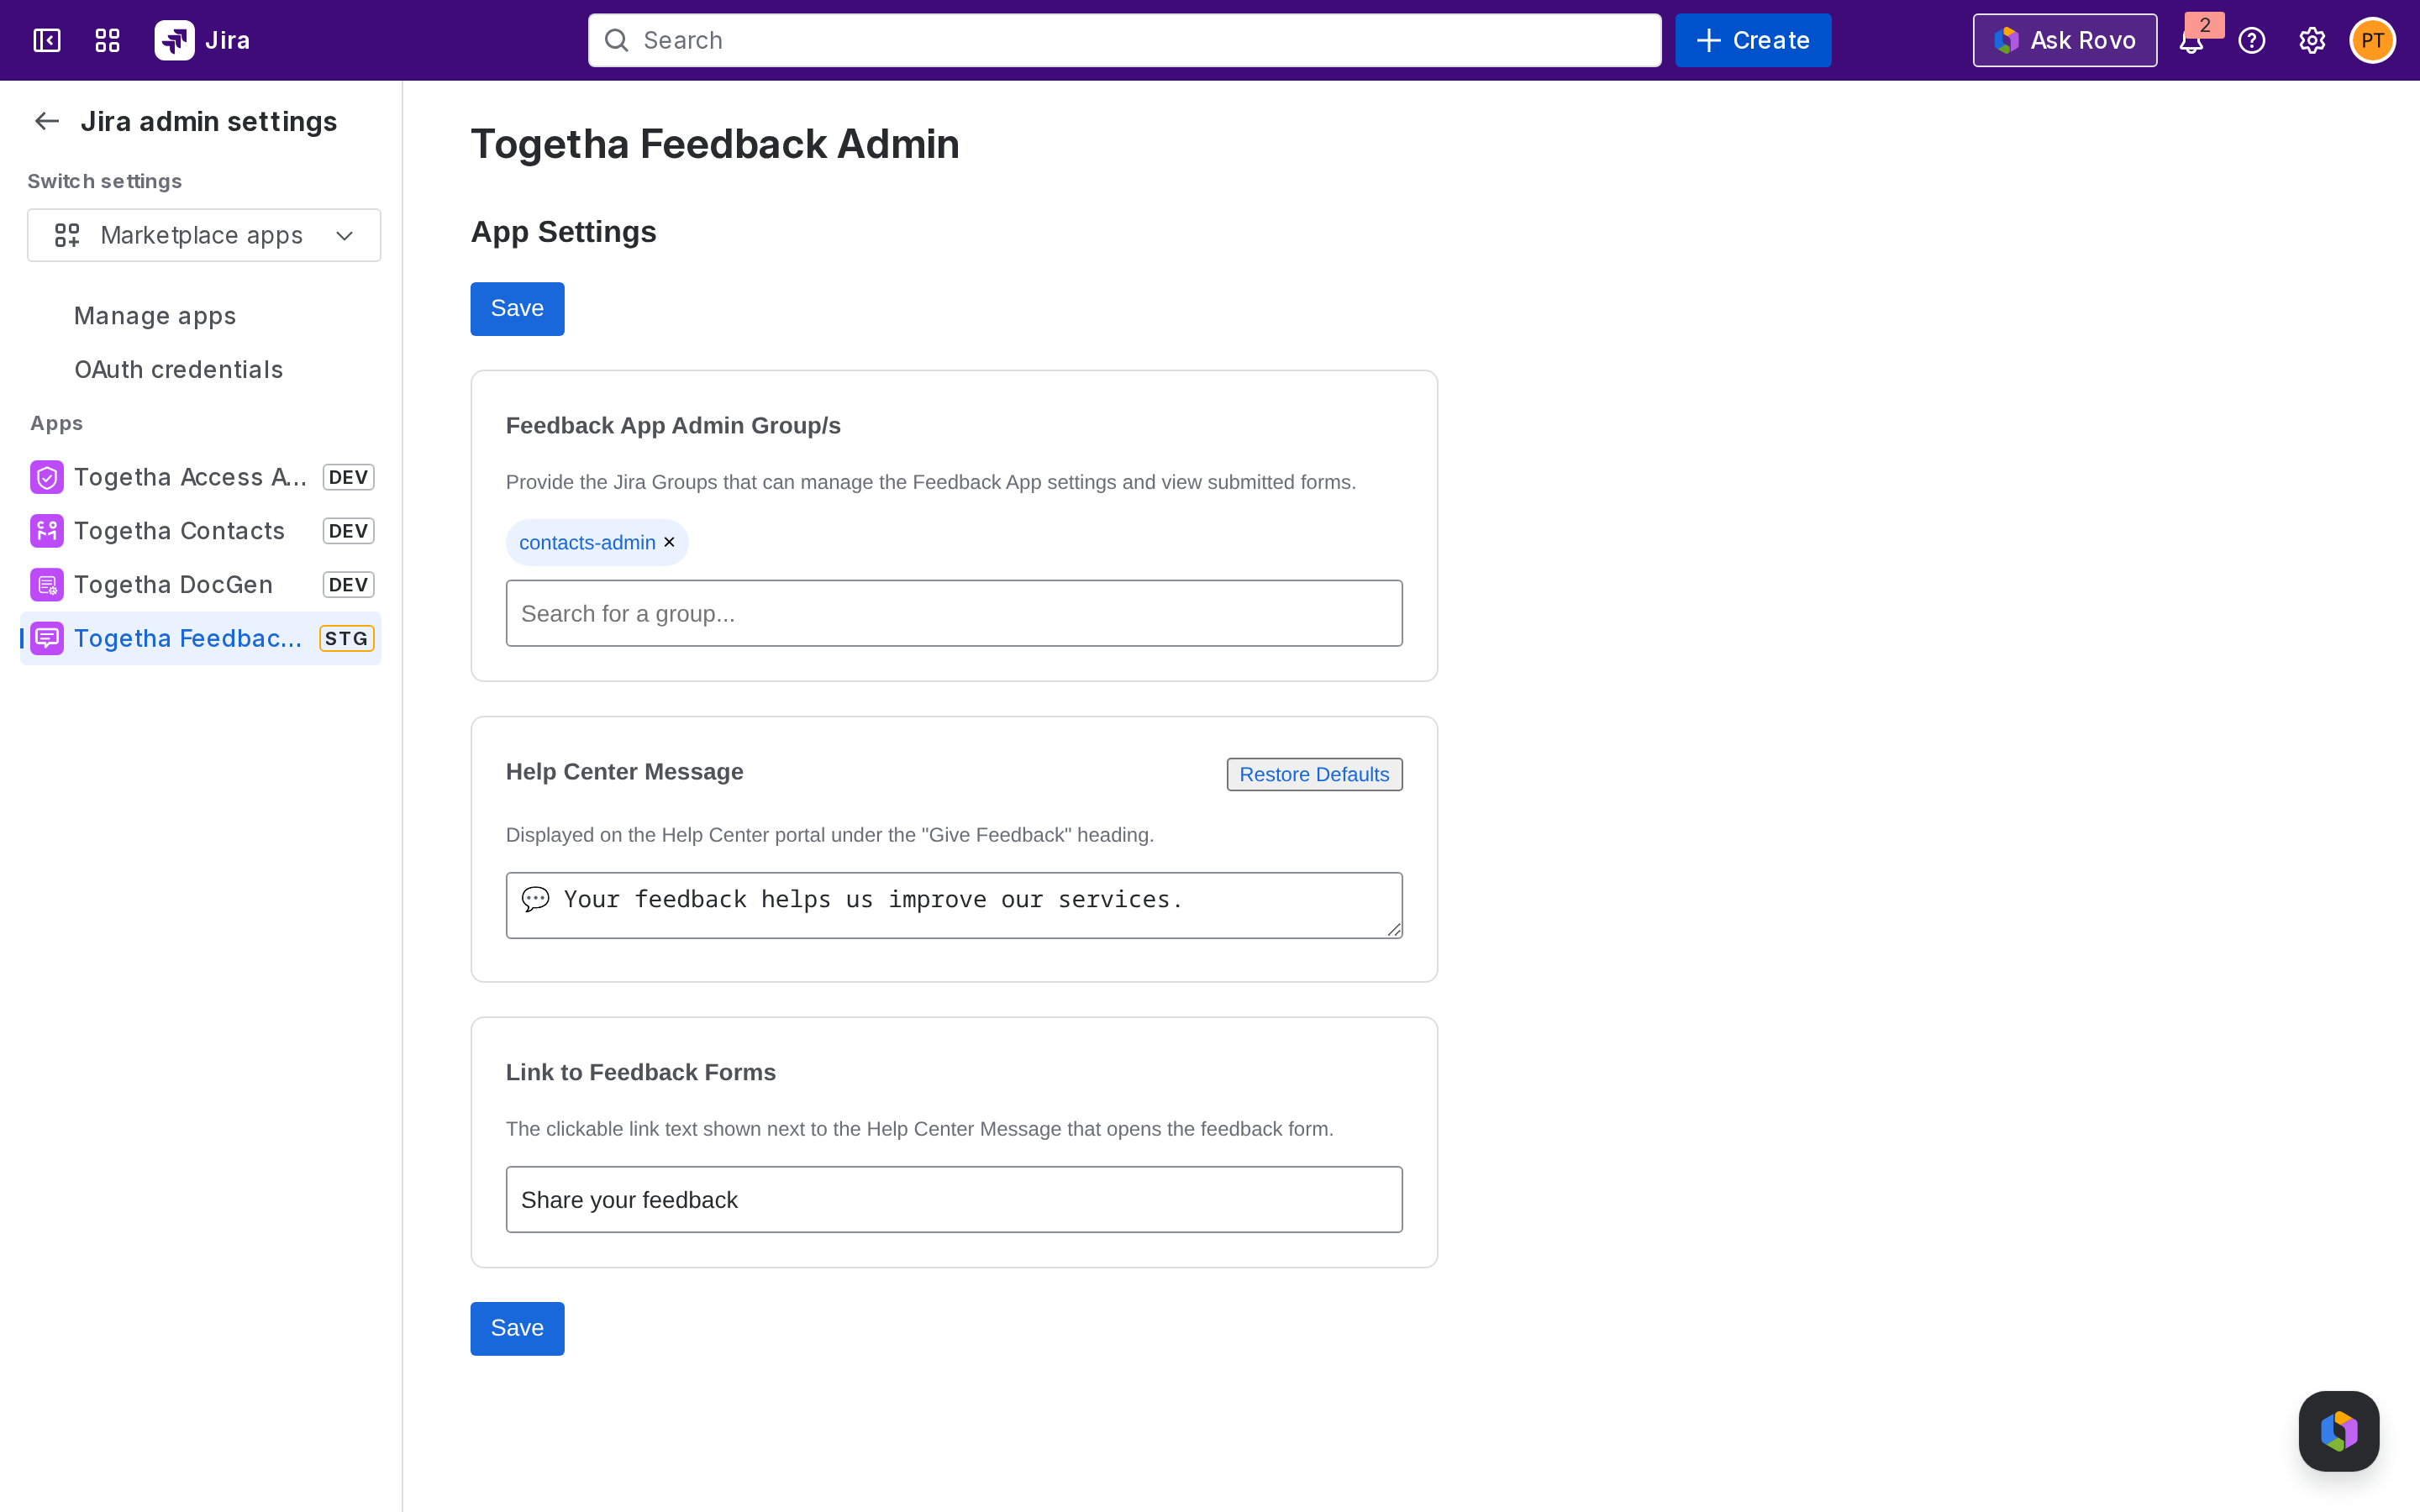
The page opens on the **App Settings** tab.
## Set the Admin Group
The Admin Group controls who can administer the app, create forms, map fields to Jira, and review submissions.
1. Click the **Admin Groups** picker.
2. Search for and select one or more Jira groups.
3. Click **Save**.
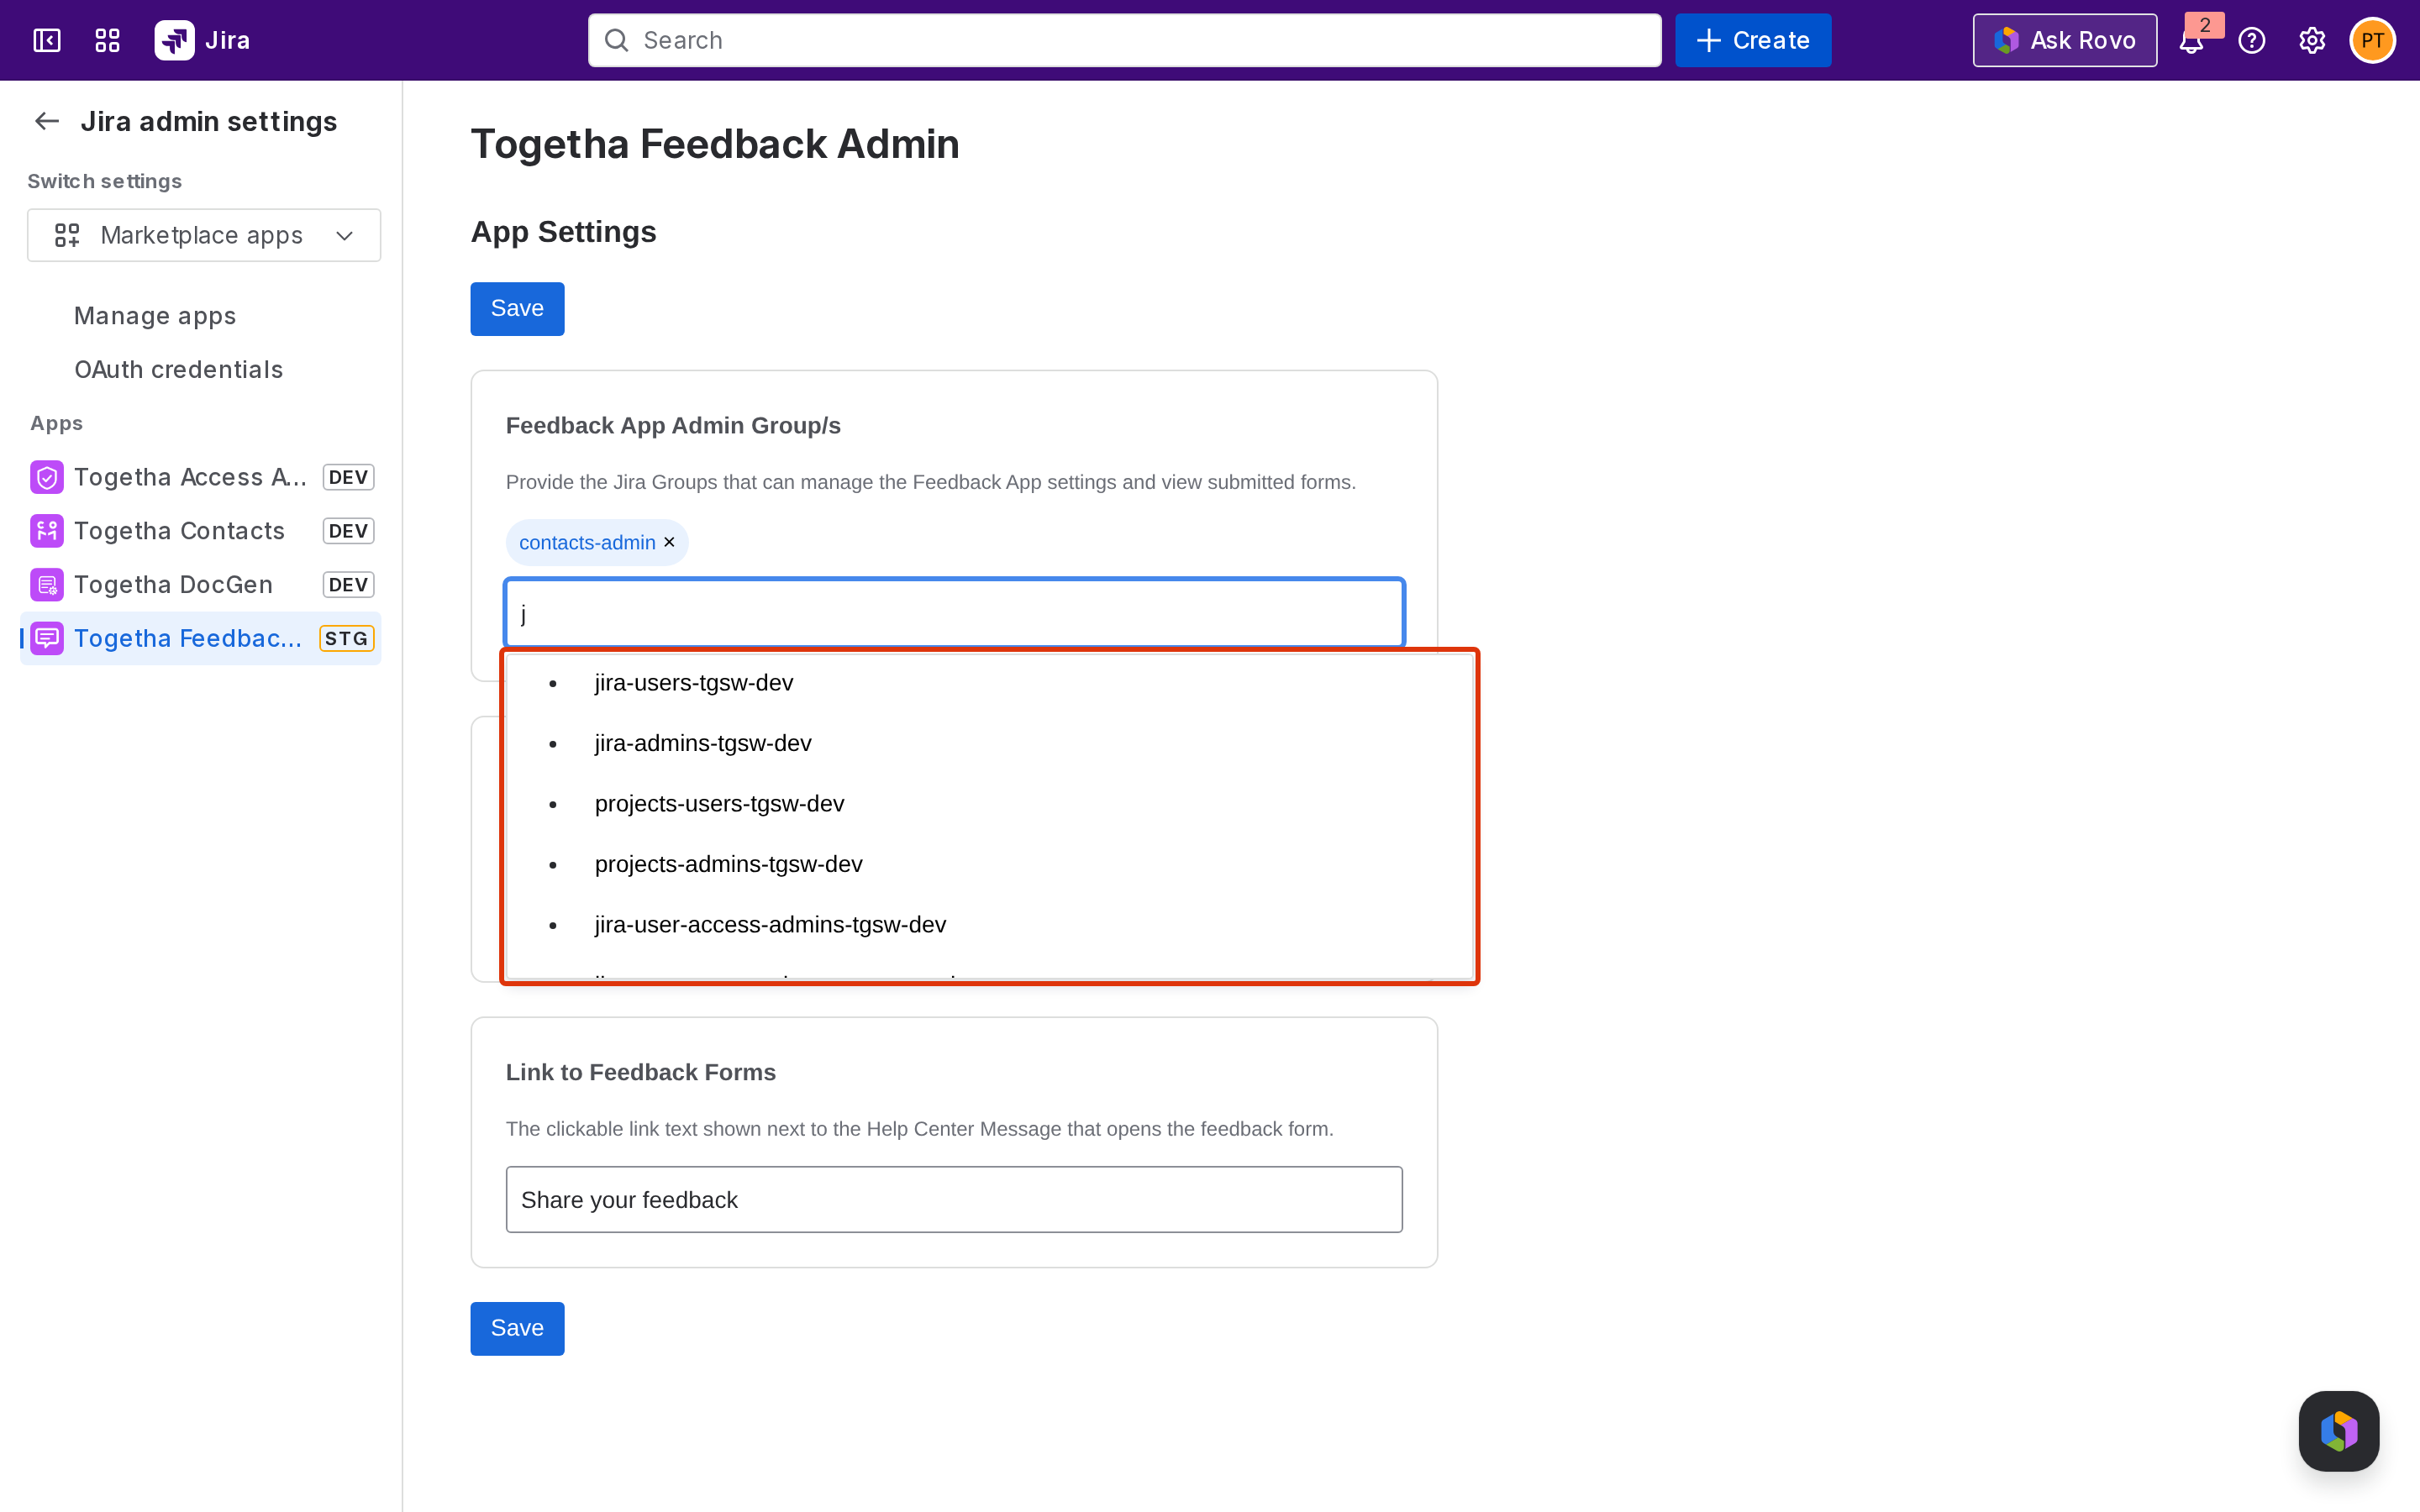
> **Important:** Jira **site administrators** always have admin access regardless of this setting. If no admin group is configured, **only** Jira site administrators can administer the app, every other user is locked out of the admin features. Add at least one group so non-site-admin members of your team can administer the app.
## Configure the Help Center prompt (optional)
If you use Jira Service Management, a **Share Your Feedback** prompt appears in the JSM Help Center subheader. The prompt links your customers to the feedback forms you've published.
By default the subheader has no extra prompt configured.
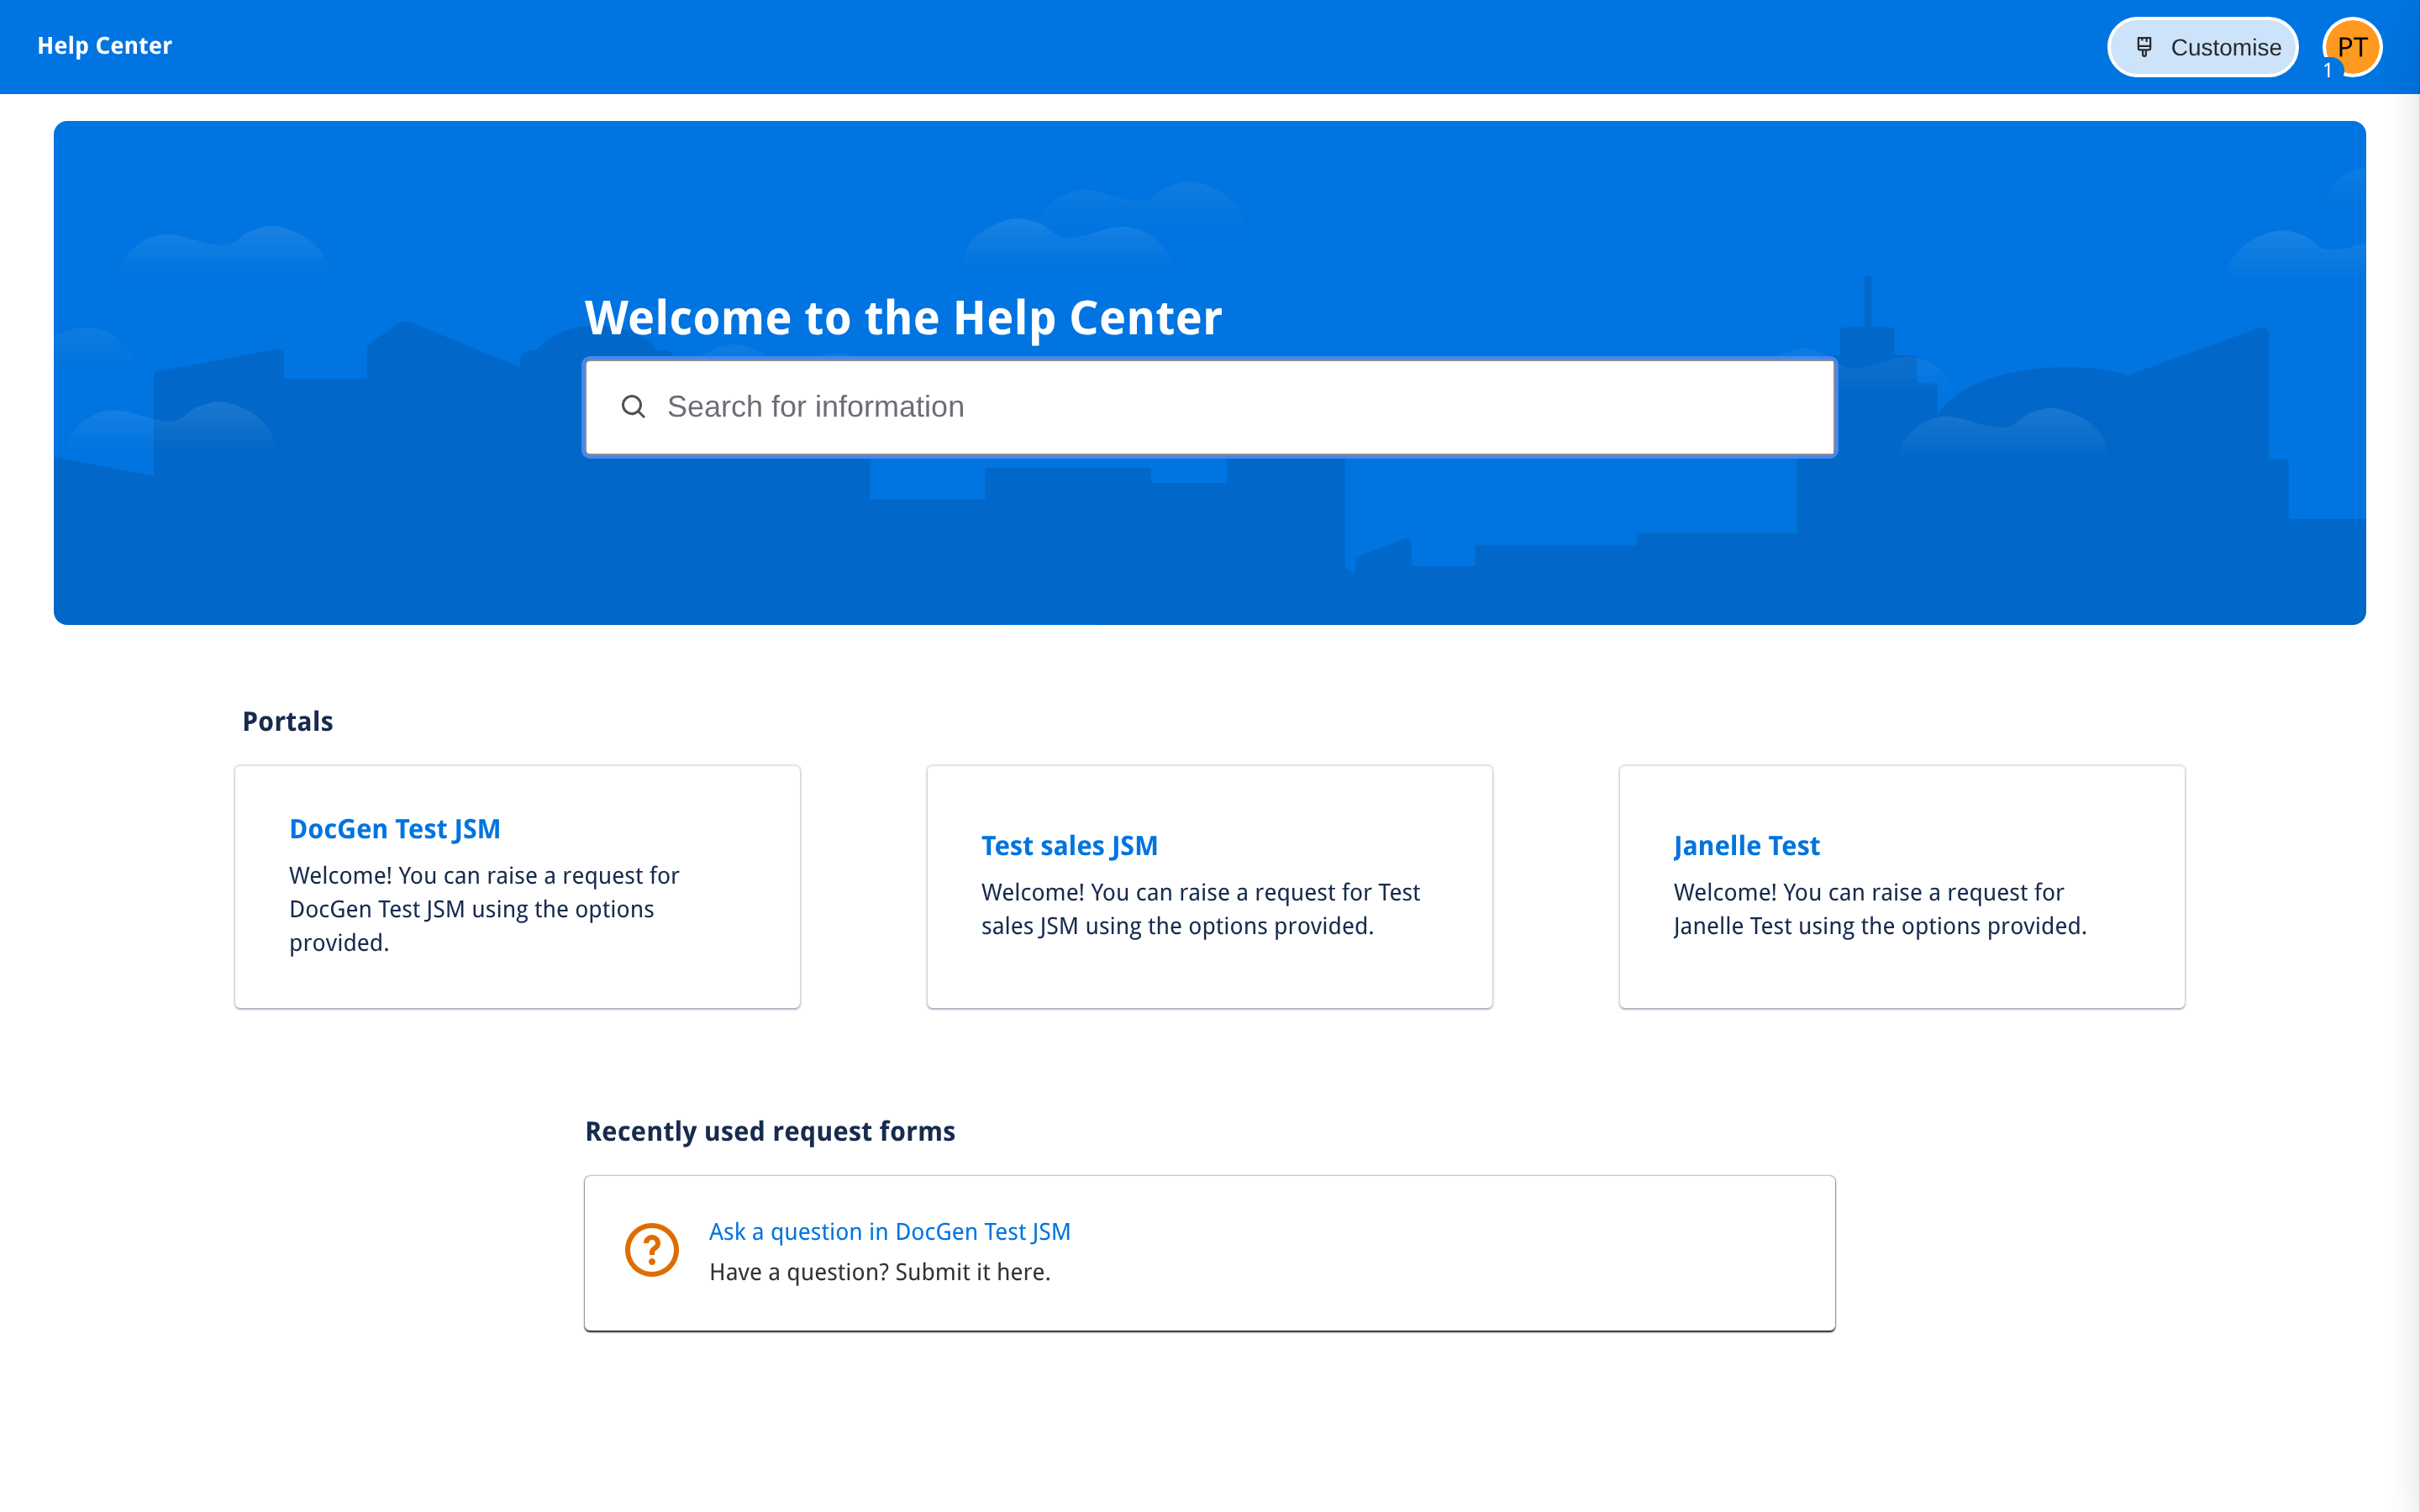
To configure it:
1. On the **App Settings** tab, edit the **Help Center prompt text**, which is the message shown to portal customers.
2. Edit the **Help Center link text** which is the call-to-action wording.
3. Click **Save**.
## Next step
[Creating a feedback form](https://docs.togetha.software/docs/creating-a-feedback-form.md) - build your first form with the 3-step wizard.
---
language: "en"
---
# Installing Togetha Feedback in Jira
You can install Togetha Feedback in Jira either through the Atlassian Marketplace or directly from your Jira site's Apps menu. Both paths require Jira site-administrator permissions.
## Get a license from the Marketplace
1. Go to the **Togetha Feedback in Jira** Marketplace listing.
2. Click **Try it free**.
3. Select the Jira instance you want to install the app on, then click **Review**.
4. Click **Start free trial**. Jira will download and install the app and a success message will notify you when it's done.
5. Open the **Togetha Feedback Admin** page from Jira's **Apps** menu to begin configuration.
## Install directly from Jira
1. Log in to your Jira instance as an **administrator**.
2. From the top navigation, open **Apps → Explore more apps**.
3. Search for **Togetha Feedback in Jira** and select the app.
4. Click **Try it free** to begin a 1-month trial.
5. Click **Start free trial**. Jira installs the app and shows a success message when it's done.
## Verifying the install
Once installation completes, two new entries appear in your Jira navigation:
* **Apps → Feedback** - the global page where users submit feedback and admins review submissions.
* **Apps → Manage apps → Togetha Feedback Admin** - the admin settings page (also reachable from the Apps cog as a Jira admin).
If you don't see these immediately, refresh Jira. If they still don't appear after a minute, see [Togetha Feedback in Jira Troubleshooting](https://docs.togetha.software/docs/togetha-feedback-in-jira-troubleshooting.md).
## Next step
[Initial configuration](https://docs.togetha.software/docs/initial-configuration.md) - set the admin group and Help Center prompt before users start submitting.
---
language: "en"
---
# Installing Togetha MailDrop for Confluence
## Get a license directly from the Atlassian Marketplace
1. Go to the [**Togetha MailDrop for Confluence** Marketplace listing](https://marketplace.atlassian.com/apps/1235139/maildrop-for-confluence?tab=overview).
2. Click the **Try it free** button.
3. Select the Confluence instance you want to install the app on, then click **Review**.
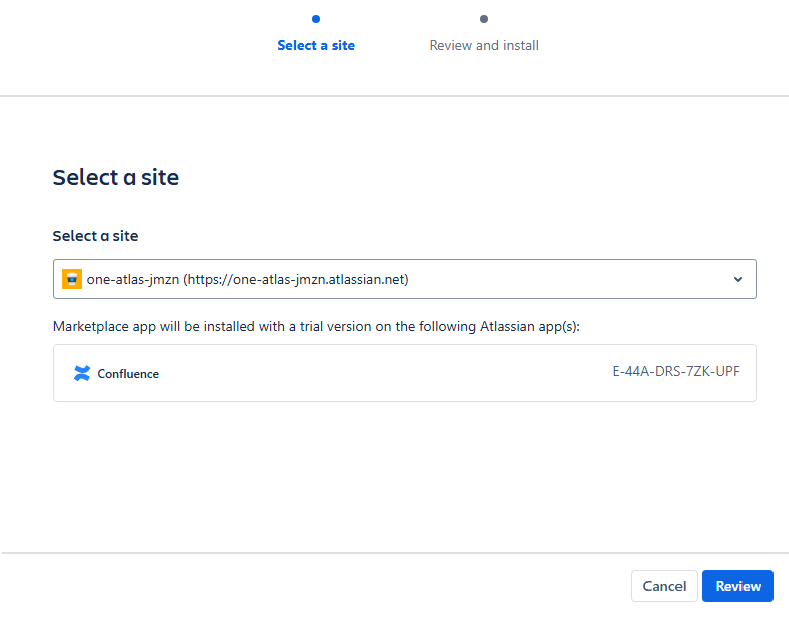
4. Click **Start free trial** .Confluence will download and install the app and a success message will notify you when it's done.
5. Start using the app!
## Install directly on your Confluence Cloud instance
1. Log in to your Confluence instance as an **admin**.
2. Select the **Apps** dropdown menu from the left navigation bar, then choose **Explore new apps**.
3. Type **Togetha MailDrop for Confluence** in the search bar and select the app.
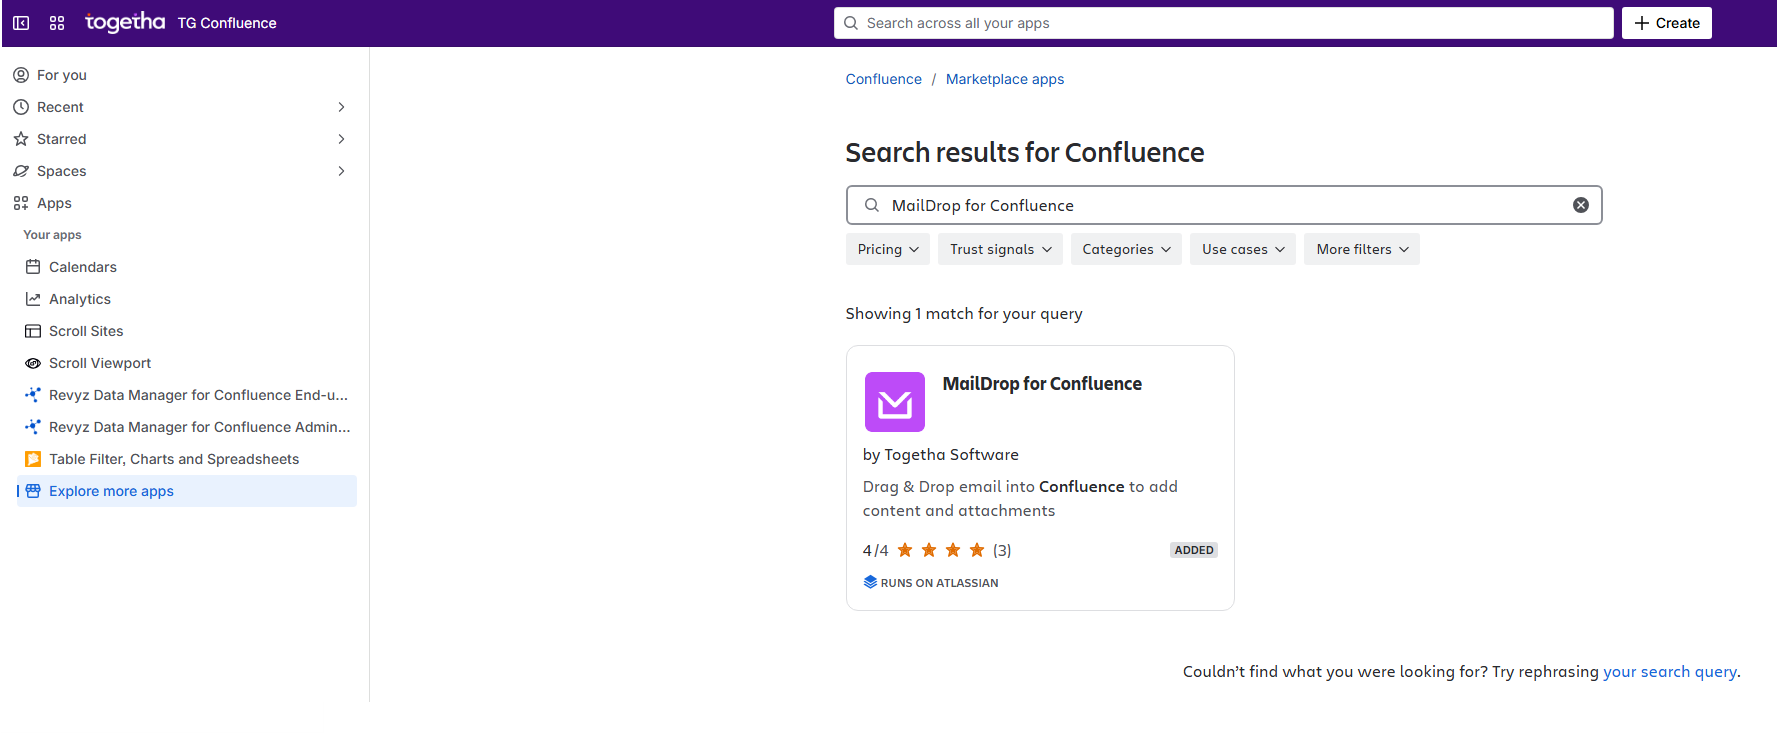
4. Click **Try it free** to begin a 1-month trial of Togetha MailDrop for Confluence.

5. Click **Start free trial**. Confluence will download and install the app and a success message will notify you when it's done.
6. Start using the app!
---
language: "en"
---
# Introduction to Contacts
Togetha Contacts is a CRM-style contacts app that lives inside Jira, so you can keep people, organisations, and groups alongside the work items they relate to.
## What you can do with Contacts
* Record contacts for people and organisations, with details like email, phone, address, and position.
* Organise contacts into groups, such as customers, suppliers, or project stakeholders.
* Link contacts to Jira work items through the Contacts custom field.
* Search contacts from anywhere in Jira using the command palette.
* View contacts in the side panel of a work item without leaving the work item.
* Import contacts in bulk from a CSV file.
* Share filtered contact views with your team through a URL.
## Where Contacts appears in Jira
| Location | What it does |
|------------------------------|-----------------------------------------------------------------------------------------------------------------------|
| **Contacts** global page | The main contacts workspace. Open it from the Apps menu, or open the Jira command palette and use the `g c` shortcut. |
| **Contacts** work item panel | A side panel on each work item that shows the contacts linked to that item. |
| **Contacts** custom field | A field you can add to any work item to attach a contact. |
| **New Contact** command | Create a contact without leaving your current page. Open the Jira command palette and use the `n c` shortcut. |
| Automation action | Lets a Jira automation rule create a contact from a form on a work item. |
The `g c` and `n c` shortcuts work from inside the Jira command palette. Press `Ctrl + K` (Windows/Linux) or `Cmd + K` (macOS) to open the palette first, then type the shortcut.
## Key concepts
| Term | Meaning |
|----------------------|--------------------------------------------------------------------------------------------------------------------------|
| **Contact** | A single record. A contact is either a **person** or an **organisation**. |
| **Group** | A named collection of contacts. A contact can belong to more than one group. |
| **Details** | Structured information attached to a contact, such as email addresses, phone numbers, addresses, positions, and notes. |
| **Relationship** | A link between two contacts, such as a person who works at an organisation, or a contact who reports to another contact. |
| **Linked work item** | A Jira work item that has a contact attached through the Contacts custom field. |
## What you'll find in the Contacts page
The Contacts page is the main place you'll work with your contacts. It has three areas:
* A **toolbar** at the top with **Add contact** and **Add group** buttons, a kebab menu for access, imports, and exports, and a layout toggle.
* A **filter side panel** on the left, for narrowing the list by search text, group, or contact type.
* A **list or card view** of your contacts in the centre. Switch between views using the layout buttons.
Click any contact's name to open the **contact details dialog**, which shows the contact's full information across tabs for comments, attributes, connections, groups, linked work items, and history.
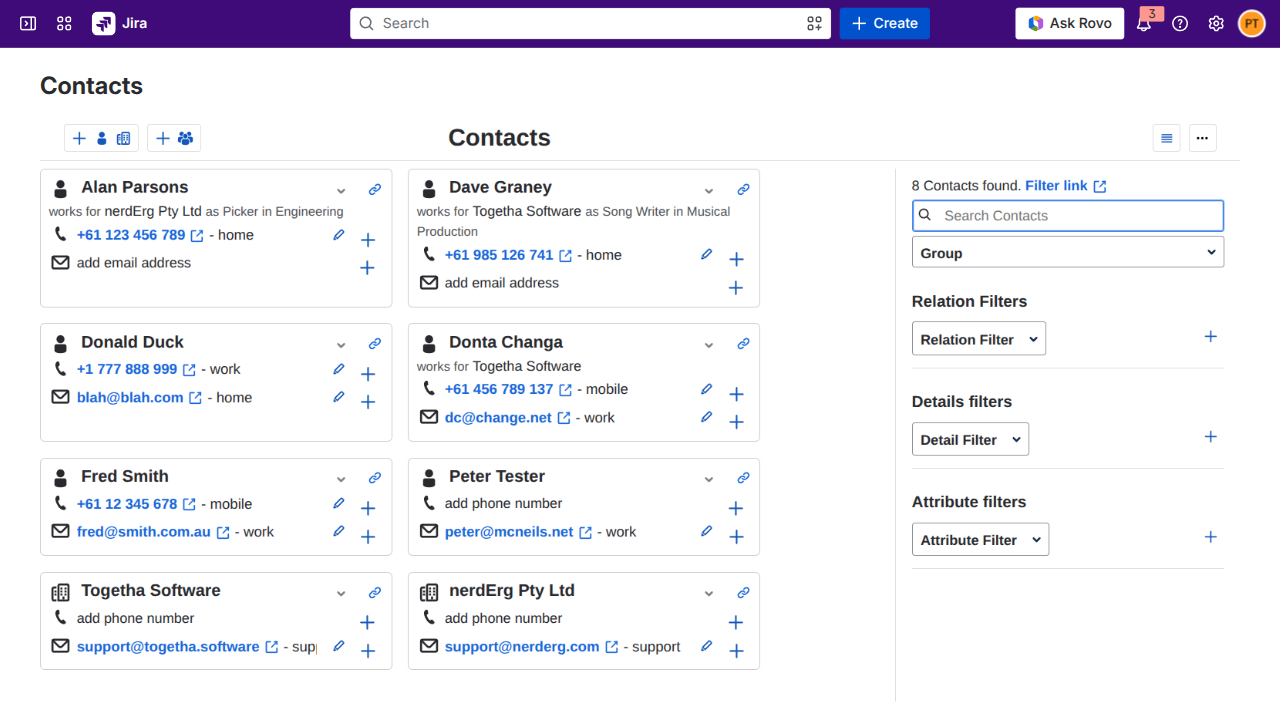
## What an end user can and can't do
You can:
* Create, edit, and delete your own contacts.
* Create and edit groups, and add or remove contacts from groups you can see.
* View contacts that have been shared with you or your team.
* Link contacts to work items you can edit.
You can't:
* Change app-wide settings such as entity types or relation kinds. Those are managed by a contacts admin.
* See contacts that have been restricted to other users or groups.
## Where to go next
* [Creating a contact](https://docs.togetha.software/docs/creating-a-contact.md): add your first person or organisation.
* [Working with groups](https://docs.togetha.software/docs/working-with-groups.md): organise contacts into named collections.
* [Linking contacts to work items](https://docs.togetha.software/docs/linking-contacts-to-work-items.md): attach a contact to a Jira Work item.
* [Importing contacts from CSV](https://docs.togetha.software/docs/importing-contacts-from-csv.md): load contacts in bulk.
---
language: "en"
---
# Linking contacts to work items
Attach a contact to a Jira Work item using the Contacts custom field, so the contact appears in the work item's Contacts side panel and turns up in contact-based searches.
## Prerequisites
* The Contacts custom field has been added to your Jira Space by a Jira admin. Without that, work items in your Space have no place to hold a contact. If you don't see a Contacts field on a work item, ask your Jira admin to add one through **Space settings** → **Fields**. They may need to create the custom field first.
* The contact you want to link already exists. If it doesn't, create it first using the steps in [Creating a contact](https://docs.togetha.software/docs/creating-a-contact.md).
* The contact is in a group you can see. The field's contact picker only shows contacts you have access to.
## Linking a contact to a work item
1. **Open the work item.**
2. **Find the Contacts field** on the work item's details panel. The field shows the configured field name (for example **Primary contact** or **Billing contact** ). When empty, it shows **set Contact**.
3. **Click the field** to open the contact picker.
4. **Type to search.** Enter a name or organisation to search by name, or type an email address to search by email instead (see **Searching by email address** below). The picker filters as you type, across the contacts you can see.
5. **Select the contact** from the results. The field saves automatically. The contact appears in the field and in the **Contacts** side panel on the right of the work item.
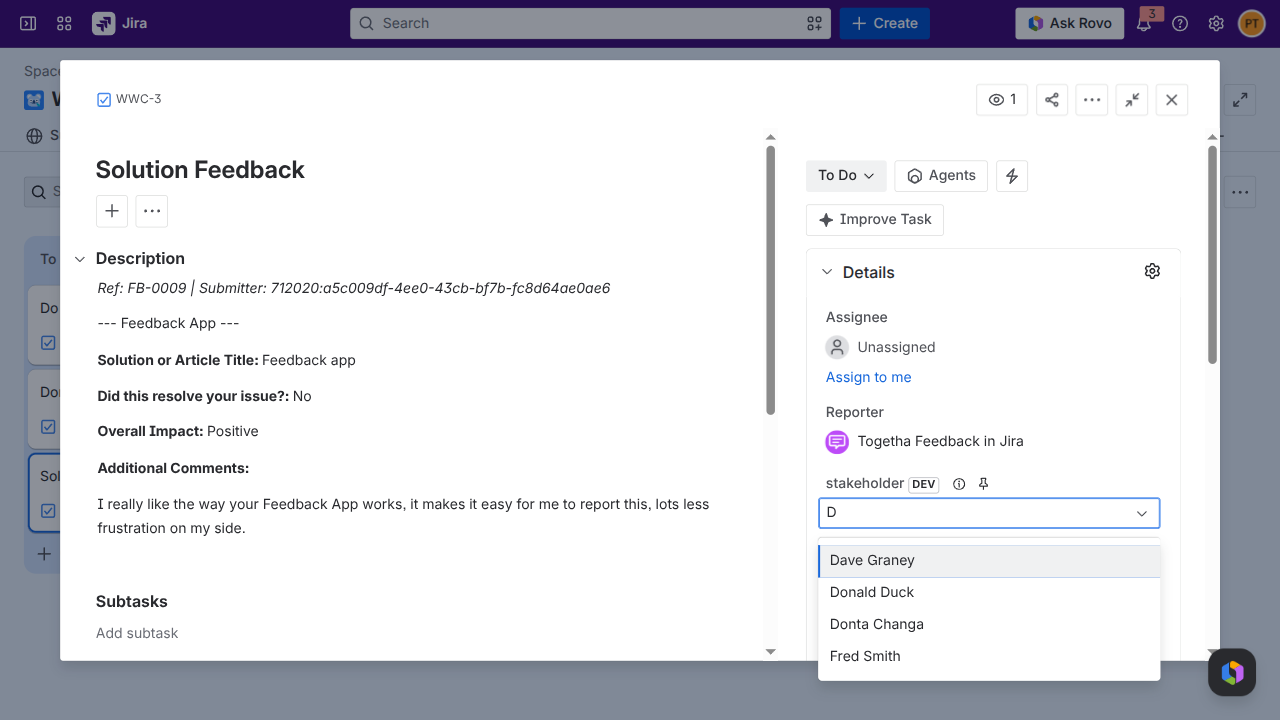
## Searching by email address
The contact picker searches by name by default. As soon as your search text contains an `@`, it switches to searching by email address and matches contacts whose email contains what you typed.
* **Type any part of an address** , such as `@acme.com` or `jordan@`, to find every contact you can see with a matching email.
* **Each result shows the contact name with its matching email address after it**, so you can tell apart contacts who share a name.
* **A contact appears once** even if more than one of its email addresses matches your search.
* **Picking a result links the contact** the same way a name search does. Only the contact name is stored on the work item, not the email text shown in the result.
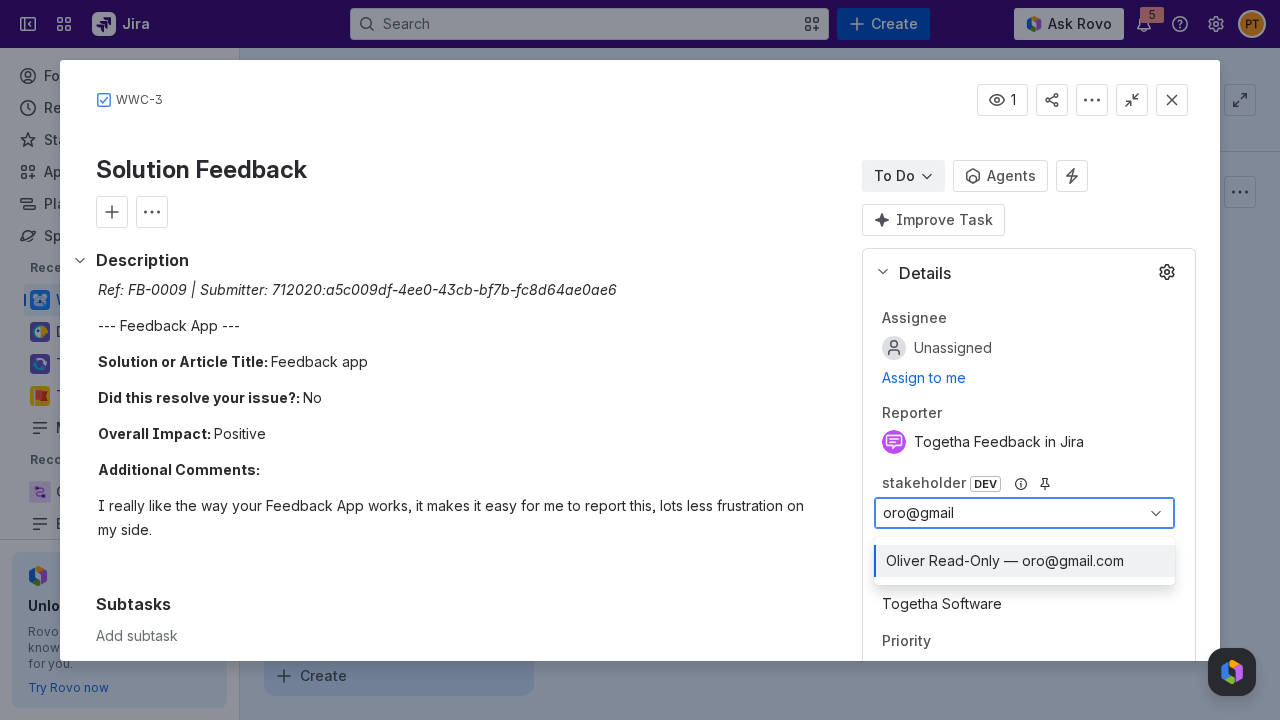
## Viewing linked contacts in the side panel
The **Contacts** side panel appears on every work item. It lists each Contact field on the work item together with the current contact for that field.
* **Click a contact's name** to open the contact details dialog without leaving the work item. From there you can see comments, attributes, connections, the contact's groups, and other linked work items.
* **The label** to the left of each name is the field name configured for that screen.
* If a field is empty, the panel shows **Contact not set.**
* If a contact has been deleted from the system, the panel shows **Contact has been deleted.** Pick a different contact in the field to clear that state.
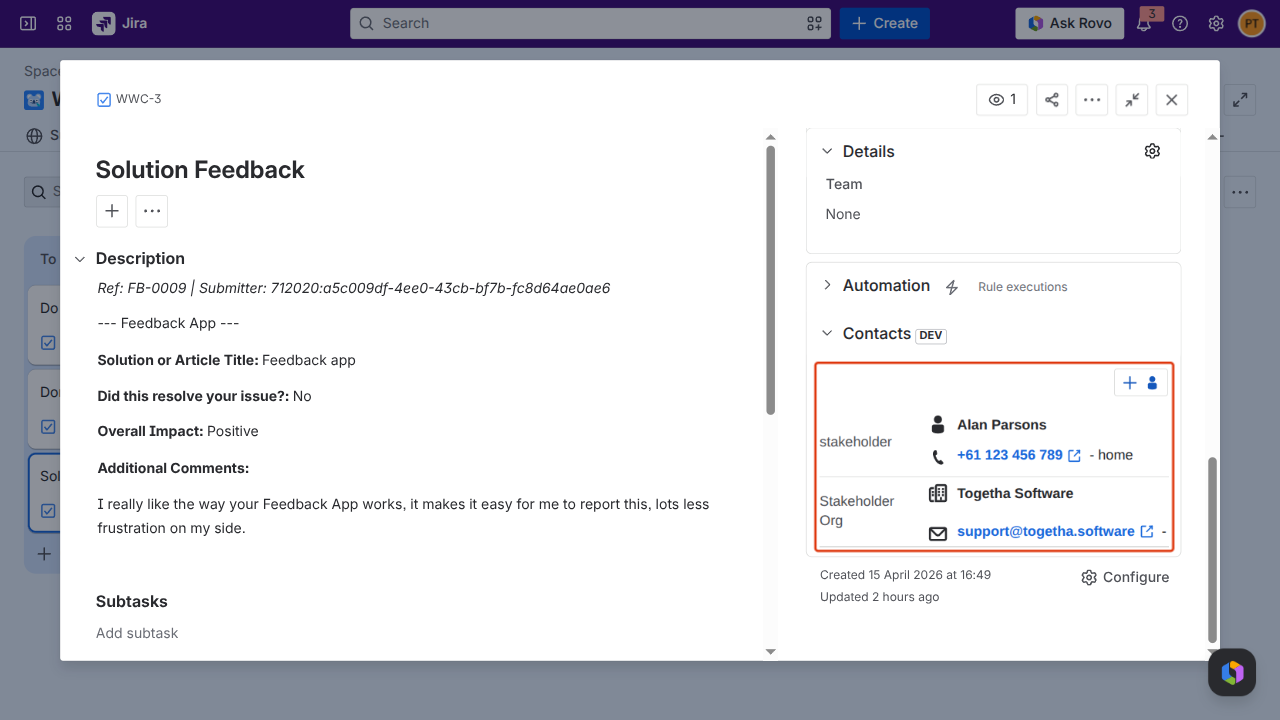
## Viewing all work items linked to a contact
To see every work item a contact is attached to (the reverse view of the side panel), open the contact details dialog and switch to the **Work Items** tab.
1. **Open the contact details dialog.** Click the contact's name anywhere it appears: the contact list, a card, the Contacts side panel on a work item, or a matching contacts result.
2. **Switch to the Work Items tab.** The list shows every work item that has this contact in any of its Contacts fields, across every Jira Space you have access to. Each entry shows the work item key and summary.
3. **Click a work item** in the list to open it in Jira.
If the contact isn't linked to any work item, or you don't have permission to see any of the linked work items, the tab shows **No work items found.**
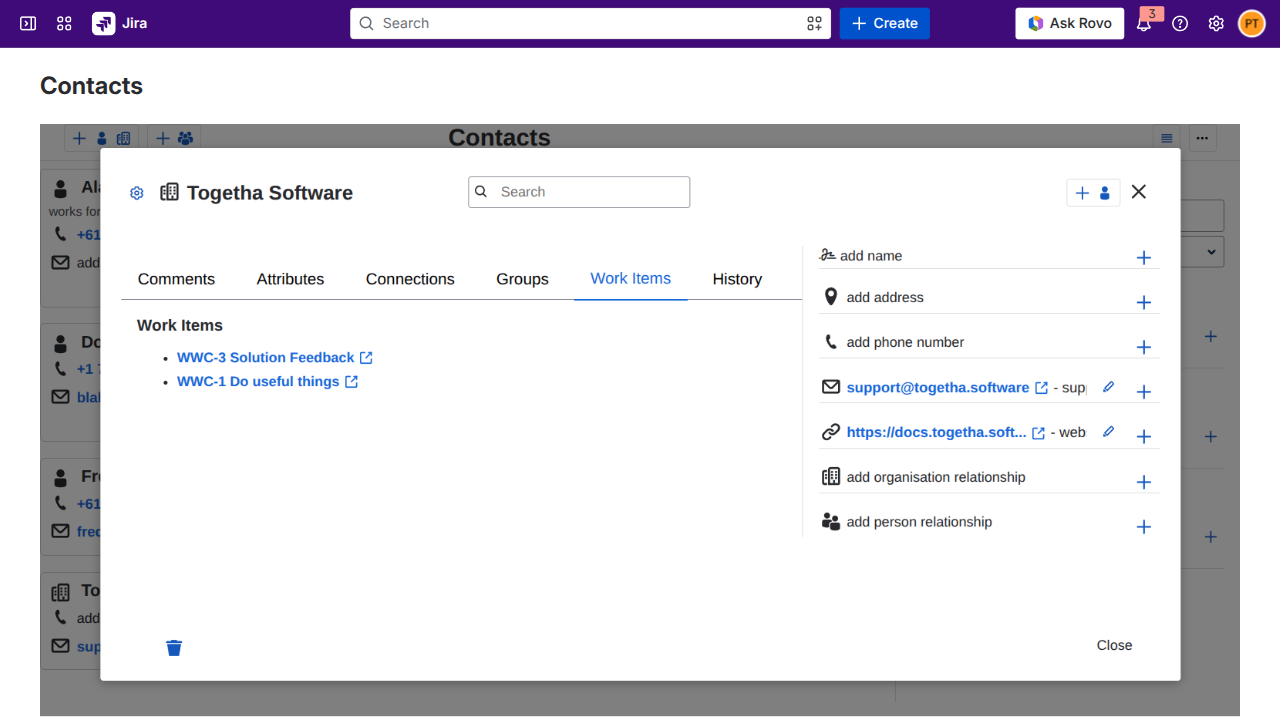
## Creating a contact while you're on a work item
If the contact you need doesn't exist yet:
1. **Click the Add contact button** (the `+` and person icon) at the top of the Contacts side panel.
2. **Fill in the contact form** in the dialog that opens. See [Creating a contact](https://docs.togetha.software/docs/creating-a-contact.md) for the form details.
3. **Save.** The new contact is created. To finish linking it to this work item, go back to the Contacts field on the work item and pick the contact you just created.
Creating a contact from the side panel does **not** automatically link it to the current work item. You still need to pick it in a Contacts field on that work item.
## Multiple contact fields on one work item
A Jira Space can have more than one Contacts field on a screen, configured by your Jira admin. Each field holds a single contact. Common setups include separate fields for **Primary contact** , **Billing contact** , and **Technical contact**. Each field shows as a separate row in the Contacts side panel.
## Searching for work items by contact
The Contacts custom field is indexed for Jira search. From any work item search you can filter by contact name, for example:
"Primary contact" = "Acme Corporation"
The contact ID is also stored as a work item property under `tscontacts.contacts.contactIds`, which lets automation rules and advanced queries match work items by contact.
## Result
The contact is attached to the work item through a Contacts field. The Contacts side panel shows the linked contact, the contact's detail page lists the work item under linked work items, and Jira search can find the work item by contact name.
Next:
* [Importing contacts from CSV](https://docs.togetha.software/docs/importing-contacts-from-csv.md): load contacts in bulk before linking them.
* [Working with groups](https://docs.togetha.software/docs/working-with-groups.md): make sure the contact is in a group your teammates can see.
---
language: "en"
---
# Mapping form fields to Jira
Mapping connects a feedback form to a target Jira space and work item type, and decides which Jira field each form field populates. When a submission is accepted, the mapping is what creates the Jira work item.
You can configure mapping in **Step 3 of the form wizard** when creating a form, or by editing an existing form.
## Pick a space and work item type
1. From the **Space** dropdown, choose the Jira space to create issues in.
2. From the **Work Item Type** dropdown, choose the issue type (e.g. *Task* , *Bug* , *Story*).
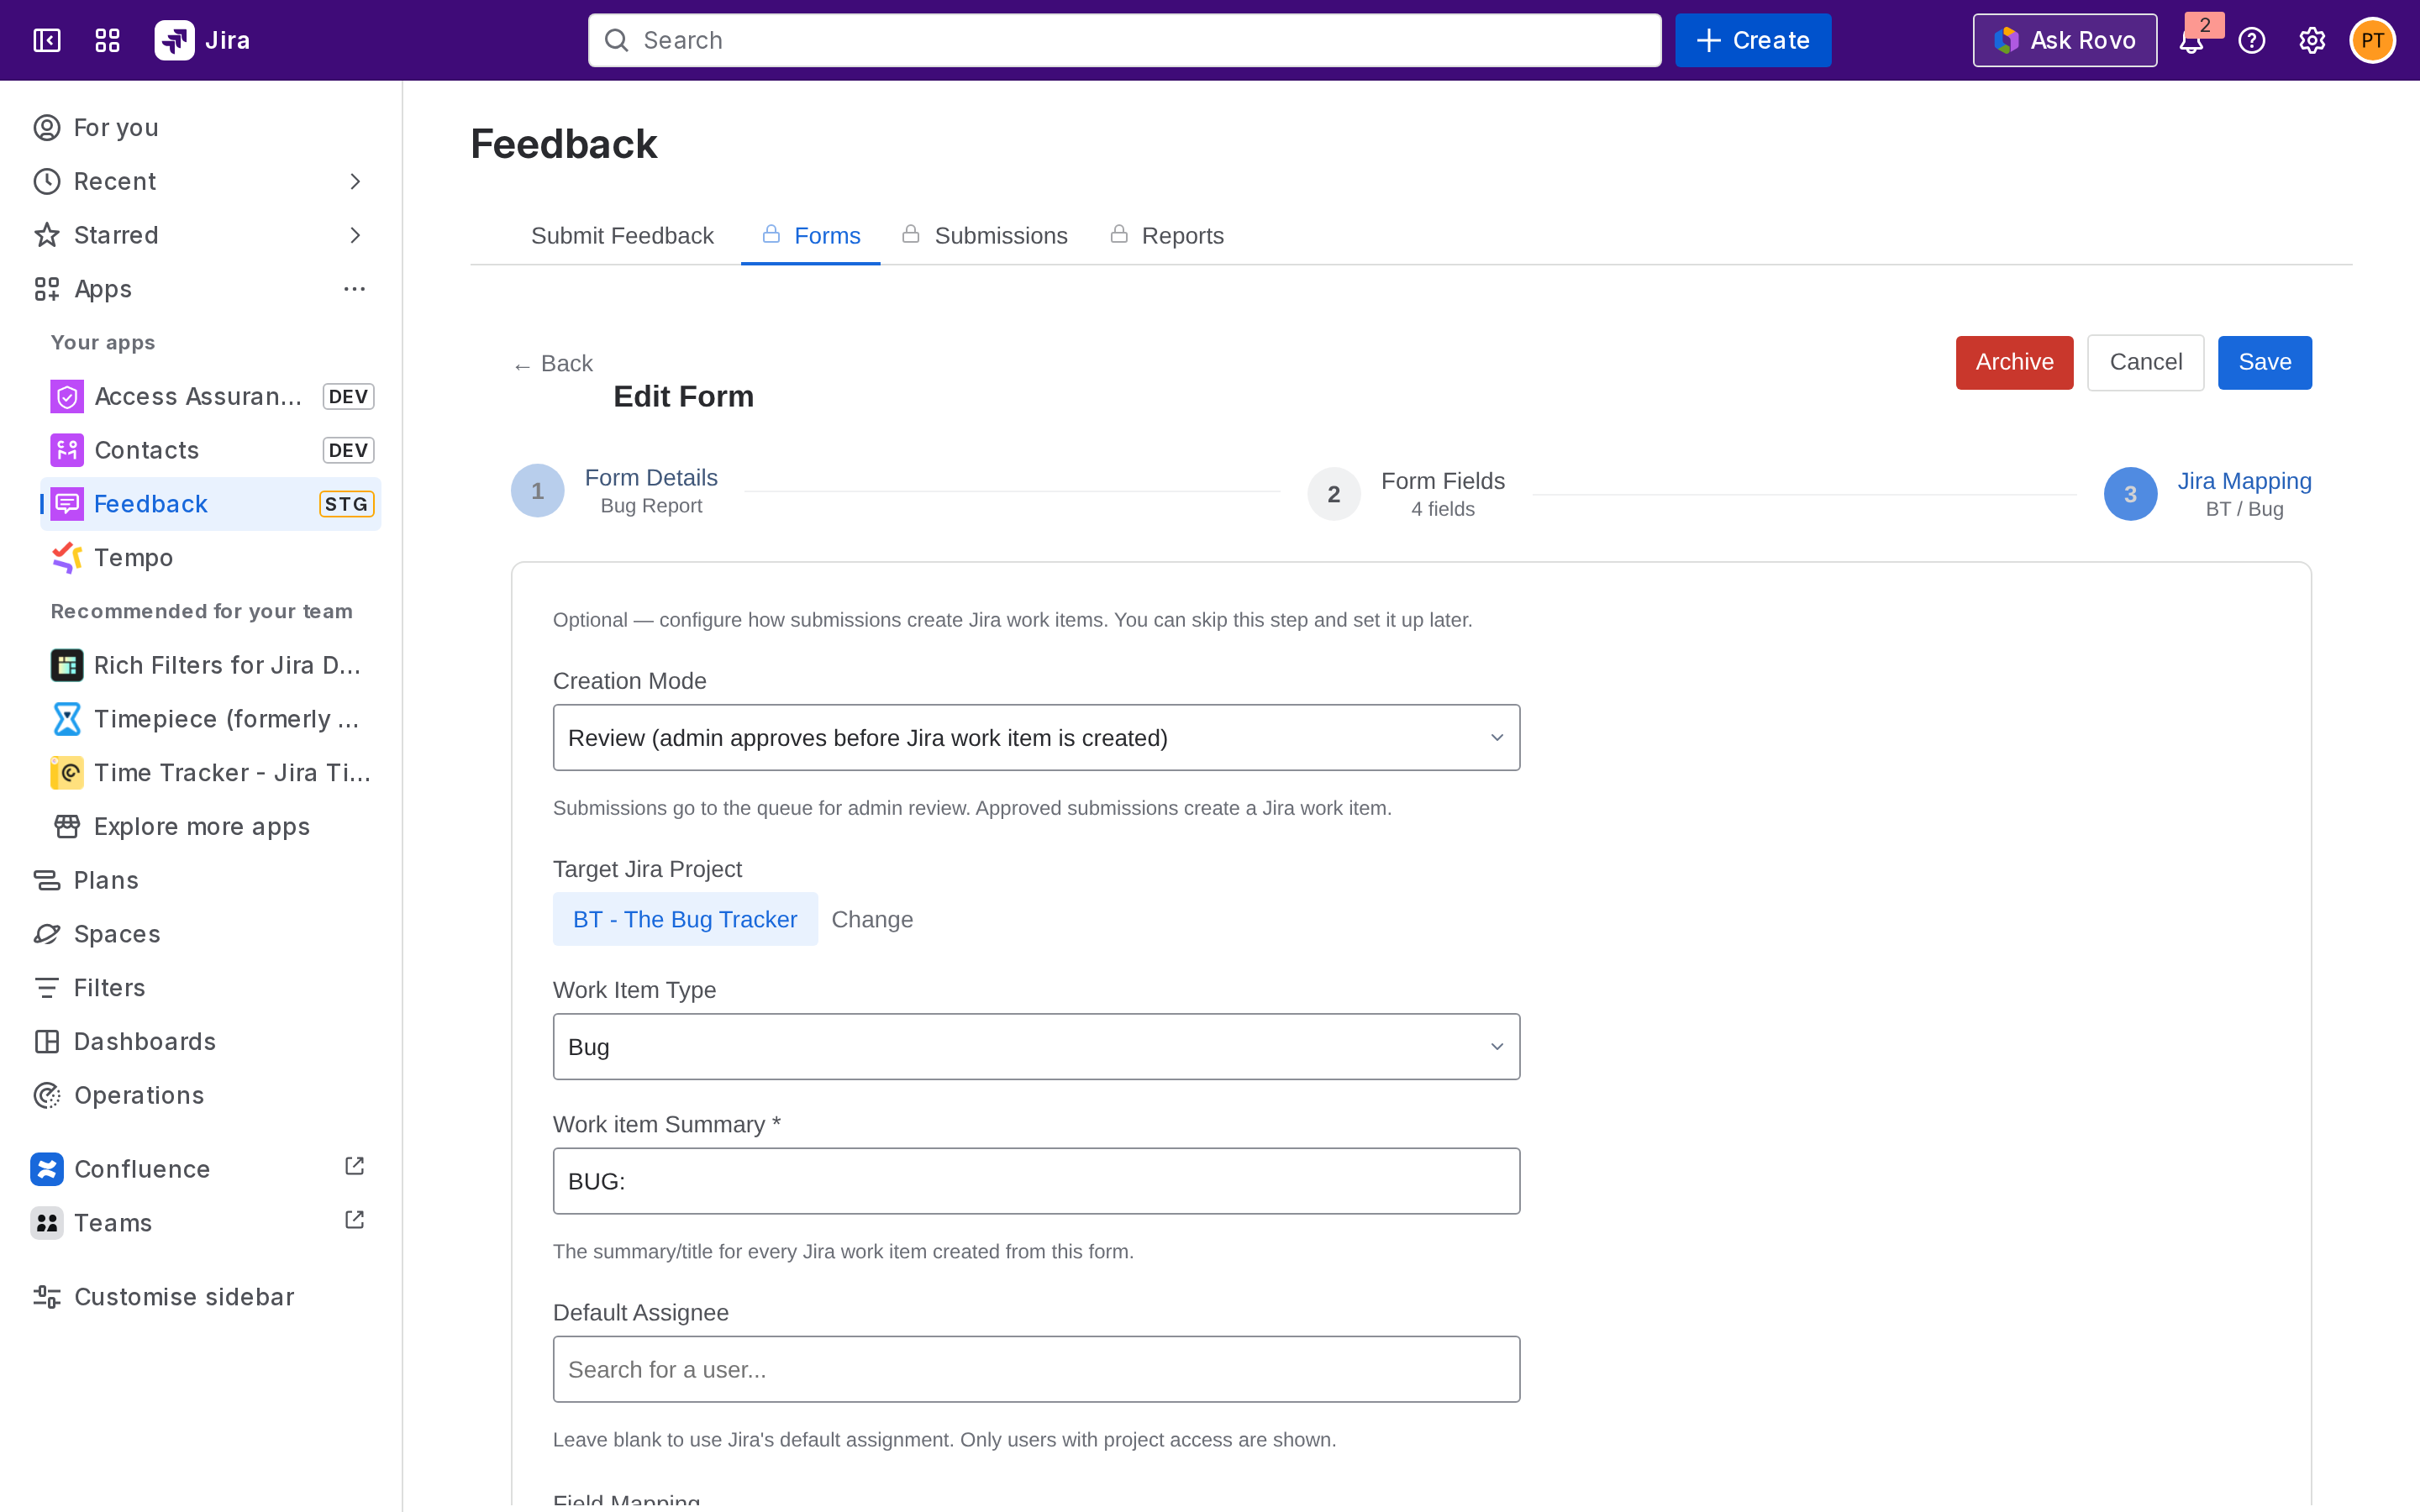
The form fields are listed below the issue-type picker once both selections are made.
## Map each form field
For each form field, pick the matching Jira field from its row's dropdown. Common targets:
* A **Short Text** field → *Summary* (Jira's required summary).
* A **Rich Text Area** → *Description*.
* **Single / Multi Select** → custom Jira fields of the same type.
* **Date** → *Due Date* or a custom date field.
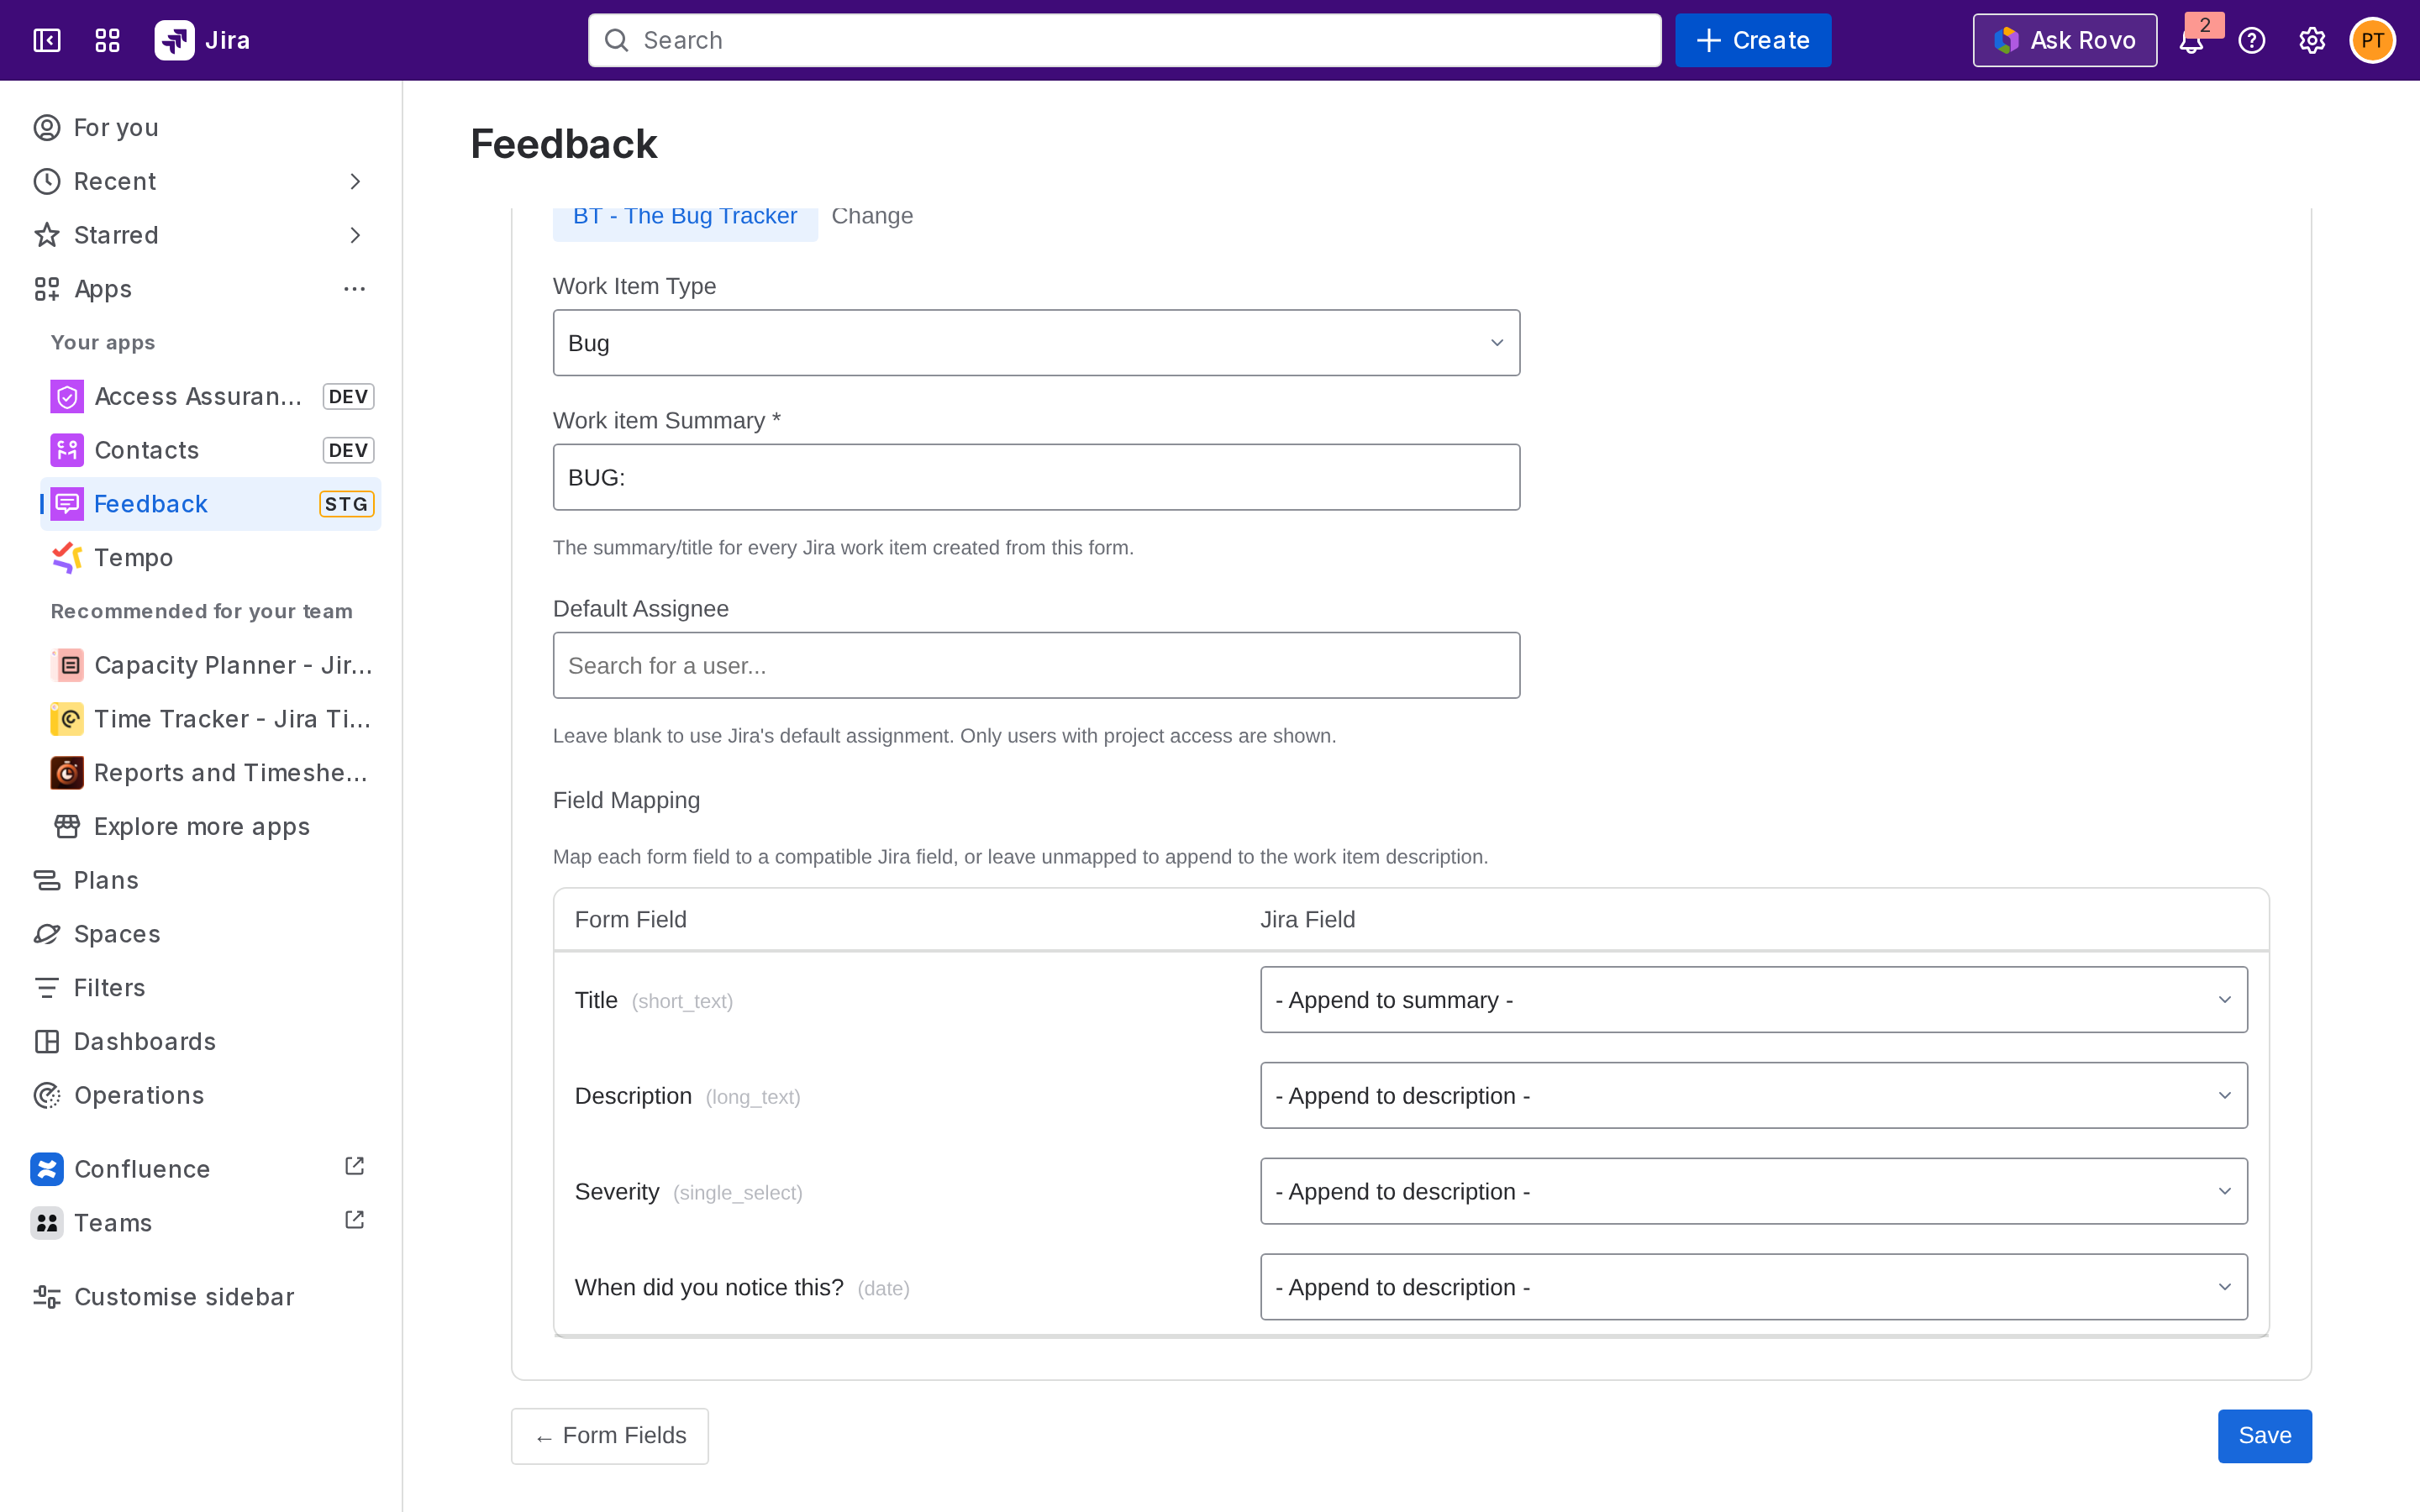
## Required-field warnings
If the chosen issue type has required Jira fields that no form field maps to, the table shows a warning. The form can still be saved as a Draft, but **submissions cannot be accepted into Jira** until the missing fields are mapped or the issue type is changed.
## What happens on submission
When a user submits a mapped form:
1. The submission is saved with status **Pending Review**.
2. An admin opens it on the Submissions tab and chooses **Accept \& Create in Jira**.
3. Togetha Feedback uses the mapping to build a Jira work item and creates it. The submission moves to **Created** and links to the new issue.
If Jira creation fails (for example, a required field is unexpectedly missing), the submission moves to **Failed** and the admin can retry, see [Reviewing and accepting submissions](https://docs.togetha.software/docs/reviewing-and-accepting-submissions.md).
## Next step
[Submitting feedback (for users)](https://docs.togetha.software/docs/submitting-feedback-for-users.md) - what end users see.
---
language: "en"
---
# Our Apps
You can find our Apps listed on the [Atlassian Marketplace](https://marketplace.atlassian.com/vendors/1226870/togetha-software).
 [**Togetha MailDrop for Confluence**](https://docs.togetha.software/docs/togetha-maildrop-for-confluence.md) lets you drag an email from your email client onto your Confluence page and have it's *contents* added to the page. Checkout [Why MailDrop?](https://docs.togetha.software/docs/why-use-togetha-maildrop-for-confluence.md) to see it's benefits.
 [**Togetha DocGen for Jira**](https://docs.togetha.software/docs/togetha-docgen-for-jira) automatically generates documents from your Jira work items using a Word document as a template, turning issue data into completed documents without input. Check out [Why DocGen?](https://docs.togetha.software/docs/why-use-togetha-docgen-for-jira) to see its benefits.
 [**Togetha Feedback in Jira**](https://docs.togetha.software/docs/togetha-feedback-in-jira.md) makes it effortless for customers and internal teams to share feedback, and for ITSM teams to action it. Check out [Why use Togetha Feedback in Jira](https://docs.togetha.software/docs/why-use-togetha-feedback-in-jira.md)?.
**Coming soon...**
 [**Togetha Contacts for Jira**](https://docs.togetha.software/docs/togetha-contacts-for-jira.md) lets you manage Contacts (Person and Organisation records) within Jira.
---
language: "en"
---
# Privacy Policy
This Policy was last updated on 9 December 2025.
## Who We Are
When we say 'Togetha', 'we', 'us' or 'our', we mean any of the following:
* Togetha Group Pty Ltd
* Togetha Group Hong Kong Limited
* Willyama Togetha Pty Ltd
* Togetha Software Pty Ltd
Togetha Group includes all entities, employees, and Contractors under Togetha Holdings Pty Ltd, operating in Australia, Hong Kong, and other regions.
Contact (Privacy): [privacy@togetha.io](mailto:privacy@togetha.io)
Trust Centre:
## Scope \& How This Policy Works
This Privacy Policy explains how we collect, use, disclose, store, handle and protect your Personal Information across digital (eg. websites, email, sms, webinars, social media and apps) and in-person events, phone calls, video conferences, etc.
Read this together with any agreement we have with you (e.g., EULA) and the controls visible in our Trust Centre. We comply with the Australian Privacy Act 1988 (Cth) and the Australian Privacy Principles (APPs), and other applicable privacy laws.
By interacting with us, you acknowledge you understand and agree with our use of your Personal Information and your rights in relation to your data.
## Types of Data
User Data: All information collected from our customers that is not Personal Information.
Personal Information (Australia): Information or an opinion about an identified individual or an individual who is reasonably identifiable (as defined in the Privacy Act).
Personal Data (EU/UK/Vietnam and similar): Any information relating to an identified or identifiable natural person (GDPR Art. 4(1)). We use Personal Information and Personal Data interchangeably in this policy.
Sensitive Information: Examples include (non‑exhaustive) racial or ethnic origin; political opinions; religious or philosophical beliefs; trade union membership; sexual orientation or practices; criminal record; health/genetic data; certain biometric data. We generally do not collect Sensitive Information unless necessary, lawful, and with appropriate safeguards.
## Data We Collect
We collect data depending on how you interact with us. Common items include:
* Identity \& contacts: name, employer and role/title, email address(es), phone number(s).
* Purchase \& support: billing/shipping details, product/license details, logs and usage info for troubleshooting.
* Preferences: newsletter opt‑in, delivery confirmations and statistics.
We do not knowingly collect Personal Information from individuals under 18. If we become aware that we hold information about a minor, we will delete it.
## Information Collected Through Interactions
Browsing our website: We log technical data (e.g., IP address, browser, date/time) and use analytics (e.g., Google Analytics).
Making enquiries: If you contact us, we collect information relevant to the enquiry and any details you provide.
Purchasing from us: We collect billing/shipping details and product/license information.
Support via our portal: We may collect usage information, system information, and logs necessary to diagnose issues.
Subscriptions: We store preferences, opt‑in consent, and tracking for statistics.
Use of our applications: Our cloud apps store only meta/config data with anonymised user IDs and write back to your Atlassian Cloud tenancy.
## How We Collect Data
Directly: Where possible, we collect Personal Information from you.
Service Providers and Subprocessors: We may collect Personal Information from Atlassian, service providers, or legitimate promotional activities.
Unsolicited information: If you provide unsolicited Personal Information we could not have collected, we will destroy or de‑identify it as soon as practicable.
Technical information: We periodically gather technical metadata to provide updates, measure usage, and issue security/technical notices.
### Cookies and Tracking Technologies
We also use cookies and similar tracking technologies to collect certain information automatically when you use our website or services.
#### What Are Cookies?
Cookies are small text files placed on your device when you visit our websites or use our applications. They help us remember your preferences, improve your experience, and analyze how our services are used. Cookies may be set by us ("first-party cookies") or by third parties ("third-party cookies") such as analytics providers or advertising partners.
#### Types of Cookies We Use
We use the following categories of cookies:
* Strictly Necessary Cookies: Essential for the operation of our website and services (e.g., to enable logins, secure areas, or shopping carts). These cannot be switched off in our systems.
* Performance/Analytics Cookies: Help us understand how visitors interact with our website by collecting and reporting information anonymously (e.g., Google Analytics).
* Functionality Cookies: Allow us to remember your preferences (such as language or region) and provide enhanced, more personalized features.
* Targeting/Advertising Cookies: Used by us or third parties to deliver relevant advertising and track the effectiveness of our marketing campaigns.
#### Third-Party Cookies
Some cookies are set by third-party services that appear on our pages, such as analytics providers (e.g., Google Analytics), advertising networks, or embedded content. These third parties may use cookies to collect information about your online activities across different websites. We do not control these cookies; please refer to the third parties' privacy and cookie policies for more information.
#### Legal Basis for Using Cookies
Strictly necessary cookies are used based on our legitimate interest in providing a secure and functional website.
All other cookies (analytics, functionality, advertising) are only used with your explicit consent, in line with GDPR requirements.
#### Cookie Consent and Control
When you first visit our website, you will see a cookie banner or pop-up requesting your consent for non-essential cookies. You can accept or reject different categories of cookies, except those strictly necessary for the site to function.
You can change or withdraw your consent at any time by accessing our \[Cookie Preferences Center\] or adjusting your browser settings. Instructions for managing cookies in your browser can be found at [http://www.allaboutcookies.org](http://www.allaboutcookies.org/).
#### How to Manage Cookies
Browser Settings: Most browsers allow you to refuse or delete cookies. Please note that disabling cookies may affect the functionality of our website.
Cookie Preferences Center: You can update your cookie preferences at any time via the link in our website footer or cookie banner.
#### Contact Us
If you have any questions about our use of cookies or this policy, please contact us at [privacy@togetha.io](mailto:privacy@togetha.io).
## Children's Privacy
Our Products and Services are not directed to children under 18. We do not knowingly collect Personal Information from children under 18. If we become aware of such collection, we will delete the information within 30 days of being aware. We are committed to complying with the Australian Children's Online Privacy Code.
## How We Use Data
Operate and improve services (identity verification, delivery, reliability, preferences, fraud prevention, compliance, updates, communications, support).
We may use technical data to the extent necessary to support or improve our Products/Services.
### Legal Basis for Processing Personal Data
Under the General Data Protection Regulation (GDPR), we are required to inform you of the legal grounds on which we process your personal data. Depending on the specific purpose and context, we rely on different legal bases as set out in Article 6 of the GDPR. The table below outlines the main categories of personal data we process, the purposes for which we use them, and the corresponding legal basis. In some cases, more than one legal basis may apply depending on the nature of your interaction with us.
|-----------------------------------|--------------------------------------------------------------------------------------------------------------------------------------------------------------------------------------------|------------------------------------------------------------------------------------------------|
| **Data Category** | **Purpose of Processing** | **Legal Basis (GDPR Art. 6)** |
| Account Information | Creating and managing user/customer accounts for Togetha apps and services | Contract (Art. 6(1)(b)) |
| Contact Details | Communicating with clients, project stakeholders, and support users | Contract (Art. 6(1)(b)); Consent (Art. 6(1)(a)) for marketing |
| Billing \& Payment Data | Invoicing, payment processing, and financial record-keeping | Contract (Art. 6(1)(b)); Legal Obligation (Art. 6(1)(c)) |
| Project \& Usage | Delivering project management, configuration, analytics, and reporting services; improving service quality | Contract (Art. 6(1)(b)); Legitimate Interests (Art. 6(1)(f)) |
| Marketing Preferences | Sending newsletters, product updates, and event invitations | Consent (Art. 6(1)(a)) |
| Technical Data (e.g., IP, device) | Security, troubleshooting, fraud prevention, and compliance | Legitimate Interests (Art. 6(1)(f)) |
| Marketing Preferences | Sending newsletters and updates | Consent (Art. 6(1)(a)) |
| Support Requests | Providing customer and technical support | Contract (Art. 6(1)(b)) |
| Cookies \& Tracking | Analytics, personalisation, advertising | Consent (Art. 6(1)(a)), except strictly necessary cookies (Legitimate Interests, Art. 6(1)(f)) |
| Legal/Compliance Data | Fulfilling legal and regulatory obligations | Legal Obligation (Art. 6(1)(c)) |
| Subprocessor Data | Engaging cloud providers (e.g., Atlassian, Microsoft, AWS) to deliver services | Contract (Art. 6(1)(b)); Legitimate Interests (Art. 6(1)(f)) |
| Service Provider Data Access | Allowing third-party service providers (e.g., marketing consultants, IT support, cloud vendors) to access and process personal data as necessary to deliver contracted services to clients | Contract (Art. 6(1)(b)); Legitimate Interests (Art. 6(1)(f)) |
### Automated Decision-Making
We do not use automated decision-making (including profiling) that produces legal or similarly significant effects on individuals, unless required or permitted by law and with appropriate safeguards. If such processes are introduced, we will provide clear information about the logic involved, the significance and consequences, and your rights to request human intervention, express your view, or contest the decision.
### Direct Marketing Communications
We send marketing where you have consented. You can unsubscribe at any time.
If you receive a message purporting to be from us without signing up, treat it with caution and notify us.
### Service Providers and Subprocessors
We may disclose your data to:
* Related companies within our corporate group
* Service providers who assist us in operating our business and delivering our products and services (for example, marketing agencies, delivery companies, consultants, IT support, and professional advisers)
* Potential purchasers in connection with a sale or proposed sale of our business;
* Legally Authorised organisations or parties you authorise;
* Others as required or permitted by law (such as regulatory authorities or to comply with legal obligations).
* Subprocessors (including cloud service providers such as Atlassian, AWS, and others) who process personal data on our behalf as part of delivering our products or services. These subprocessors are contractually required to implement appropriate data protection measures, either through our agreements or their own published Data Processing Addenda (DPAs). For more information and a current list of our subprocessors and their DPAs, visit .
We include suitable privacy and confidentiality clauses in our agreements with service providers and subprocessors where practicable.
Service providers may access or handle personal information only as necessary to perform their contracted functions and are required to protect such information in accordance with our privacy requirements
All subprocessors are contractually required to implement appropriate data protection measures, either through our agreements or their own published Data Processing Addenda (DPAs). DPAs are available in [https://trust.togetha.io](https://trust.togetha.io/).
## Cross‑Border Transfer of Data
Using our Products/Services may involve international transfers of Personal Information.
We share Personal Information globally (Asia‑Pacific, Europe, North America, other locations) and implement measures to ensure compliance with applicable privacy laws.
Personal Information may be handled and stored by service providers in the United States, Australia, EU countries, Asia‑Pacific, and other jurisdictions where service providers or we operate.
Compliance statement: We comply with applicable privacy laws; if local laws grant additional rights, we honor them.
## Data Protection in Different Regions
Australia (Australian Customers): EU laws are substantially similar to the Privacy Act/APPs. Other regions may not be equivalent; we use contractual safeguards. Non‑Australian recipients may not be subject to the Privacy Act/APPs; enforcement options may differ.
EU/UK Customers: We may transfer Personal Data outside the EEA/UK relying on EU SCCs (EU 2021/915) and the UK Addendum. Request redacted copies at [privacy@togetha.io](mailto:privacy@togetha.io).
## How We Protect Your Data
We implement reasonable measures to protect your Data. Trust Centre: .
We will notify you of security breaches as soon as reasonably practicable.
Online transmissions cannot be guaranteed secure; exercise care and notify us of suspected unauthorised activity.
Liability exclusions apply to the maximum extent permitted by law, subject to non‑excludable consumer rights.
## How Long We Keep Your Personal Information
We retain Personal Information only as long as necessary unless longer retention is required by law or reasonably necessary.
## Your Rights
Choosing not to disclose: You may remain anonymous or use a pseudonym for general enquiries.
Access \& correction: Request access/corrections; identity verification may be required; limited exceptions apply.
Right to be forgotten: Request deletion subject to law; we verify identity, assess feasibility, and delete where approved.
GDPR rights (EU/UK): Access, rectification, erasure, restriction, objection, portability; response within one month. Contact [privacy@togetha.io](mailto:privacy@togetha.io)
We may refuse to delete due to legal obligations (eg. Australian Tax Office requirement).
## Questions or Complaints
Data Processing Officer: Brian Hill, brian.hill@togetha.group, +61 2 6190 1554
Unsubscribe or contact [privacy@togetha.io](mailto:privacy@togetha.io)
Supervisory Authorities:
**Australia --- OAIC** : GPO Box 5218, Sydney NSW 2001; 1300 363 992; [enquiries@oaic.gov.au](mailto:enquiries@oaic.gov.au)
**United Kingdom --- ICO:** Wycliffe House, Wilmslow, Cheshire SK9 5AF; +44 1625 545 700; [icocasework@ico.org.uk](mailto:icocasework@ico.org.uk)
**European Union** --- Contact your Member State authority.
**United States** --- Contact the relevant state authority.
## Updates to This Privacy Policy
We may update this Privacy Policy from time to time to reflect changes in our practices or for other operational, legal, or regulatory reasons. When we make changes, we will post the updated policy on this page and update the "Last updated" date at the top of the policy. We encourage you to review this Privacy Policy periodically to stay informed about how we protect your information.
If you have any questions about changes to this policy, please contact us at [privacy@togetha.io](mailto:privacy@togetha.io).
## Definitions
**Contractors:** Freelance contractor, a very small business, engaged by Togetha to perform specific tasks or projects as part of our delivery team. Contractors are not employees, but work under a contract for services, often on a temporary or project basis.
**Personal Information / Personal Data:** As defined by applicable law.
**Data Subject:** The individual the Personal Information relates.
**Service Provider:** An external organisation engaged by Togetha to deliver a specific set of services, often as part of their regular business operations. Service providers usually operate as independent businesses with their own staff, processes, and infrastructure.
**Subprocessor:** A type of service provider that processes personal data on our behalf as part of delivering our products or services. Subprocessors include cloud service providers (such as Atlassian, AWS, and others) and other organisations who process, store, or transmit personal data for us. Data Processing Agreements are available at [https://trust.togetha.io](https://trust.togetha.io/).
**Related Companies:** Is any company that is partially owned by Togetha Group Holdings Pty Ltd.
---
language: "en"
---
# Required permissions
To generate documents automatically and attach them to your Jira issues, the app requires certain permissions. Here is a simplified explanation of why each set of permissions is needed:
## 📂 Reading Issue and Field Data
* **Scopes:** `read:jira-work`, `read:user:jira`, `read:jira-user`
* **Purpose:** To fill out your templates, the app needs to read information from your Jira issues, such as the Summary, Description, and any custom fields you have set up. It also needs to see who is assigned to an issue or who reported it so that their names can appear correctly in your generated documents.
### 📎 Attaching Documents
* **Scopes:** `write:attachment:jira`, `read:attachment:jira`, `write:jira-work`
* **Purpose:** The primary function of the app is to create a document and save it back to your Jira issue. These permissions allow the app to upload the final `.docx` or `.pdf` files directly to the relevant issue for your team to access.
#### 📝 Support for JSM Forms
* **Scope:** `read:servicedesk-request`
* **Purpose:** If you use Jira Service Management (JSM), this app can extract data from the forms your customers fill out. This permission allows the app to "see" those form answers so it can include them in your document templates.
#### 💾 Template Storage
* **Scope:** `storage:app`
* **Purpose:** The app needs its own "filing cabinet" within the Atlassian cloud to store the `.docx` templates you upload in the admin settings. This ensures your templates are always available whenever an automation is triggered.
#### ⚙️ App Security and Identity
* **Scopes:** `read:app-user-token`, `read:app-system-token`, `report:personal-data`, `read:avatar:jira`
* **Purpose:** These are technical requirements that allow the app to securely identify itself and act on your behalf within Atlassian's security guidelines. They ensure that all document generation is performed safely and follows your site's privacy rules.
---
language: "en"
---
# Required permissions for Togetha Feedback in Jira
Togetha Feedback in Jira requests the following permissions when you install it. Each scope is justified below.
## Forge scopes
| Scope | Why we need it |
|-----------------------------|----------------------------------------------------------------------------------------------------------------------------------------------------------------|
| `storage:app` | Persisting forms, fields, mappings, and submissions in the app's managed Forge SQL database. No data leaves Atlassian Cloud. |
| `read:jira-work` | Reading the Jira space list and work item type / field metadata when configuring form mappings, and resolving linked work items shown in the submissions list. |
| `write:jira-work` | Creating Jira work items from accepted submissions when the form is mapped to a Jira space. |
| `read:jira-user` | Resolving the current user (display name) and looking up Jira groups for the Admin Group picker. |
| `manage:jira-configuration` | Listing custom fields available on issue types so the field-mapping table can offer them. |
These scopes are fixed in the app's manifest and apply to every install.
## Jira-admin vs Feedback-admin
Two admin tiers are recognised:
* **Jira site administrators** always have admin access to Togetha Feedback, irrespective of any group configuration. This guarantees that even a misconfigured Admin Group can be recovered.
* **Feedback admins** , any user who is a member of one of the Jira groups configured in the **Admin Groups** setting (see [Initial configuration](https://docs.togetha.software/docs/initial-configuration.md)).
Non-admin users only see what's explicitly available to them: the Submit tab on the Feedback page and any forms whose visibility includes their groups.
## Group-restricted forms
A form can be restricted to specific Jira groups. When restricted:
* The form does **not** appear in the Submit tab's form list for users outside the configured groups.
* Direct submission attempts (e.g. via a saved deep link) are refused server-side. Group membership is checked at submit time, not just at list time.
* Group membership for the current user is read at request time using `read:jira-user`.
## Anonymous submissions
When a form is flagged as **Allow anonymous submissions**:
* The submitter's `accountId` is **not** stored against the submission.
* Admins reviewing the submission see no link to the submitter.
* The submission timestamp and field values are stored normally, only the identity attribution is suppressed.
Anonymous mode does not change network or storage behaviour: submissions still travel through Atlassian's servers and are stored in the Forge SQL database.
---
language: "en"
---
# Resources
## Trust and Licenses
* [License Agreement](https://docs.togetha.software/docs/eula.md)
* [DPA](https://docs.togetha.software/docs/dpa.md)
* [Privacy Policy](https://docs.togetha.software/docs/privacy-policy.md)
* [App Privacy Statements](https://docs.togetha.software/docs/app-privacy-statements.md)
## Documentation
*
---
language: "en"
---
# Reviewing and accepting submissions
Admins review submissions on the **Submissions** tab of the Feedback page (Jira **Apps → Feedback**).
## Submissions tab
The tab lists every submission across every form. Use the columns to identify what's new and the status badge to see what's already been actioned.
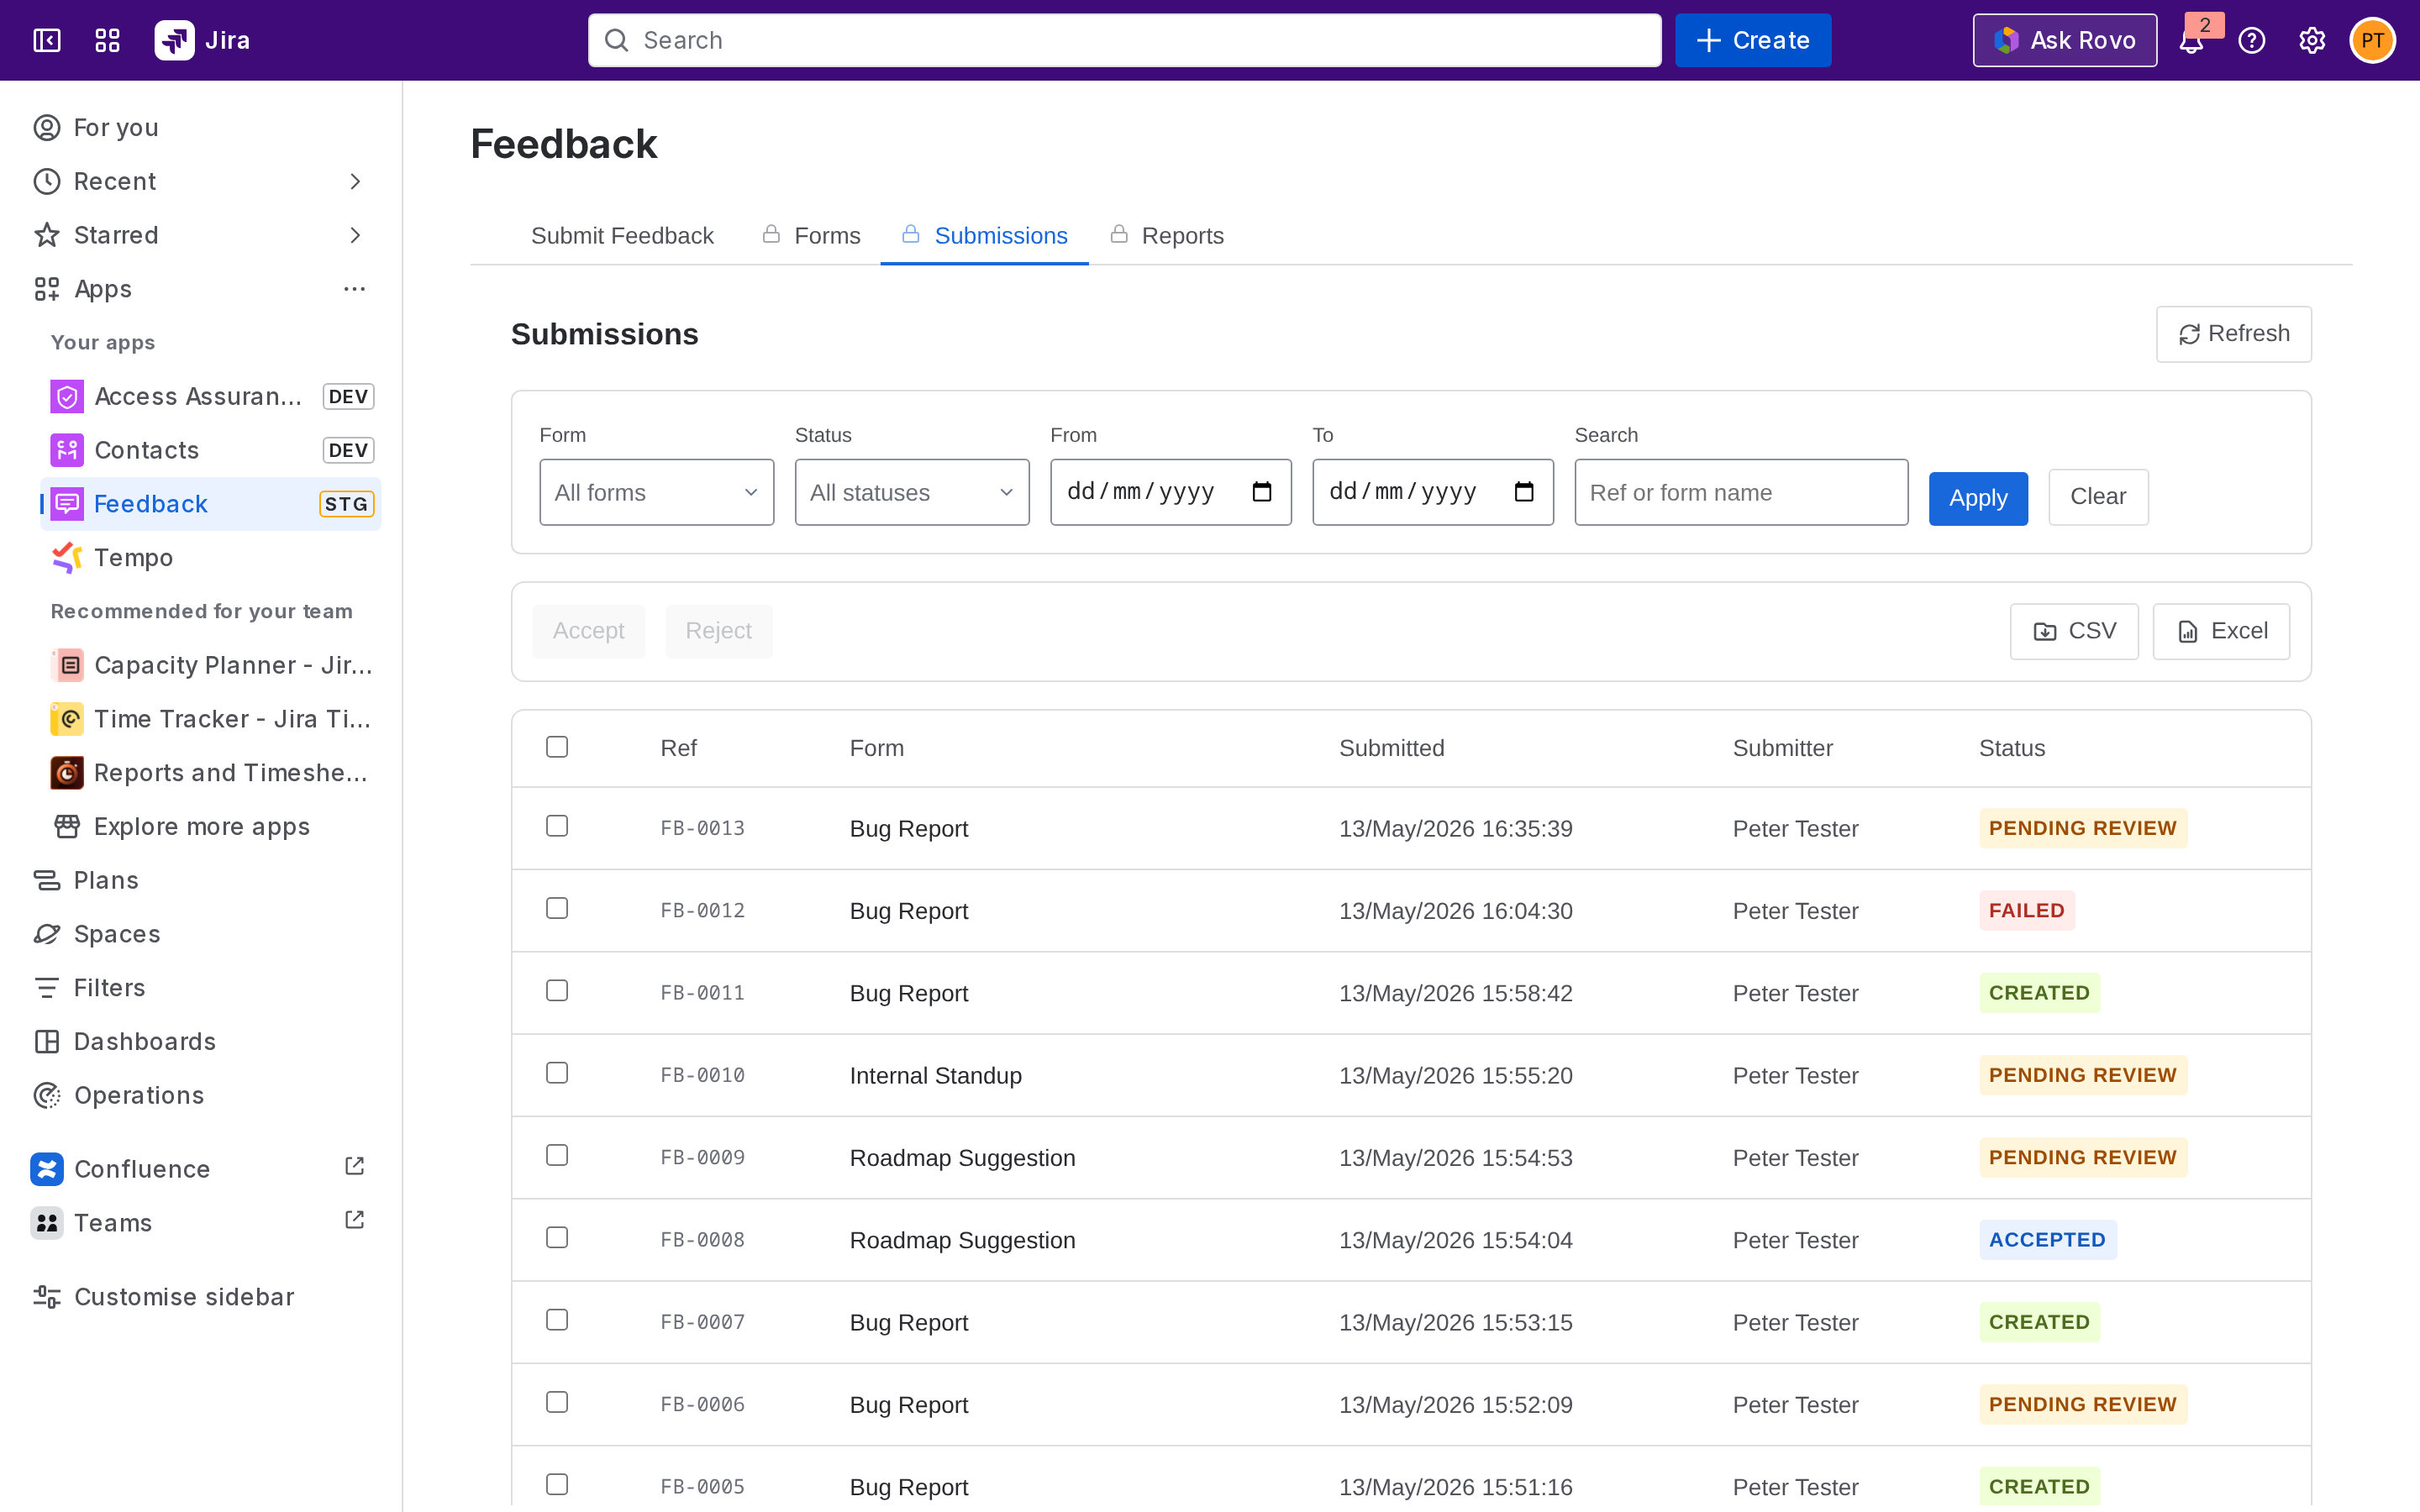
Statuses you'll see:
| Status | Meaning |
|--------------------|---------------------------------------------------------------------|
| **Pending Review** | Newly submitted, awaiting admin action. |
| **Created** | Accepted and a Jira work item was created (mapped forms). |
| **Accepted** | Accepted with no Jira creation (unmapped forms). |
| **Rejected** | Closed by an admin without creating a work item. |
| **Failed** | Acceptance was attempted but Jira creation failed, retry available. |
## Submission detail
Click a row to open the submission detail. You see the form name, submitter, submission timestamp, and every field value.
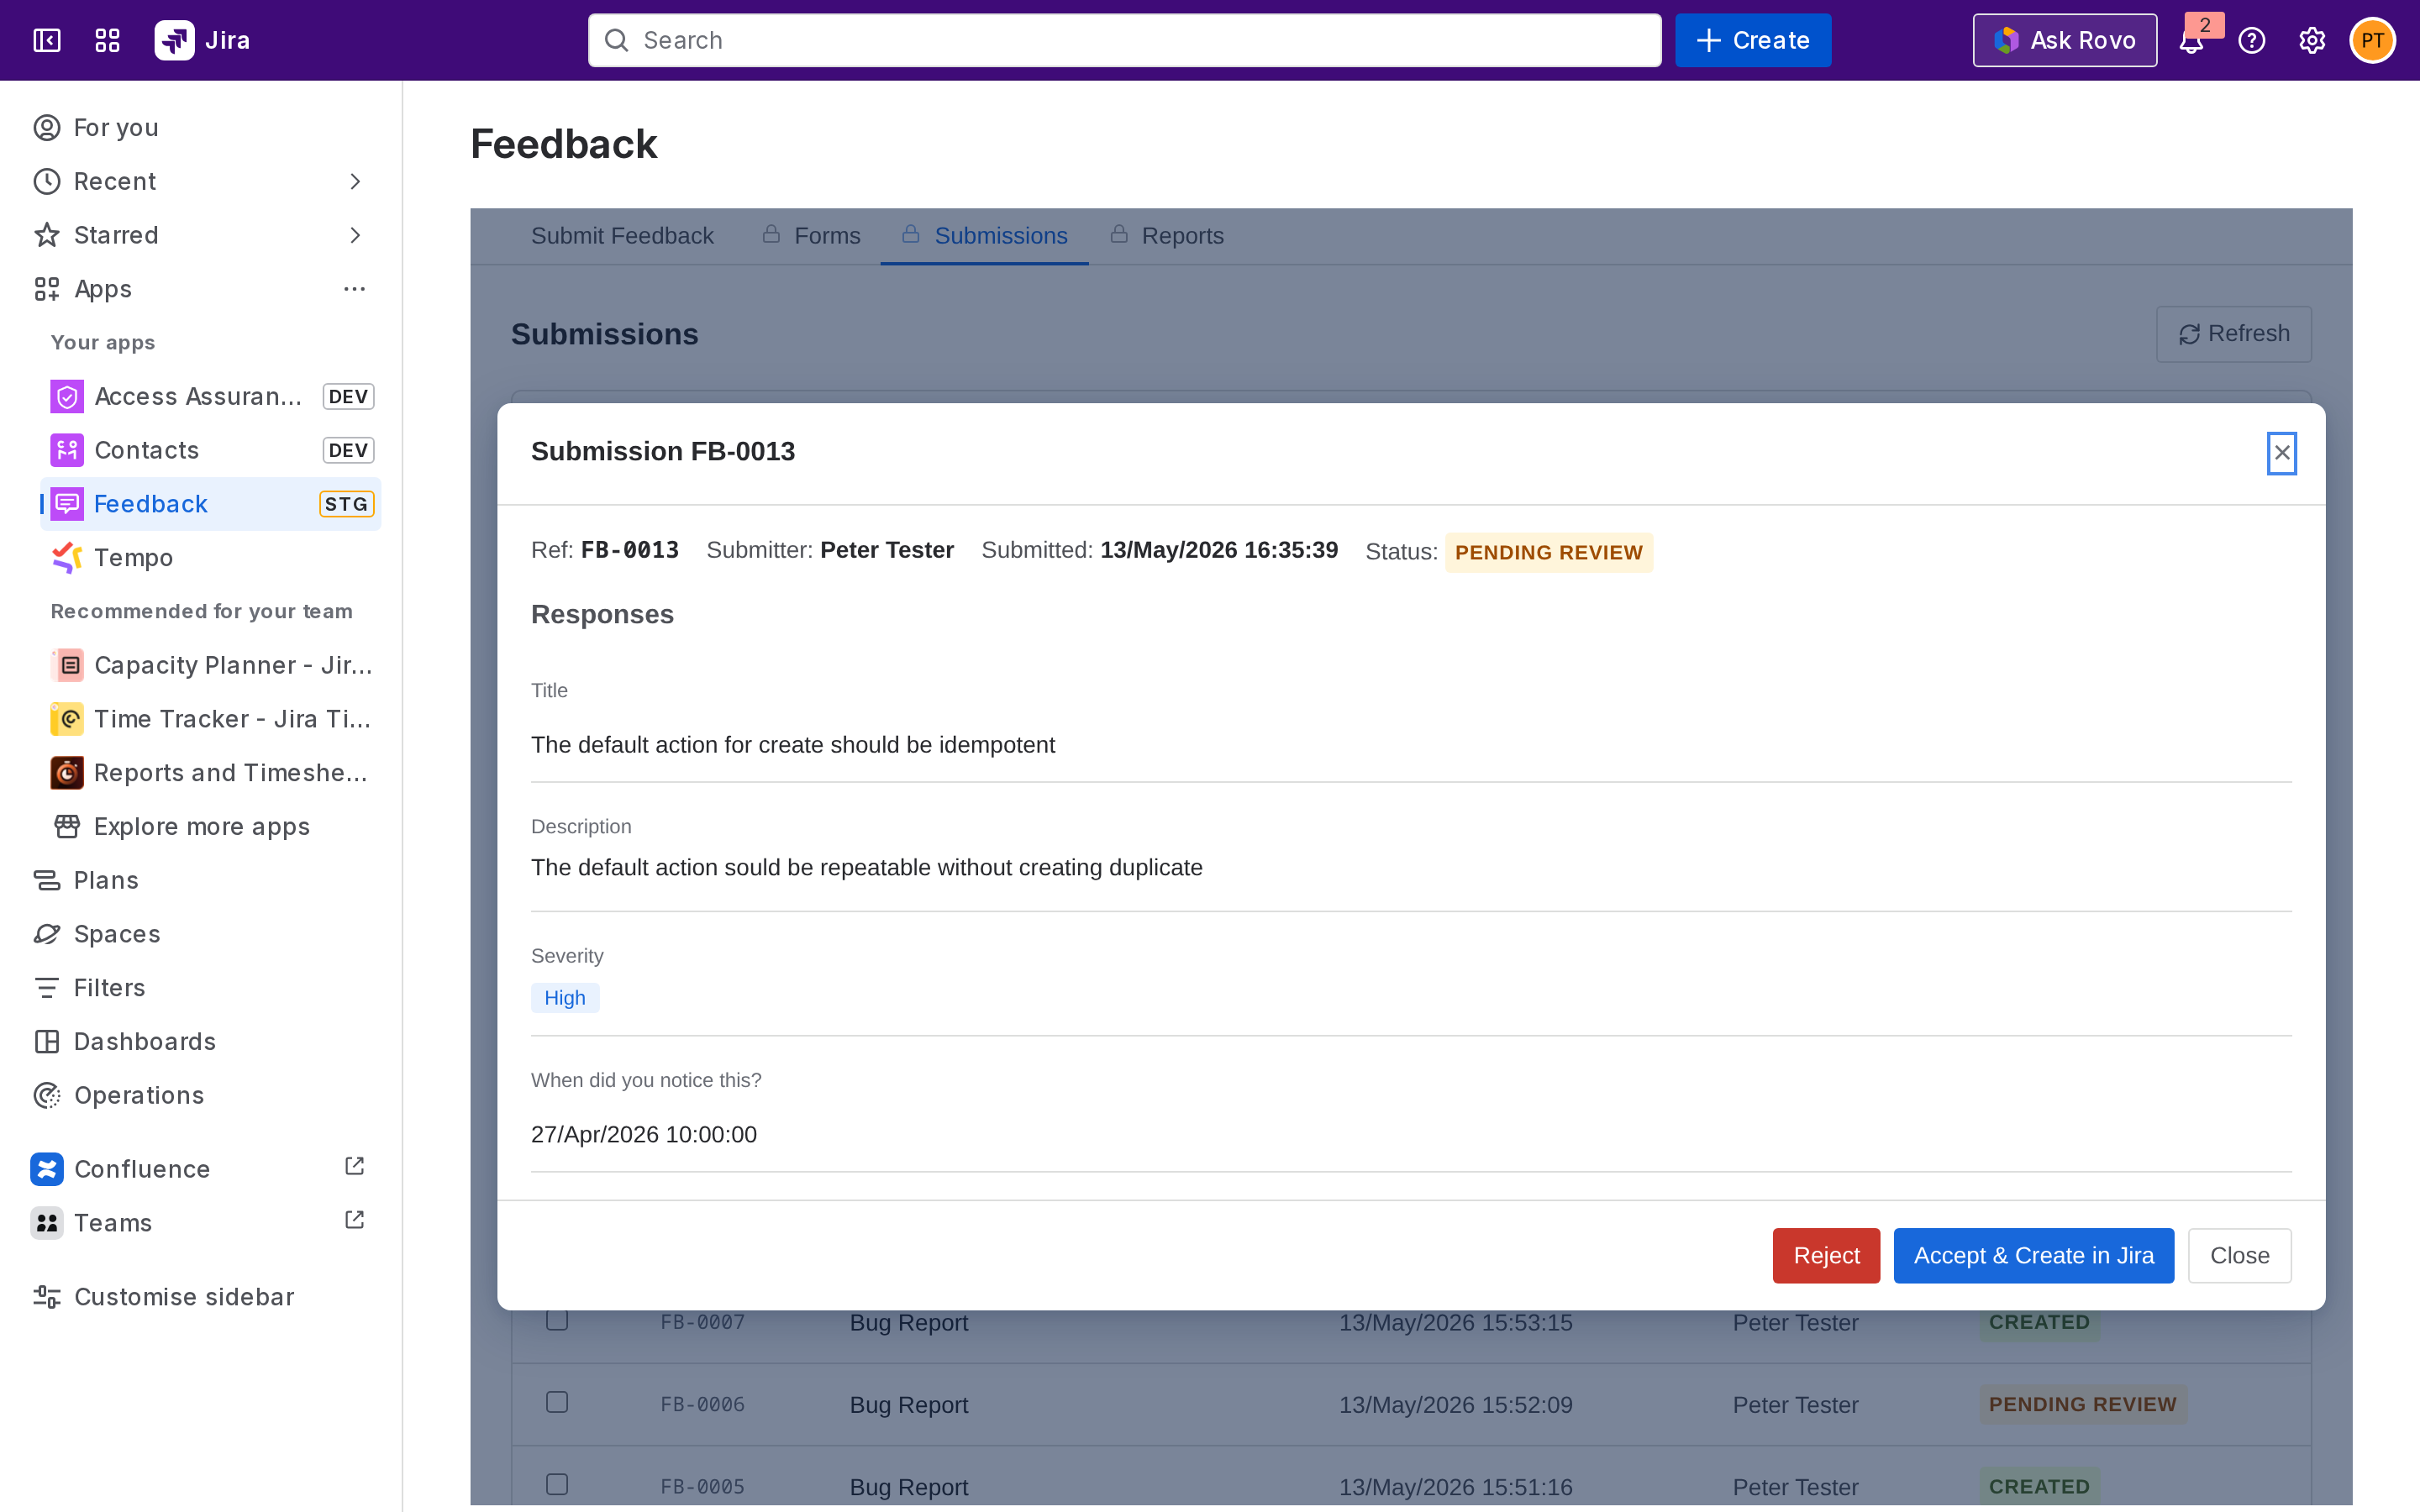
## Actions
The action buttons available depend on the submission's current status and whether the form has a Jira mapping.
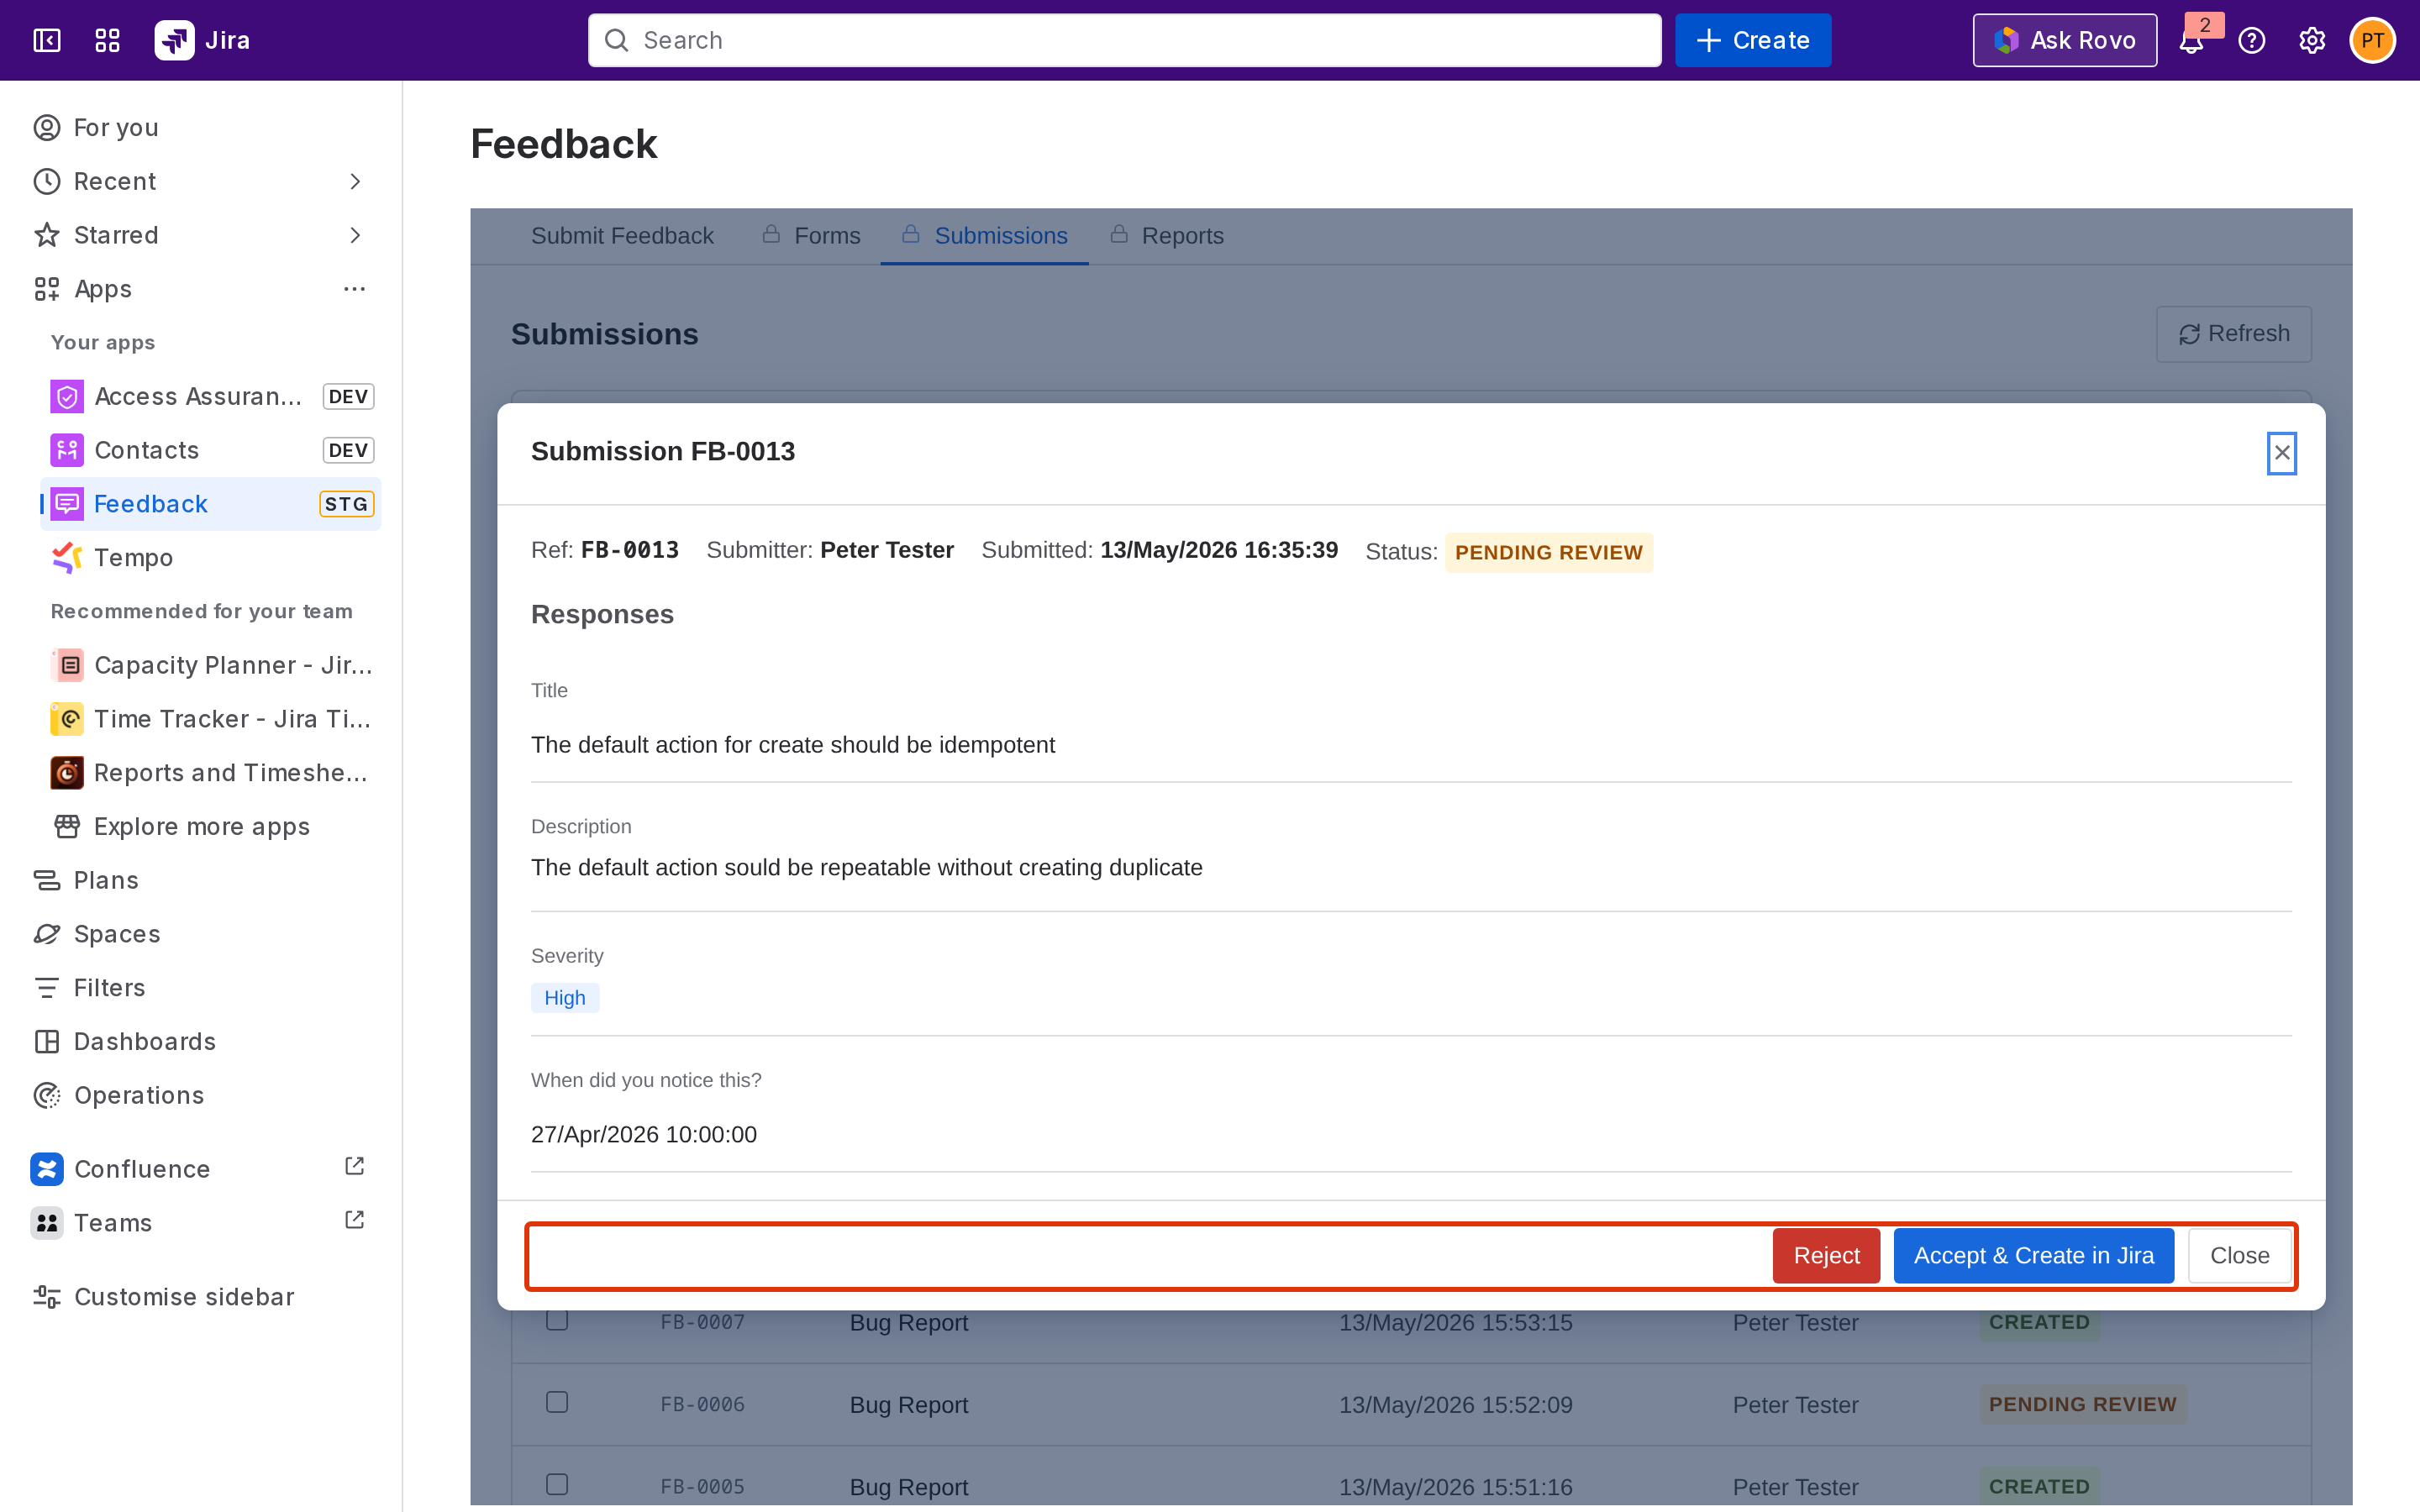
| Button | When it appears | What it does |
|------------------------------|---------------------------------|-----------------------------------------------------------------------------------------------------------------------------------|
| **Accept** | Pending Review, no Jira mapping | Marks the submission accepted. No Jira issue is created. |
| **Accept \& Create in Jira** | Pending Review, form is mapped | Marks accepted **and** creates the Jira work item from the mapping. |
| **Reject** | Pending Review | Prompts for a reason; closes the submission without a Jira issue. |
| **Retry Jira Sync** | Failed | Re-runs Jira creation. Useful when the original failure was transient (e.g. a missing required field that has since been mapped). |
A 60-second rate limit applies to retries, if you click Retry too soon, a *please wait* message appears.
## Filters and bulk actions
Use the filters at the top of the tab to narrow by status, form, or date range. Use the row checkboxes plus **Bulk Accept** / **Bulk Reject** to action multiple submissions at once.
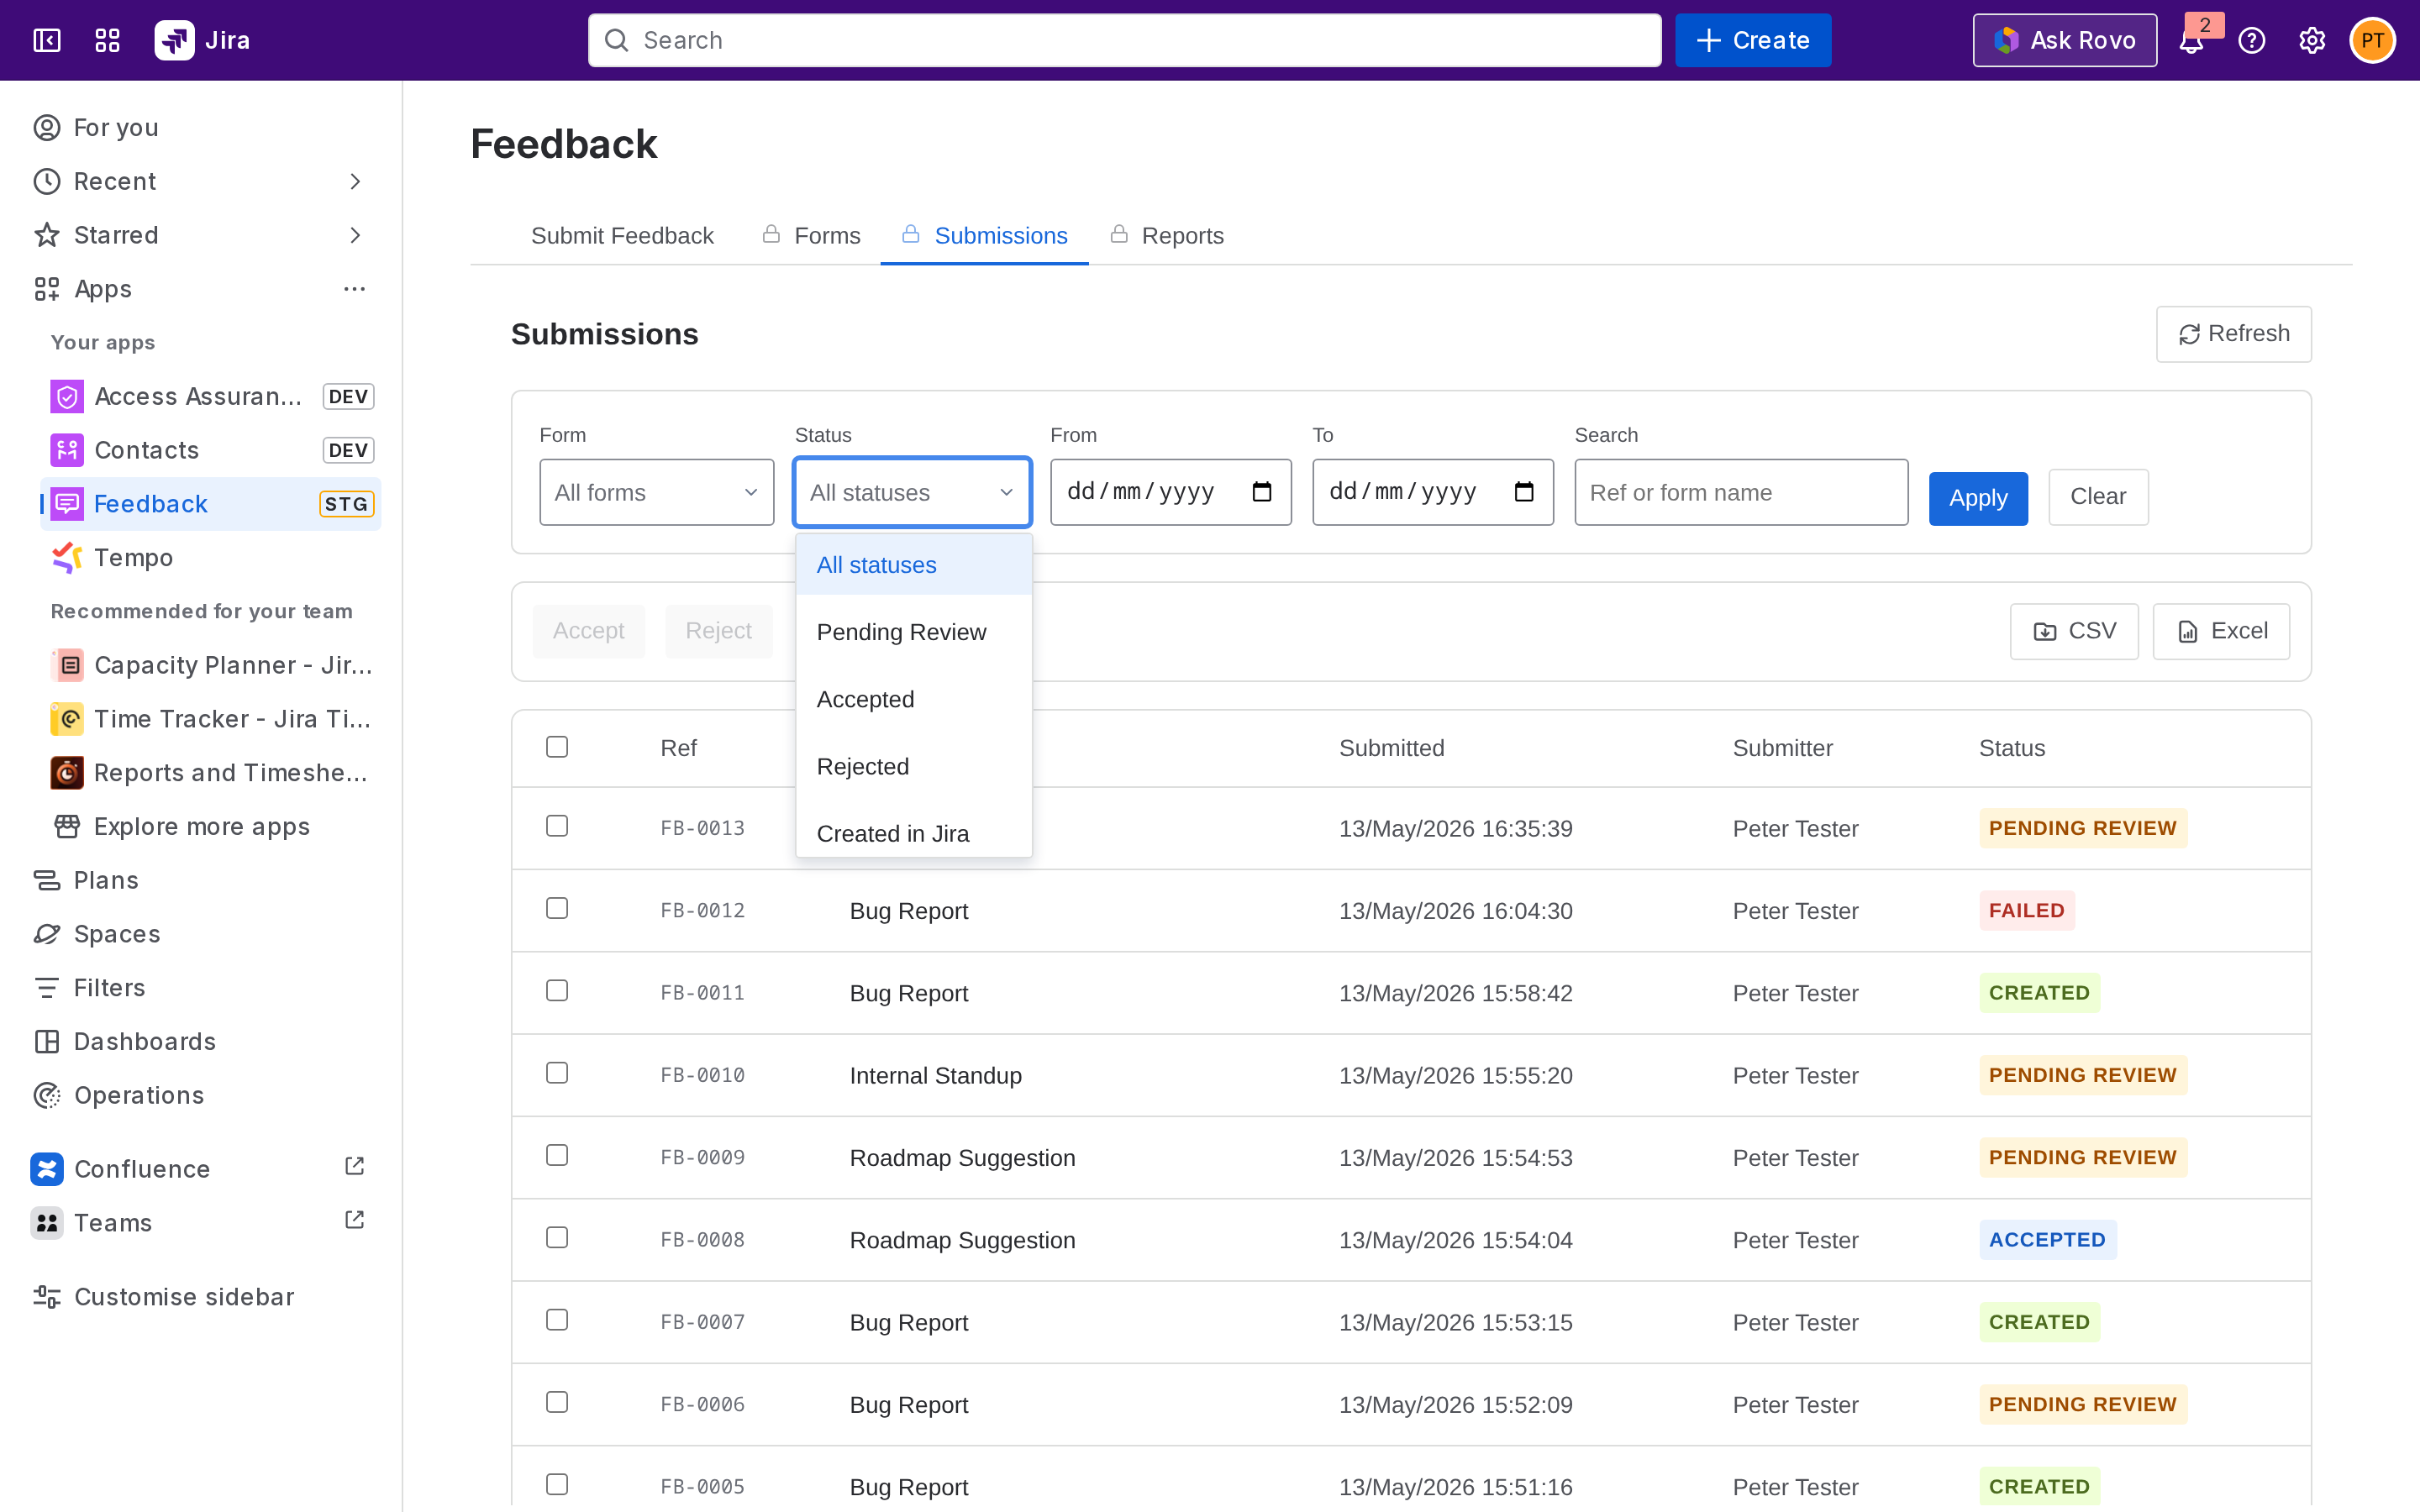
## After acceptance
When acceptance creates a Jira issue, the submission detail shows a direct link to the new work item. Click it to open the issue in Jira.
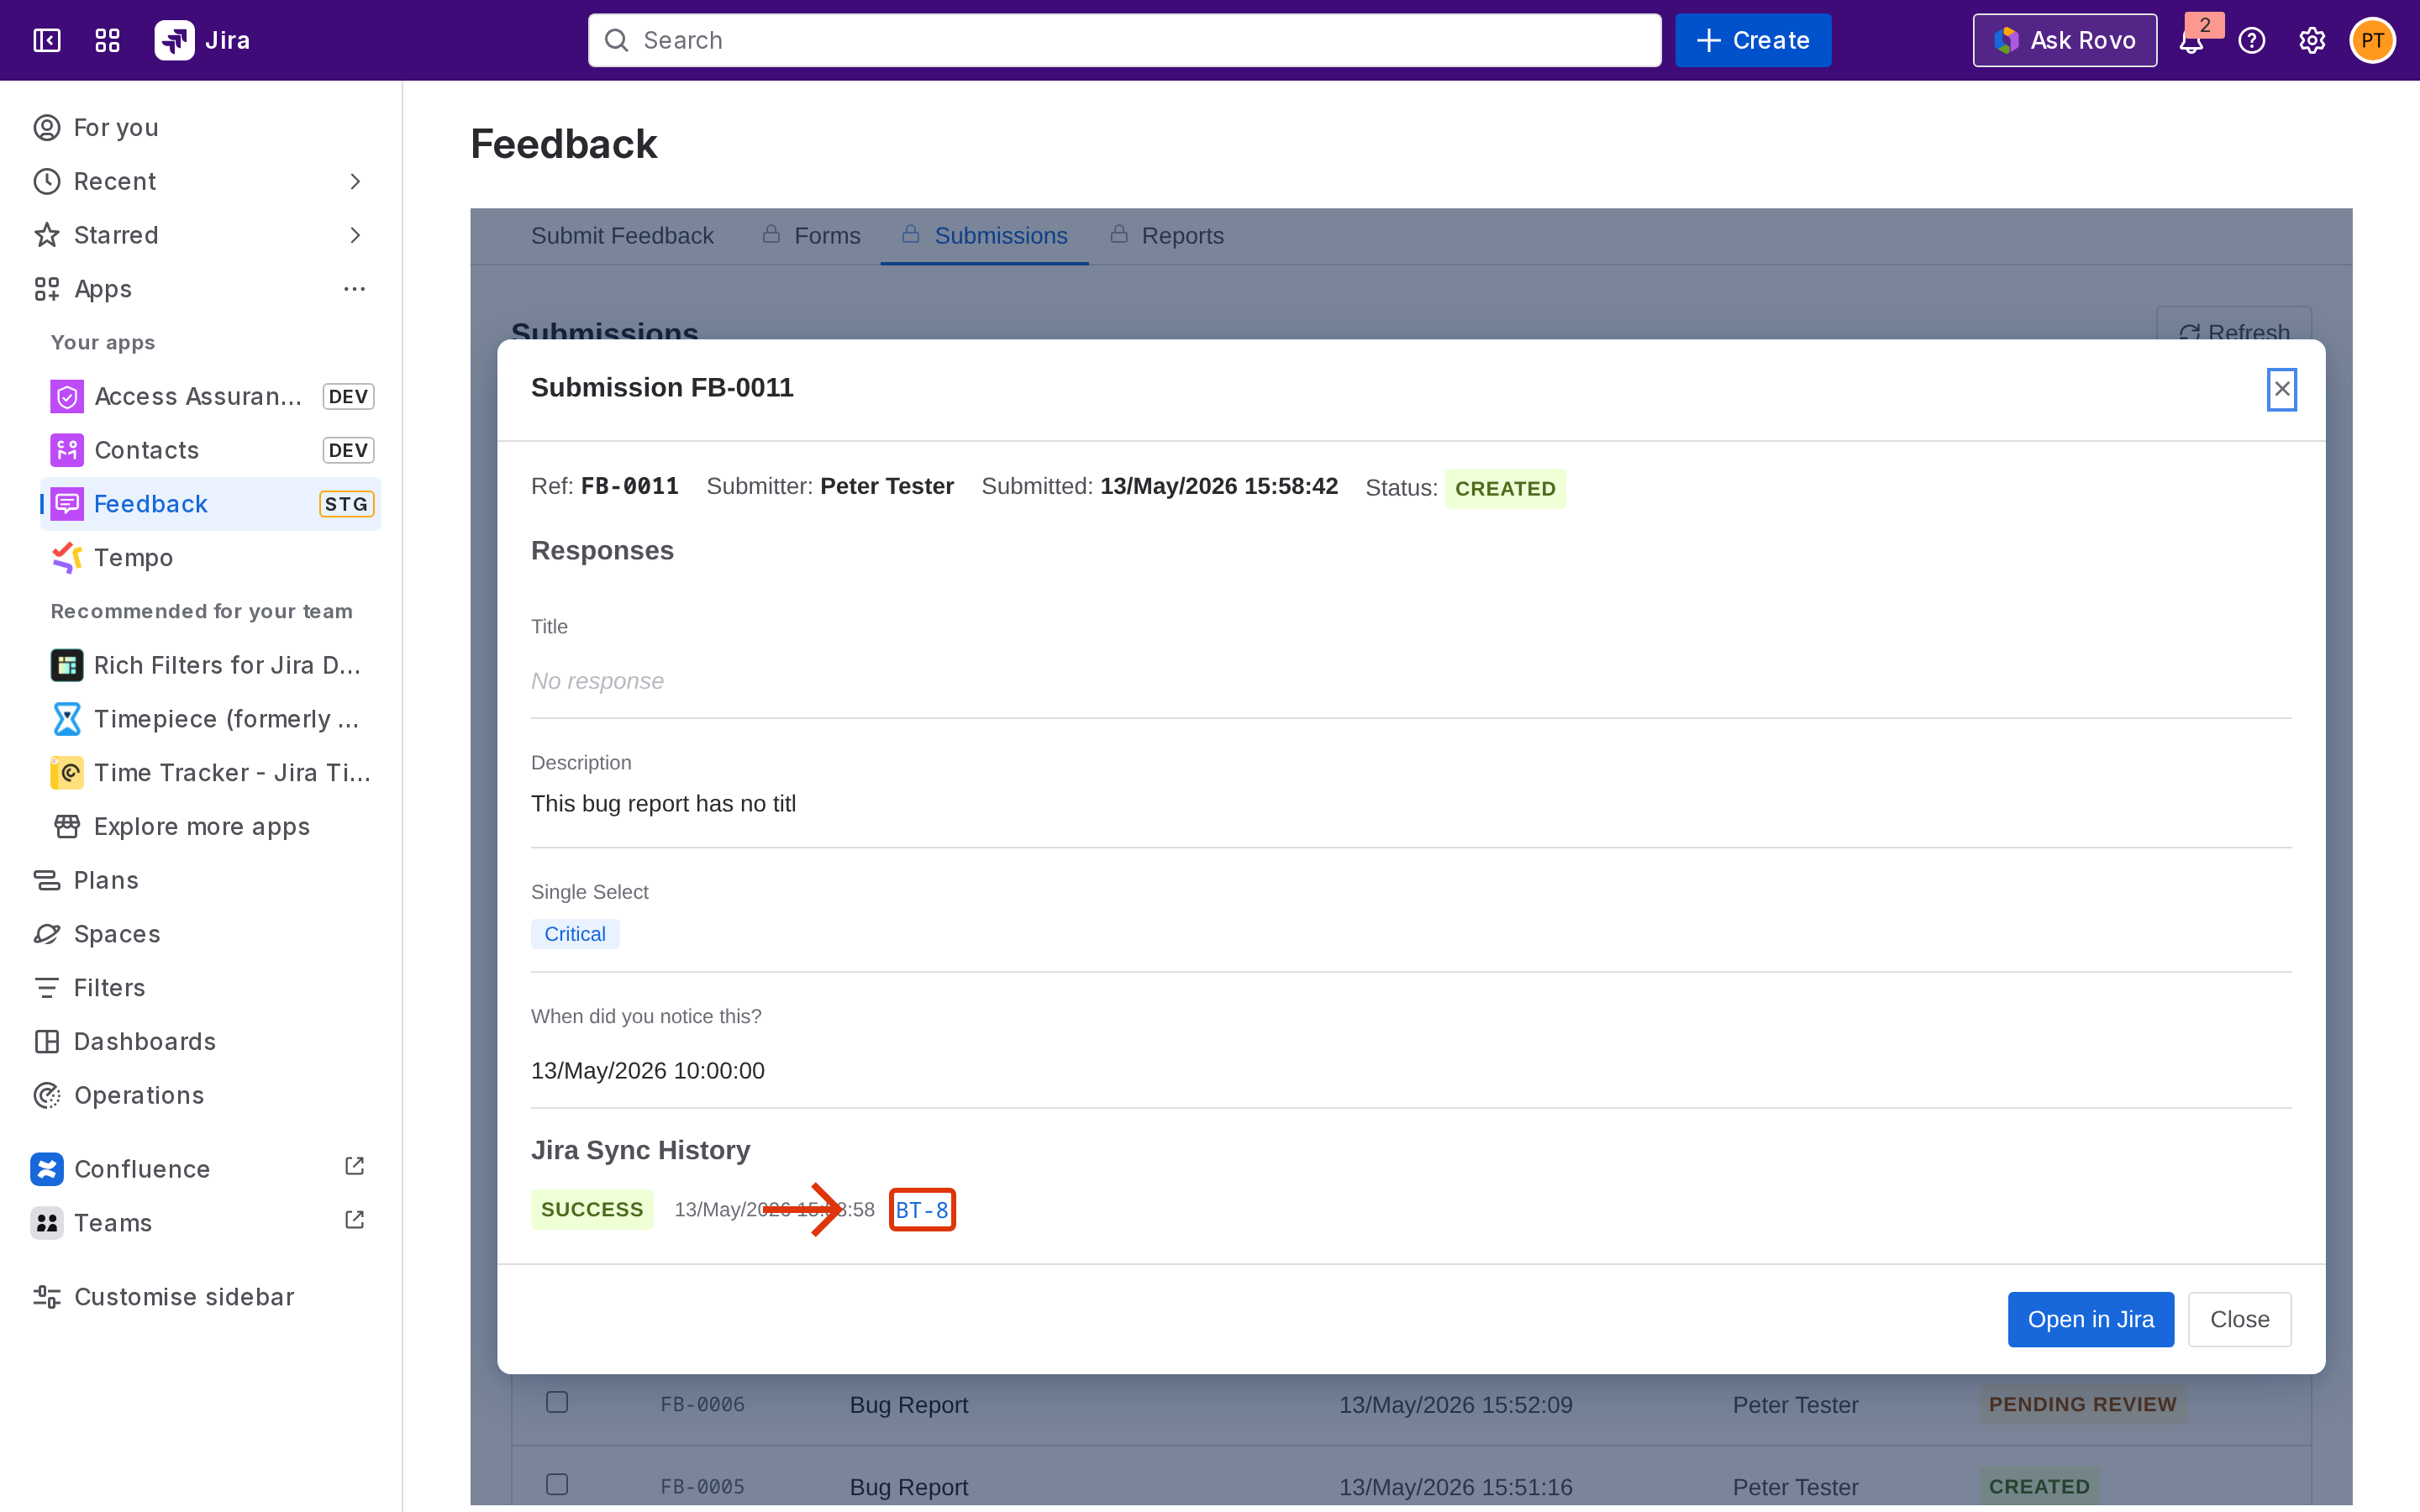
## Next step
[Viewing reports](https://docs.togetha.software/docs/viewing-reports.md) - see counts and export submission data.
---
language: "en"
---
# Submitting feedback (for users)
End users have two entry points to submit feedback: the Feedback page inside Jira, and (when JSM is in use) the Help Center subheader.
## From the Feedback page
1. From the Jira top navigation, open **Apps → Feedback**.
2. On the **Submit** tab, choose a form from the list.
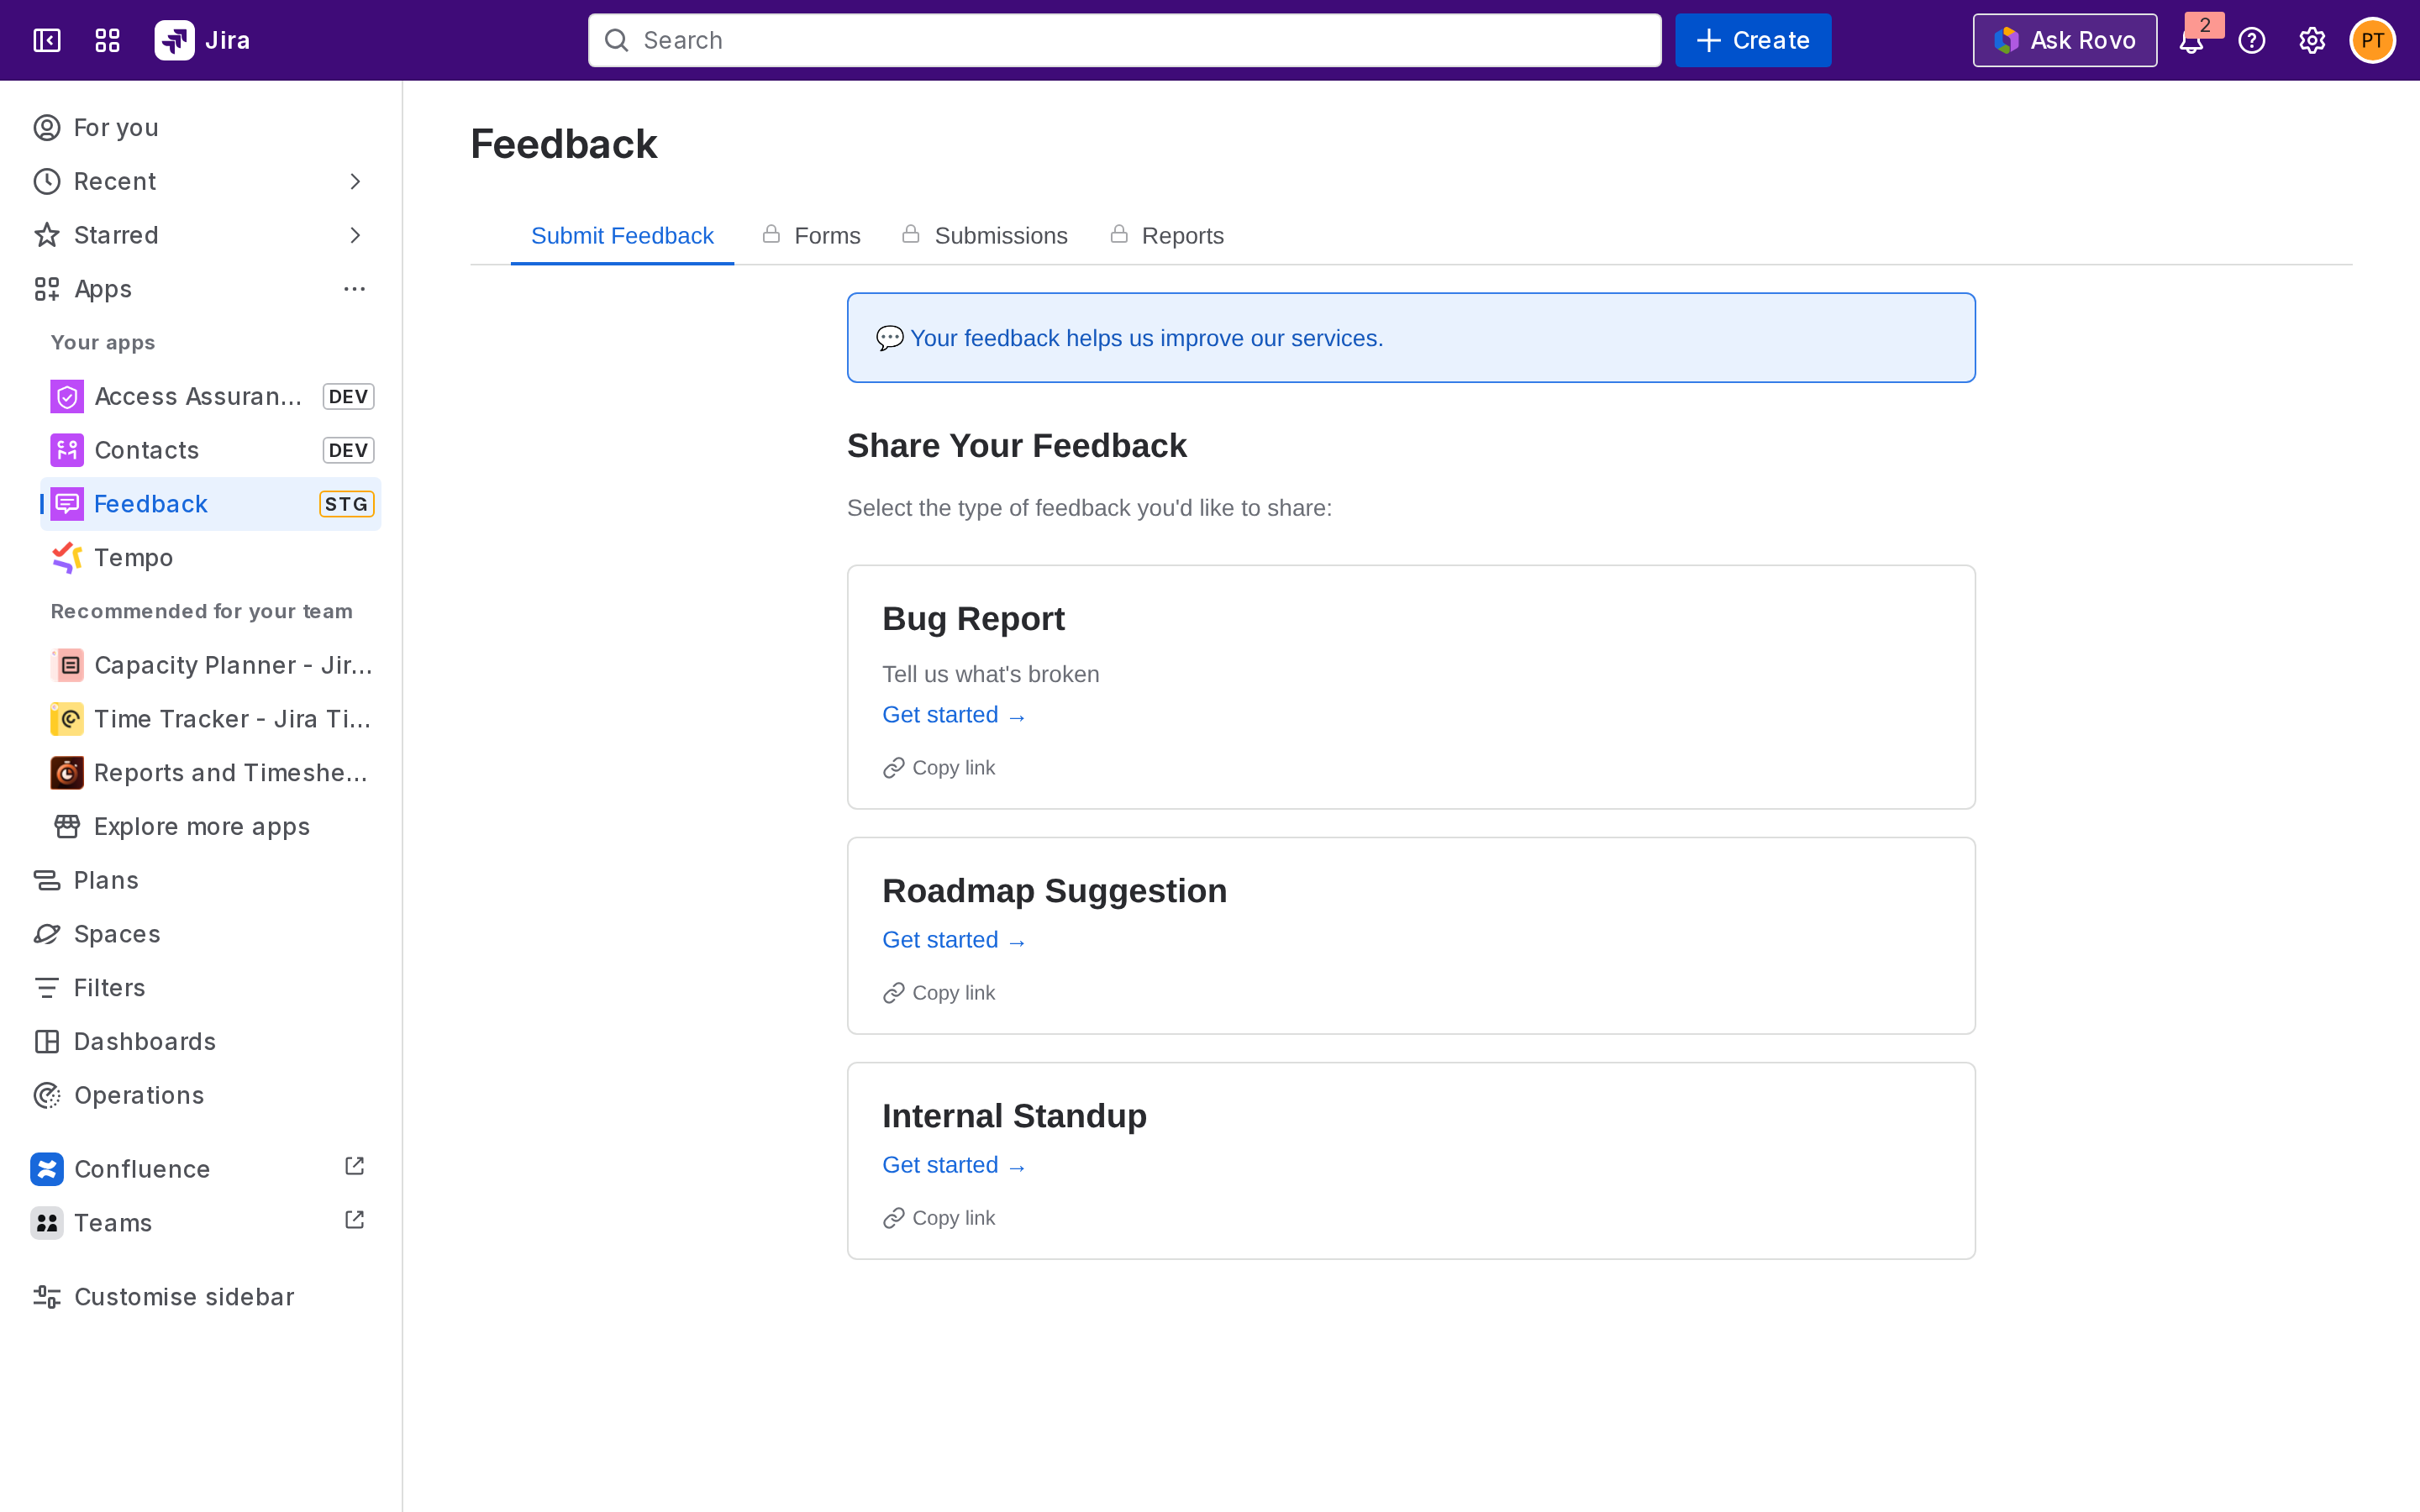
1. Fill in the fields and click **Submit**.
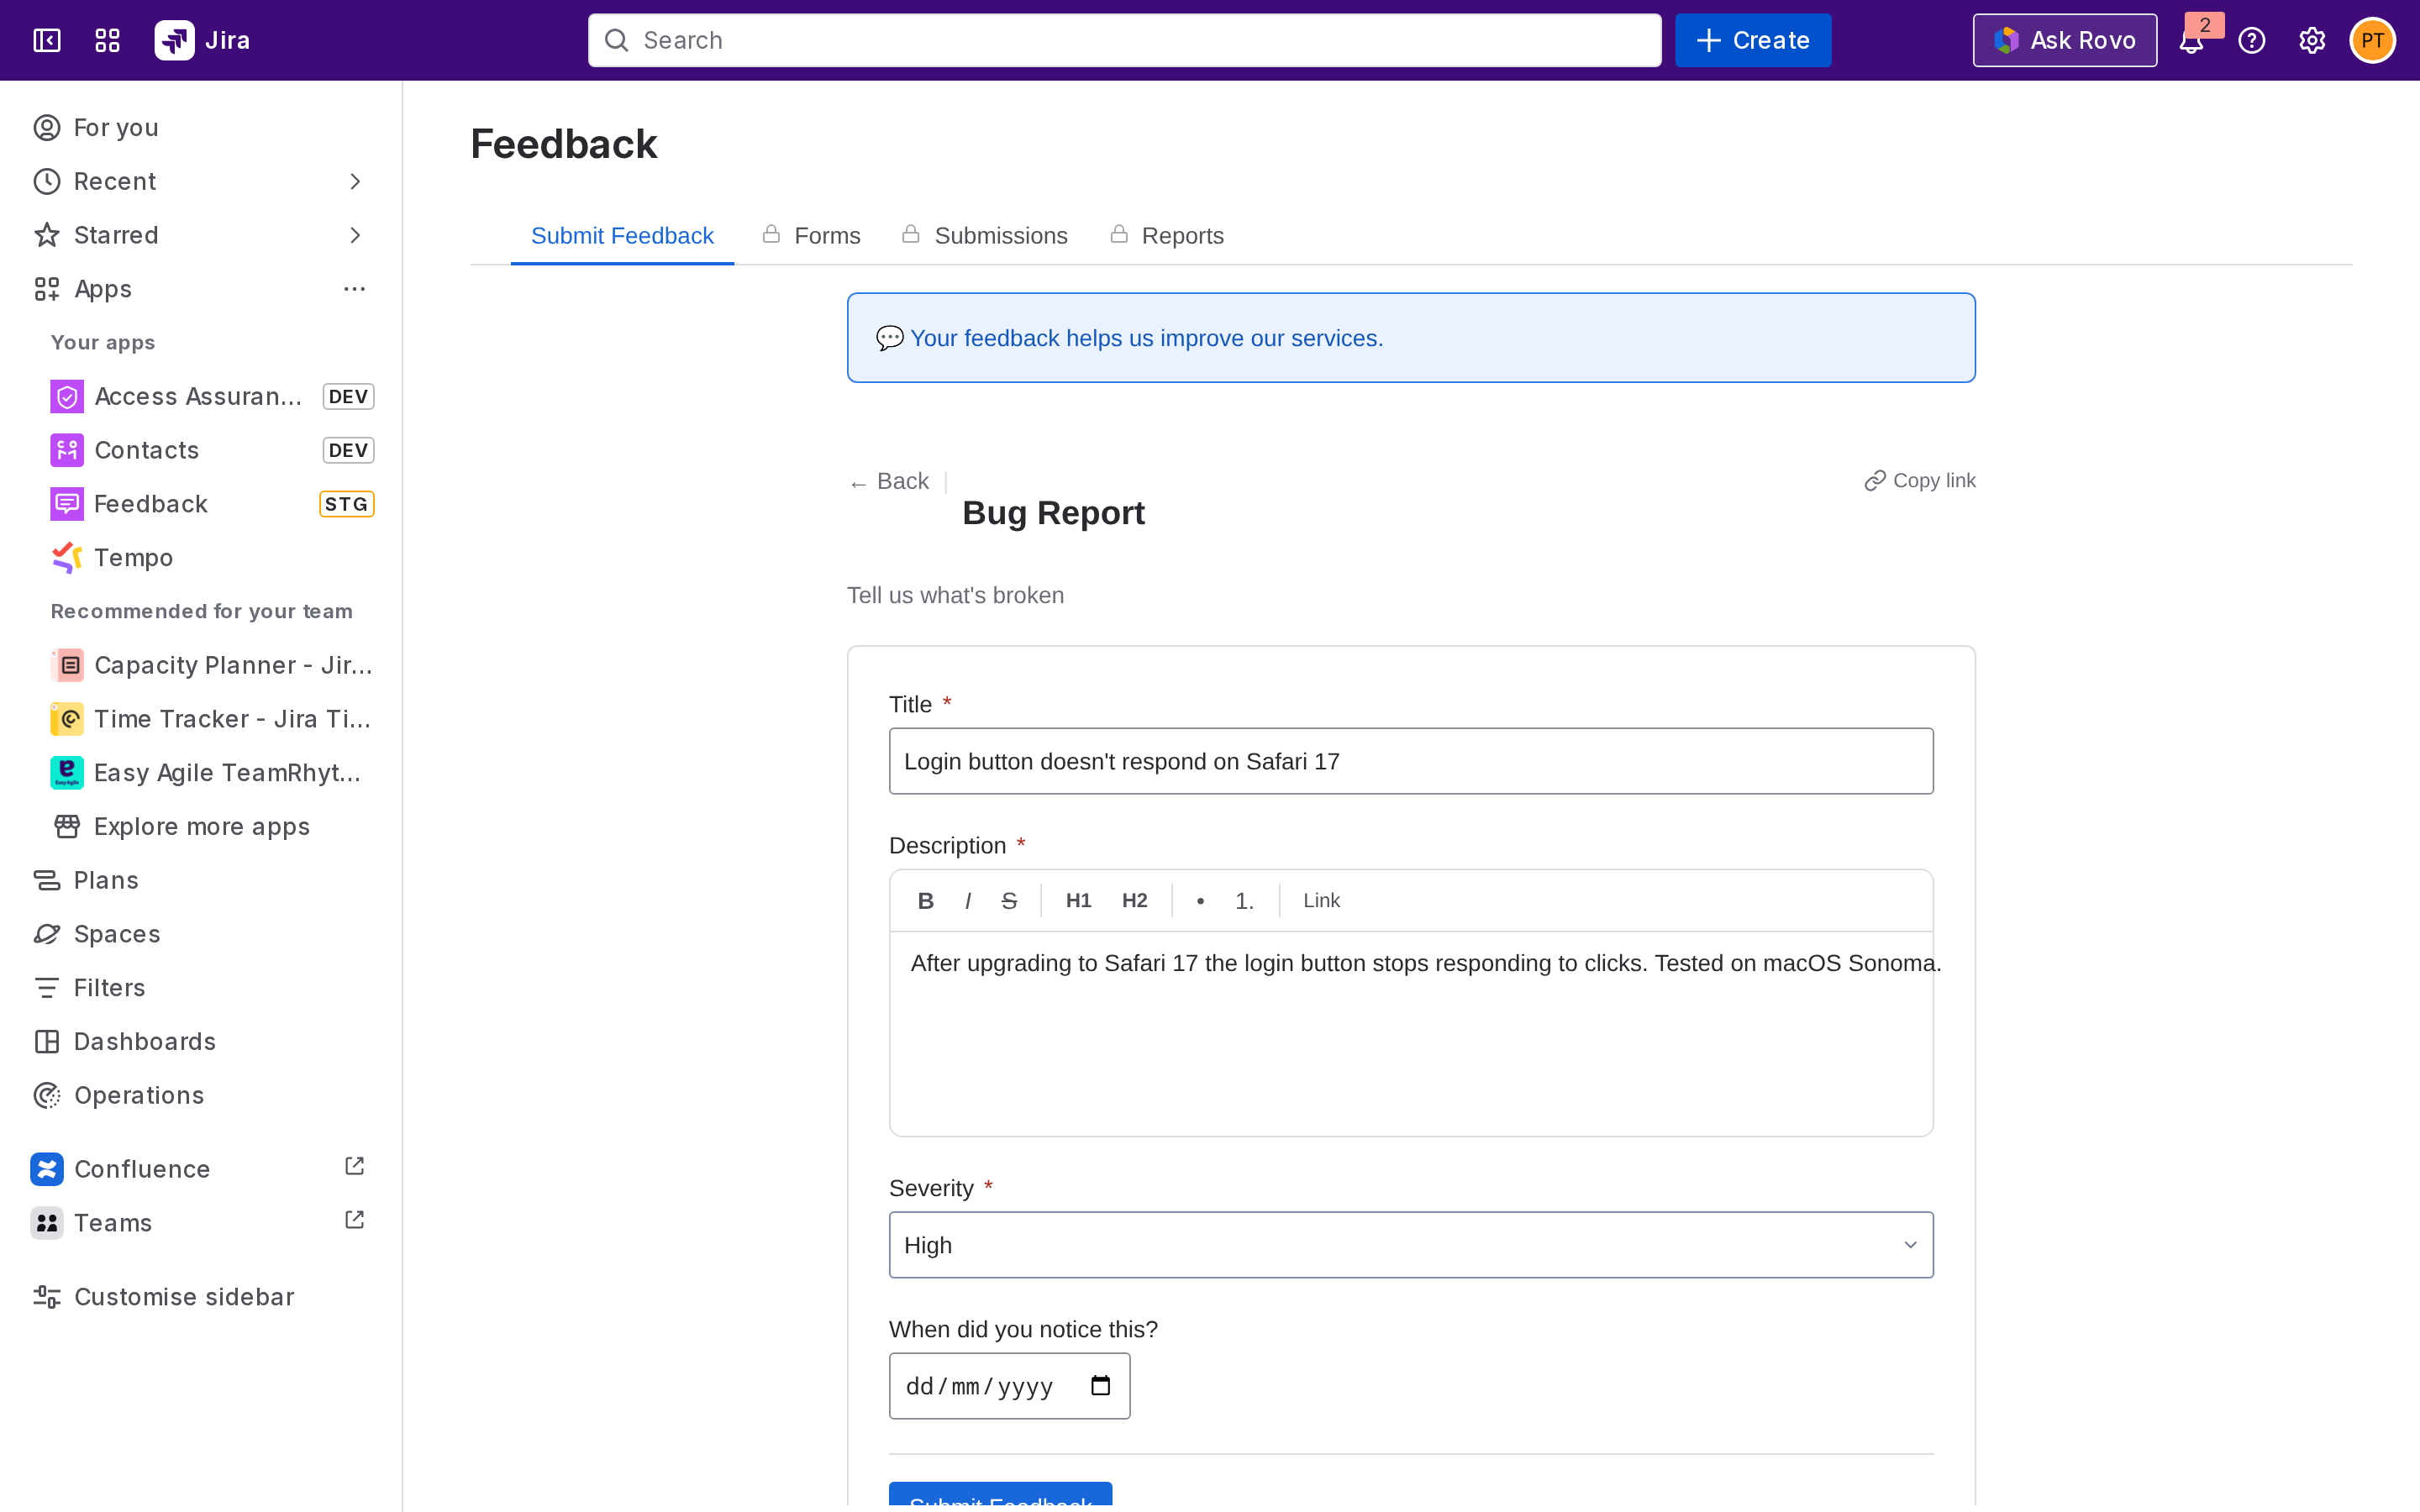
A success message confirms your submission. If the form is mapped to Jira, the submission goes to admin review before becoming a Jira work item.
## From the JSM Help Center
If your administrator has configured the Help Center prompt, a **Share Your Feedback** link appears at the top of your service desk's portal.
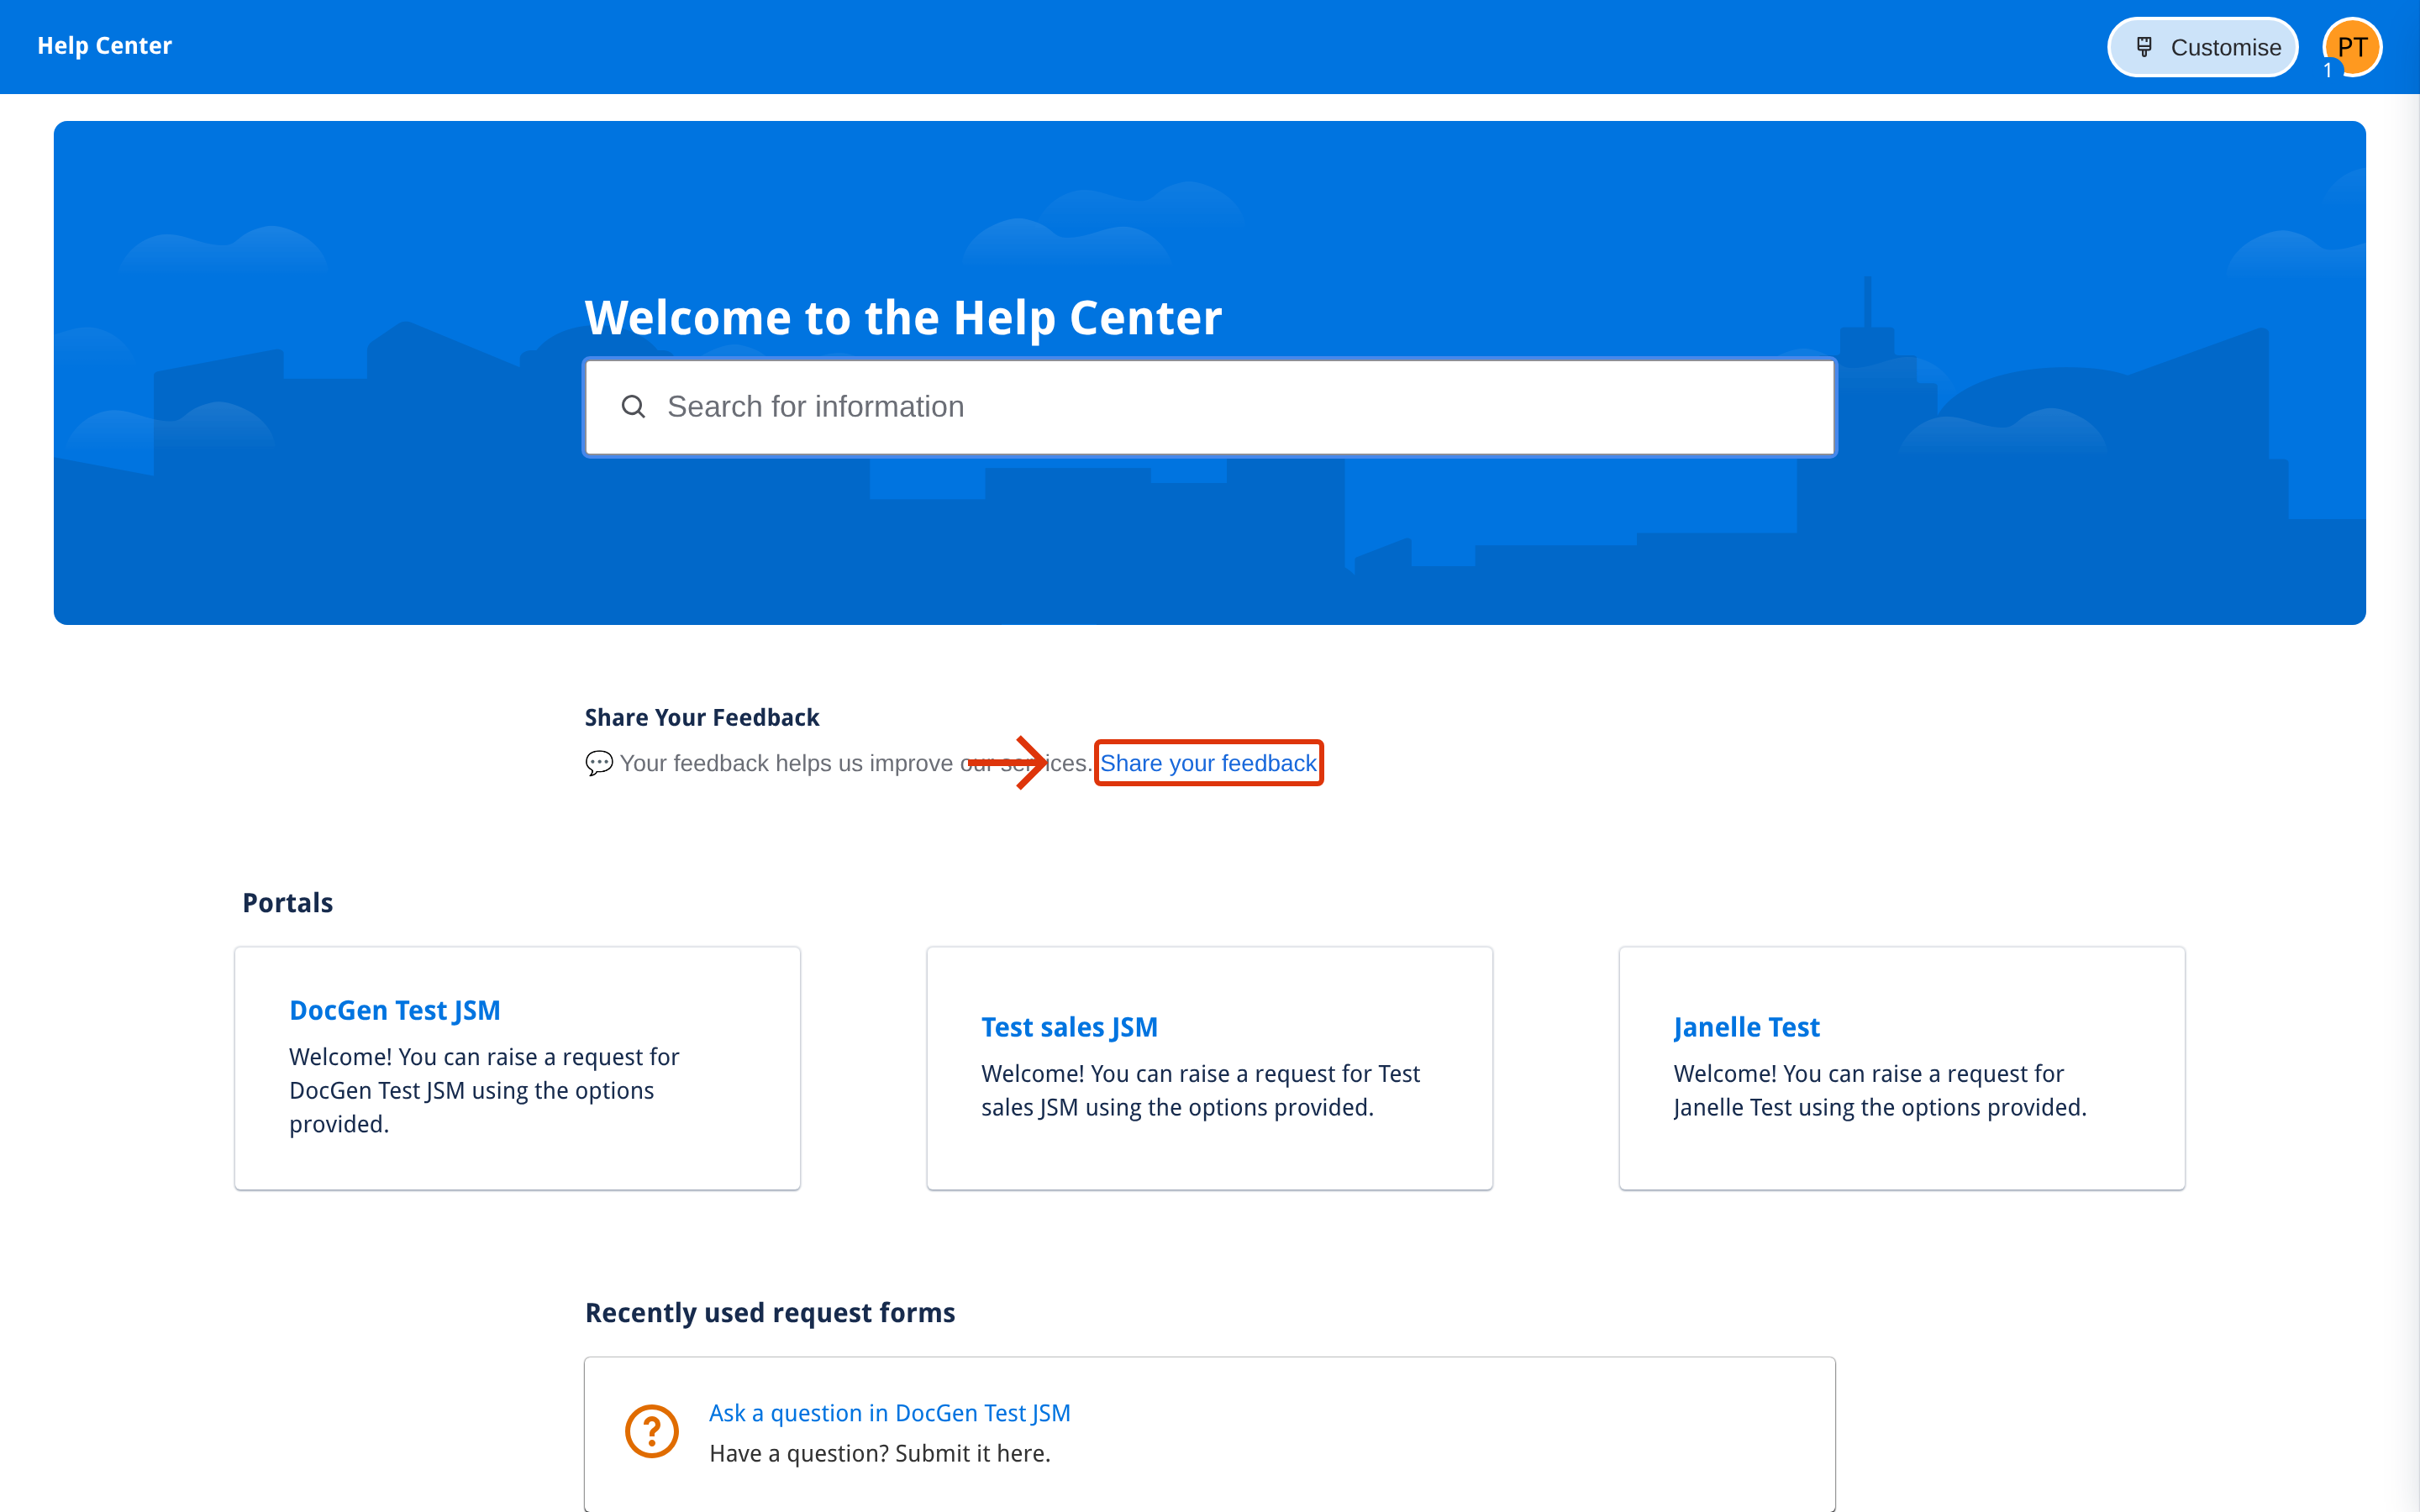
1. Click the link.
2. Choose a form from the list (only forms that allow Help Center / unlicensed access appear.)
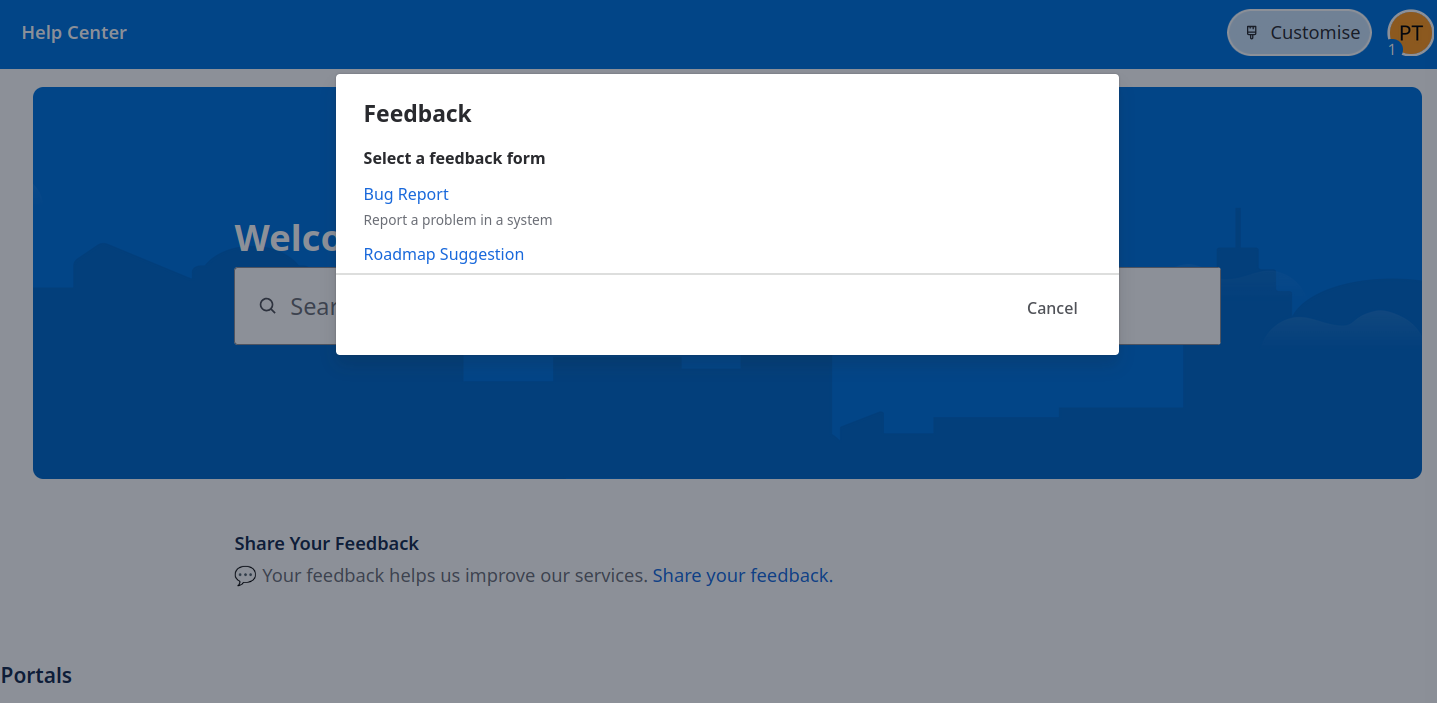
1. Fill in the fields and click **Submit**.
You don't need a Jira license to submit through the Help Center, JSM customers and unlicensed users can submit directly.
## Anonymous vs identified submissions
Forms can be flagged **anonymous** by the form's creator. When a form is anonymous:
* Your account ID is **not stored** with the submission.
* Admins reviewing the submission see no link back to you.
* Forms that require attribution to the submitter (e.g. for follow-up) should leave anonymity off.
## Next step
[Reviewing and accepting submissions](https://docs.togetha.software/docs/reviewing-and-accepting-submissions.md) - for admins, what happens after the submit click.
---
language: "en"
---
# Support and Feedback
Are you having an issue with [Our Apps](https://docs.togetha.software/docs/our-apps.md)? If you log a support ticket we'll get back to you ASAP.
You can log a support ticket at [https://support.togetha.group](https://support.togetha.group/) or by sending an email to [support@togetha.software](mailto:support@togetha.software).
Our support hours are 9am to 5pm Monday to Friday, Australian Eastern Standard Time (AEST), which means that is when we're likely to answer your question. In general we will try to answer your question within 48h.
AEST is
* 10 hours ahead of the UK
* 14 hours ahead of New York
* 17 hours ahead of California
* 2 hours behind New Zealand
## Feedback
We love feedback. If you have anything you'd like to tell us, a suggestion on how we can do better or even what we're doing right please leave a feedback ticket at [https://support.togetha.group](https://support.togetha.group/) or send us an email at [support@togetha.software](mailto:support@togetha.software).
---
language: "en"
---
# Togetha Contacts for Jira
Want to manage your contacts and organisational stakeholders in Jira?
Want to add contacts and organisations to work items? Even when they aren't a member of your site?
Togetha Contacts for Jira is coming soon!

Togetha Contacts is a contacts and relationship manager.
You can manage your contacts and organisational stakeholders in Jira and add them to work items. Togetha Contacts manages groups and relationships, helping you track who works where and their connections.
Want to know more? email [support@togetha.software](mailto:support@togetha.software) or [book a call with Geoff](https://calendly.com/geoffmether).
---
language: "en"
---
# Togetha DocGen for Jira
*View in the* [*Atlassian Marketplace*](https://marketplace.atlassian.com/?gad_source=1&gad_campaignid=1435468008&gbraid=0AAAAAC-6hO23nGl9QDuNzcXNN9YtiUIlM&gclid=CjwKCAjwhLPOBhBiEiwA8_wJHIFGDLykWZrjgnwOQy1WNAkoDQWA4f6Fn42NnnPt5B1MRV-e6fSABxoCsEoQAvD_BwE)*to install a free 30 day trial.*
DocGen for Jira automatically generates documents from your Jira work items using a Word document as a template, turning issue data into completed documents.
When a Jira automation rule runs, DocGen creates a document and fills in its placeholders using data directly from the Jira work item.
DocGen runs entirely within Atlassian, your data never leaves Atlassian Cloud.
* [Why use Togetha DocGen for Jira?](https://docs.togetha.software/docs/why-use-togetha-docgen-for-jira.md)
* [Togetha DocGen Use Cases](https://docs.togetha.software/docs/togetha-docgen-use-cases.md)
[User Guide - Togetha DocGen for Jira](https://docs.togetha.software/docs/user-guide-togetha-docgen-for-jira.md)
---
language: "en"
---
# Togetha DocGen for Jira Troubleshooting
Here are a couple of problems you may run into, and our suggested solutions.
If you encounter a problem that isn't covered here, please contact us via our [++support desk++](https://support.togetha.group/) and we'll get right back to you.
## Forge automation actions on a Custom Domain hangs the automation user interface.
When adding DocGen in the **Action**step of the automation, the app fails to connect, with a spinner when using a Custom Domain.
If you have a **Custom Domain** like [https://bobs.excellent.jira.com](https://bobs.excellent.jira.com/) and not a [https://bobs.atlassian.net](https://bobs.atlassian.net/) you will probably encounter this problem. Currently there is no known workaround for this behaviour. You can track this Atlassian bug at
The following error appears in the Browser Developer Console:
Uncaught Error while sending bridge message: Message received from invalid origin: https://your.custom.domain.com/
Uncaught (in promise) Error: Failed to establish ready state with product
---
language: "en"
---
# Togetha DocGen Use Cases
Here are some common use cases for Togetha DocGen for Jira.
## Internal approvals
Teams can generate approval documents, such as capital expenditure requests, procurement forms, or change approvals, directly from work items. The resulting PDF or Word document is a clear, standardised record ideal for finance teams, auditing, and reporting. It is particularly valuable in regulated environments, where formal documentation is required for legal purposes.
## Customer-facing documents and agreements
Customer requests can be transformed into professional documents and shared as formal confirmations or agreements. Togetha DocGen takes requests submitted through the JSM portal, such as training bookings or support changes, and turns them into polished PDFs containing full details, pricing, and terms and conditions. This fosters customer trust and confidence.
## Contracts and order forms
Togetha DocGen automates the creation of contracts, quotes, and order forms using data captured in work items, whether entered by customers or internal teams. The app ensures that all documents follow a consistent format and include the correct commercial and legal information.
## Project documentation
Project documentation such as summaries, scopes, and reports can be generated at key points in a workflow, e.g. after submission, approval, or resolution. Togetha DocGen keeps documentation aligned with live data so that everything is easy to track and reference.
---
language: "en"
---
# Togetha Feedback in Jira
*View in the* [++*Atlassian Marketplace*++](https://marketplace.atlassian.com/?gad_source=1&gad_campaignid=1435468008&gbraid=0AAAAAC-6hO23nGl9QDuNzcXNN9YtiUIlM&gclid=CjwKCAjwhLPOBhBiEiwA8_wJHIFGDLykWZrjgnwOQy1WNAkoDQWA4f6Fn42NnnPt5B1MRV-e6fSABxoCsEoQAvD_BwE)*to install a free 30 day trial.*

Togetha Feedback in Jira makes it effortless for customers and internal teams to share feedback, and for ITSM teams to action it.
Capture structured feedback when and where you need it through a simple Jira feedback form added to your Jira Service Management portal.
* [Why use Togetha Feedback in Jira?](https://docs.togetha.software/docs/why-use-togetha-feedback-in-jira.md)
* [Togetha Feedback in Jira Use Cases](https://docs.togetha.software/docs/togetha-feedback-in-jira-use-cases.md)
[User Guide - Togetha Feedback in Jira](https://docs.togetha.software/docs/user-guide-togetha-feedback-in-jira.md)
---
language: "en"
---
# Togetha Feedback in Jira Troubleshooting
This page lists the issues we see most often and how to resolve them. If your problem is not here, contact us at **support@togetha.software**.
## "This app is currently not licensed. Please contact your Jira administrator."
**What it means:** The app's Marketplace license has either lapsed or is not active for this installation. Resolvers have refused the request and the frontend banner is showing.
**How to resolve:**
1. As a Jira site admin, open **Apps → Manage apps**.
2. Locate **Togetha Feedback in Jira** and confirm the licence status.
3. If the trial has expired, start a paid subscription from the listing.
4. If the licence is active but the banner persists, refresh the page and retry. If the issue continues, contact support.
In dev / staging contexts (and free apps), the licence object is not provided by Atlassian and the gate allows requests through. If you're seeing the banner there, check that you don't have `FORCE_UNLICENSED=true` set in your environment.
## The "Share Your Feedback" link doesn't appear in the JSM Help Center
Three common causes:
1. **The Help Center prompt isn't configured.** Check the App Settings tab, both **Help Center prompt text** and **Help Center link text** must be set.
2. **The portal subheader is cached.** Hard-refresh the Help Center page (Ctrl/Cmd + Shift + R).
3. **The app is unlicensed for unlicensed users.** Confirm the install is licensed in **Apps → Manage apps**. The portal subheader is gated by the same licence check as the rest of the app.
## A submission is stuck at *Failed*
A submission moves to **Failed** when admin acceptance was attempted but the Jira issue could not be created.
The most common cause is a **required Jira field that has no form-field mapping**. Open the form's mapping (Forms tab → form → Edit → Step 3) and verify that every required Jira field for the issue type is mapped to a form field.
After fixing the mapping, click **Retry Jira Sync** on the failed submission. A 60-second rate limit applies between retries.
If the failure persists, open the submission detail; the error message from Jira is shown there. Common errors include:
* `Field 'priority' is required` → priority is required for the chosen issue type but no form field maps to it.
* `Project does not exist or you don't have permission` → the space was deleted or the app's permissions changed.
## "This form has submissions and cannot be deleted"
To preserve audit history, a form with at least one submission cannot be deleted. **Archive it instead**. Archived forms are hidden from submitters but their submissions remain visible on the Submissions tab and in reports.
To archive: Forms tab → form → **Archive**.
## Where to get help
* Email: **support@togetha.software**
* Marketplace listing: **Togetha Feedback in Jira**
When contacting support, include:
* Your Atlassian site URL.
* A screenshot of the issue.
* The submission ID (if relevant).
* The exact error message text.
---
language: "en"
---
# Togetha Feedback in Jira Use Cases
Here are some common use cases for Togetha Feedback in Jira.
## Quick feedback on a recent/ongoing project
It's good for an ITSM team to monitor how users are feeling about recent and ongoing changes, updates, and implementations. That way, they feel heard and you can identify areas for improvement early.
Togetha Feedback lets you send specific feedback forms to specific Jira groups and stakeholders with shareable links. This creates a focused feedback loop that helps ensure your IT projects are both successful and well-received by users.
## Highlighting problems without the need for support tickets
Users don't want to raise a support ticket every time something isn't quite right. For one, they may not actually need support. They may just want to tell you what they've noticed.
Togetha Feedback lets you capture feedback on minor defects without the need for a full service request workflow, and no requirement to update the user on progress. The review queue lets you accept/reject feedback before it becomes a work item in Jira, so that only necessary tickets are created.
## Quick surveys on company matters
Togetha Feedback can also be used to seek input from staff on general business matters. This could be anything from "What risks do you think we're facing as a company?" to "What's your meal preference for the Christmas party?".
Staff can respond to these surveys anonymously, which allows for honest insights. And if you're organising an event, surveys can be used to auto-create Jira work items, improving event coordination. The information can also be exported to Excel or a CSV file and managed outside of Jira if you prefer.
---
language: "en"
---
# Togetha MailDrop for Confluence
*View in the* [*Atlassian Marketplace*](https://marketplace.atlassian.com/apps/1235139/maildrop-for-confluence)*to install a free 30 day trial.*

*MailDrop for Confluence* lets you drag an email from your email client into Confluence, and have it's *contents* added to a Live Doc, Page or Blog.
When an email is dropped on to a Confluence Page, Live Doc or Blog, *MailDrop for Confluence* adds the **contents** of the email **and its attachments** to the end of the page.
*MailDrop for Confluence* processes the email directly in Confluence. You do not need to set up a mail server, and your data never leaves Confluence. There are no third party servers involved.
* [Why use Togetha MailDrop for Confluence?](https://docs.togetha.software/docs/why-use-togetha-maildrop-for-confluence.md)
[User Guide - Togetha MailDrop for Confluence](https://docs.togetha.software/docs/user-guide-togetha-maildrop-for-confluence.md)
---
language: "en"
---
# Togetha MailDrop for Confluence Troubleshooting
Here are a couple of problems you may run into, and our suggested solutions.
If you encounter a problem that isn't covered here, please contact us via our [support desk](https://support.togetha.group/) and we'll get right back to you.
## Nothing happens when I drop an email into Confluence
If you drop an email onto a Confluence page and you can see the email is attached, but none of the contents get inserted and you don't see the **"Adding email..."** message (or any error message), try the following:
1. Check that the page has been *published* . If the page has a blue Publish button at the top right, it **hasn't been published yet.**
(Togetha MailDrop doesn't get told that you have dropped an attachment onto an unpublished page.)
2. Page restrictions may be preventing Togetha MailDrop from accessing the page. Try creating a new page in your personal space, publishing it, then edit it, and add an email. If that works, then it is a page restriction preventing Togetha MailDrop from working. You may need to ask the space administrator to help fix the problem, but you can try allowing Togetha Maildrop to edit the page by:
1. clicking the padlock icon

2. adding Togetha MailDrop for Confluence as a user that can edit the page, click Save.
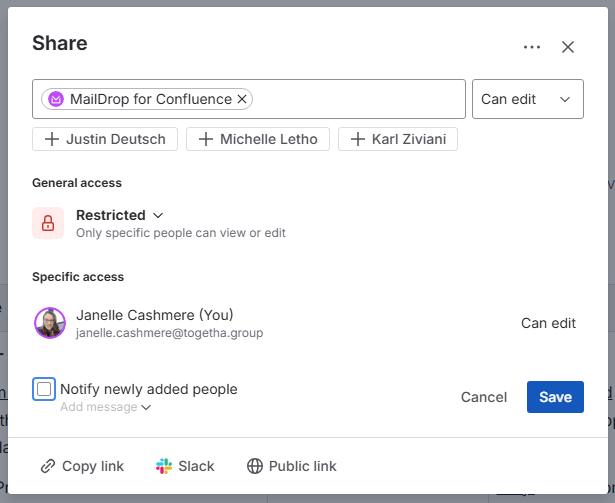
## You get a message saying "Failed to load email, sorry."
If Togetha MailDrop for Confluence says **"Adding Email..."** followed shortly after by **"Failed to load email, sorry"**, then an error has occurred while updating the page.
We have seen this on old Confluence pages that haven't been edited for a while. Try making a small change to the page and updating it before trying to add the email again. So:
* Make a small change to the page, e.g. add "test" at the end.
* Update the page by clicking **Update**.
* Edit the page again.
* Drop the email onto the page and see if it works.
If it still doesn't work, it could be due to some formatting that isn't compatible with Confluence.
If you do encounter problems loading emails, please do share it with us so we can fix it. You can[get in contact via our support desk](https://portal.support.togetha.group/servicedesk/customer/portals) any time.
Some emails contain images that come from a server on the web (external images). These images may include some form of tracking information that will be triggered each time you view the image in Confluence. No other information on the page will be trackable, only the number of times the email is viewed.
---
language: "en"
---
# Transferring contacts to another user
Hand over contacts you own to another user. Transferring moves the selected contacts into that user's contacts so they become the owner, which is useful when you change roles or share responsibility for a set of contacts.
## How transferring works
Transferring takes contacts out of your default group and puts them into the other user's default group. The contact's other group memberships stay as they are, so if you and the new owner both belong to a shared group that the contact is in, you'll still see it after the transfer.
| Detail | What happens |
|--------------|-------------------------------------------------------------------------------------------|
| Ownership | The contacts move to the other user's contacts, and they become the owner. |
| Your access | You lose access to a transferred contact unless you share another group that contains it. |
| Other groups | Memberships in shared groups are kept. Only your default group membership is swapped. |
Transferring is the bulk version of changing the owner of a single contact. It acts on every contact you've selected in one step.
You can only transfer your own contacts. Contacts shared with you can't be transfered.
## Prerequisites
* You can open the **Contacts** page from the Apps menu.
* You have write access to the contacts you want to transfer (contacts you created, or contacts in a group shared with you with write access).
* The person you're transferring to has opened Contacts at least once, so they have a place to receive the contacts.
## Transfer contacts to another user
The **Transfer Contacts to...** action appears only while the **My Contacts** group filter is selected.
1. **Open the Contacts page** and **open the Group filter** in the side panel.
2. **Select My Contacts.** The list shows the contacts you own.
3. **Switch to list view** using the table icon on the right of the toolbar.
4. **Tick the checkbox** on each contact you want to transfer.
5. **Open the kebab menu** (the three-dot menu on the right of the toolbar) and click **Transfer Contacts to...**
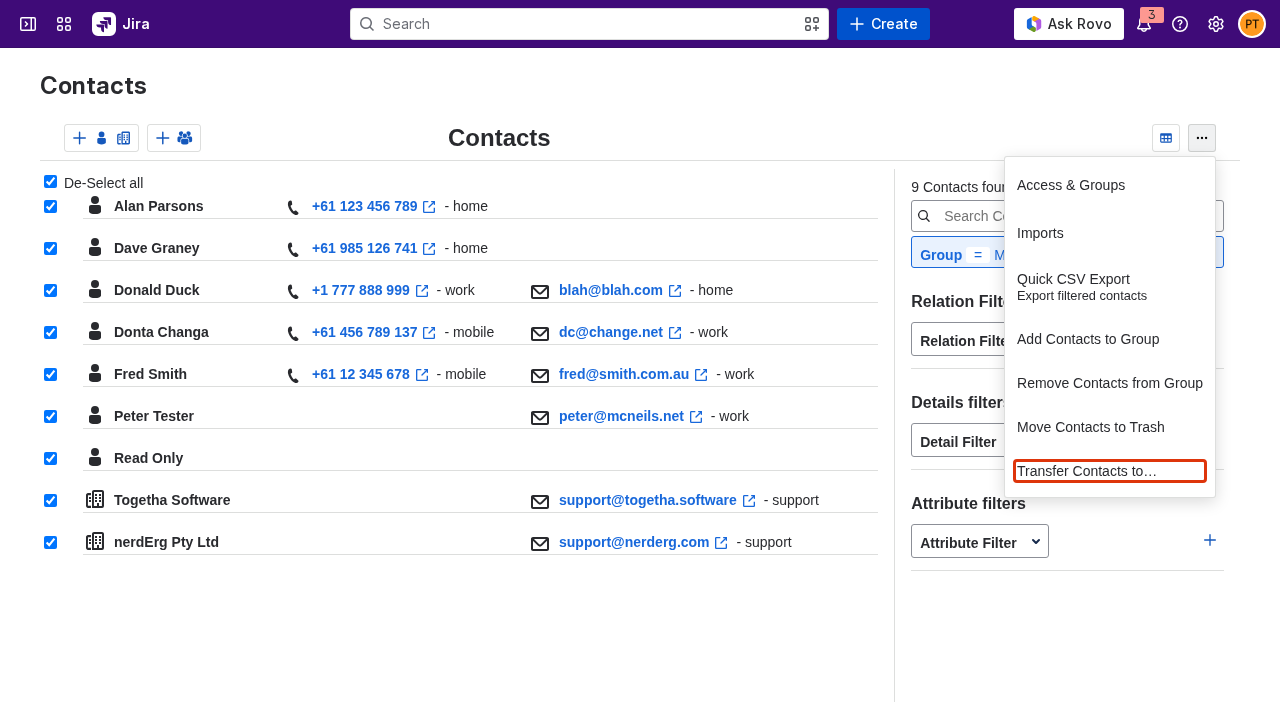
1. **Search for and select the user** to transfer the contacts to.
2. **Click Transfer.** The contacts move to that user's contacts and leave your My Contacts list.
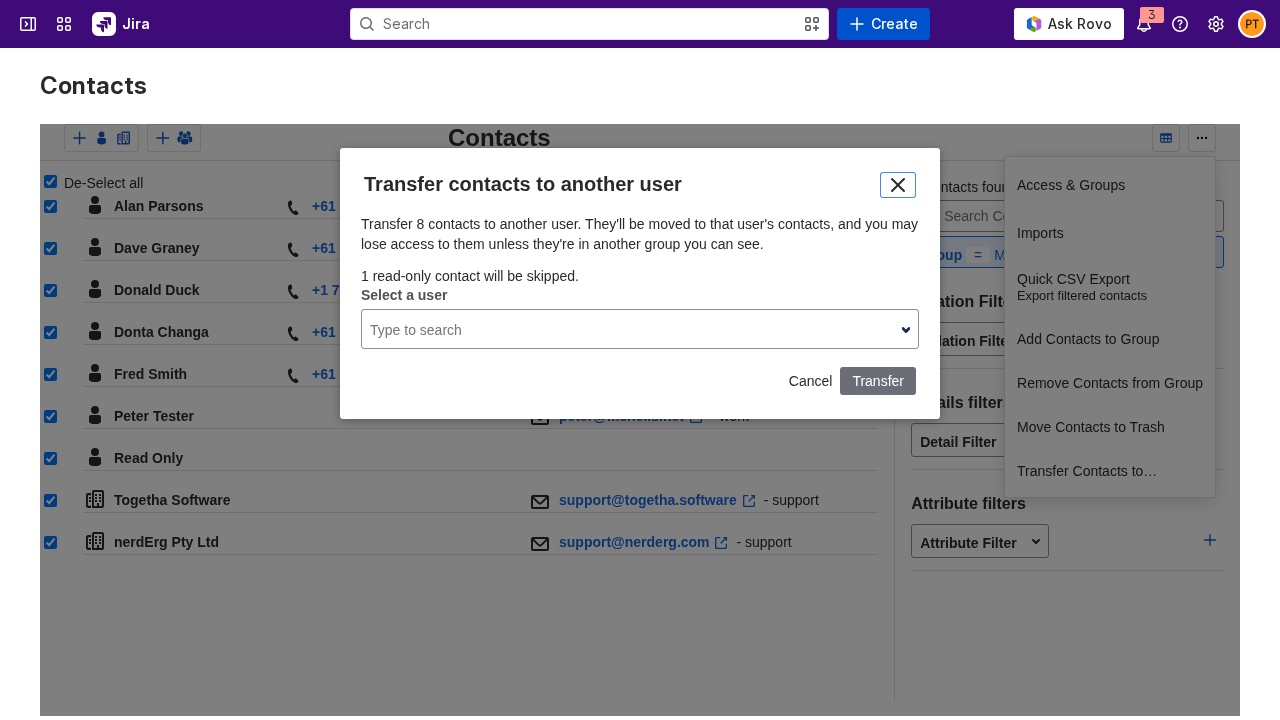
The dialog tells you how many contacts it will transfer and reminds you that you may lose access to them.
## Transfer a single contact
To hand over one contact, change its owner from the contact details dialog.
1. **Click the contact's name** to open the contact details dialog.
2. **Open the Groups tab.** Your default group is listed as your name followed by **(owner)**.
3. **Click the change owner button** (the icon beside your owner group). The **Change owner** dialog opens.
4. **Search for and select the new owner** , then **click Change owner.** The contact moves to that user's default group and leaves yours.
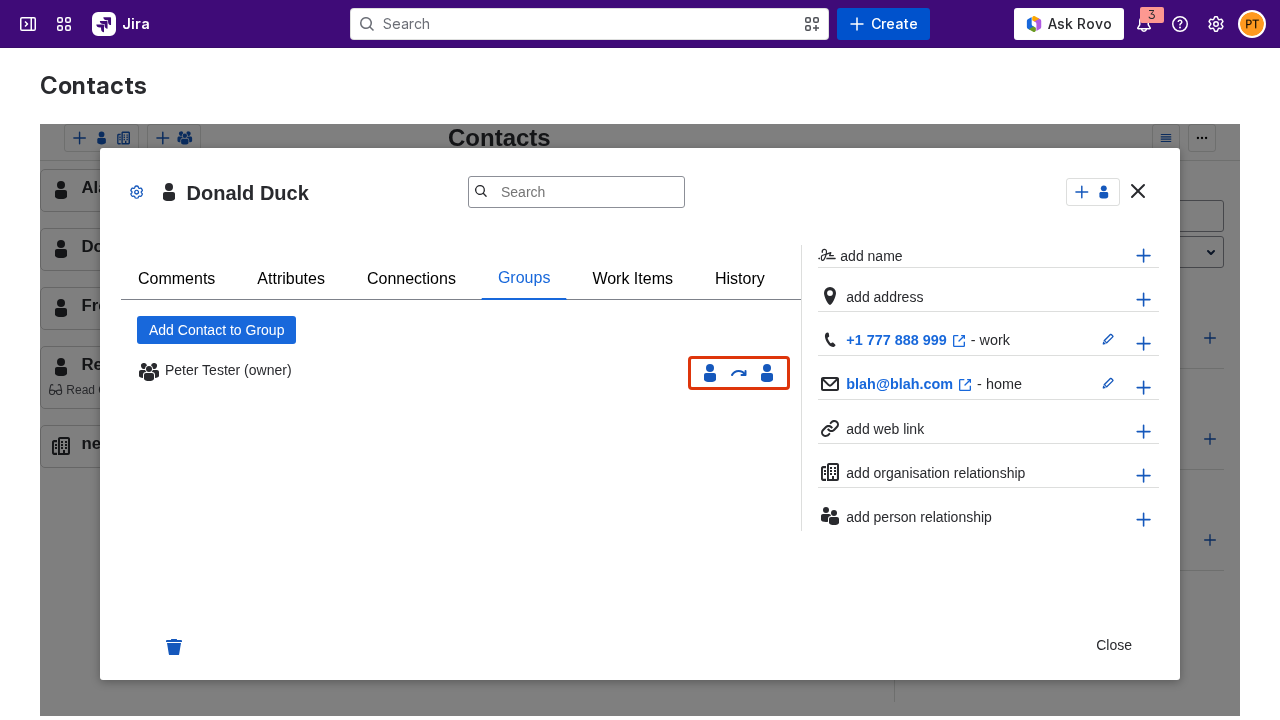
The change owner button shows only for contacts you own, so you won't see it on contacts shared with you. Like a bulk transfer, this moves the contact out of your default group and into the new owner's, and you may lose access to it unless you share another group that contains it.
## When contacts are skipped or blocked
A transfer leaves some contacts untouched in these cases:
* **Read-only contacts** you selected are skipped. The dialog tells you how many it will skip, and only the contacts you can write to are transferred. (This is very unlikely to happen)
* **Transferring to yourself** does nothing, because the contacts are already in your contacts.
* **A user who has never opened Contacts** can't receive a transfer yet. The dialog shows a message asking you to have them open Contacts once, and no contacts are transferred.
## Result
The transferred contacts now belong to the other user and appear in their contacts. They've left your My Contacts list. If you both share another group that holds a transferred contact, you'll still see it through that group.
Next:
* [Working with groups](https://docs.togetha.software/docs/working-with-groups.md): share a group so you and the new owner can both see a contact.
* [Deleting contacts](https://docs.togetha.software/docs/deleting-contacts.md): move contacts you no longer need to the trash.
---
language: "en"
---
# User Guide - Togetha Contacts for Jira
* [Introduction to Contacts](https://docs.togetha.software/docs/introduction-to-contacts.md)
* [Creating a contact](https://docs.togetha.software/docs/creating-a-contact.md)
* [Working with groups](https://docs.togetha.software/docs/working-with-groups.md)
* [Linking contacts to work items](https://docs.togetha.software/docs/linking-contacts-to-work-items.md)
* [Importing contacts from CSV](https://docs.togetha.software/docs/importing-contacts-from-csv.md)
* [Contacts admin page](https://docs.togetha.software/docs/contacts-admin-page.md)
* [Deleting contacts](https://docs.togetha.software/docs/deleting-contacts.md)
* [Transferring contacts to another user](https://docs.togetha.software/docs/transferring-contacts-to-another-user.md)
* [Exporting contacts](https://docs.togetha.software/docs/exporting-contacts.md)
* [Automation actions](https://docs.togetha.software/docs/automation-actions.md)
* [Filtering contacts](https://docs.togetha.software/docs/filtering-contacts.md)
---
language: "en"
---
# User Guide - Togetha DocGen for Jira
* [How to create your template using placeholders](https://docs.togetha.software/docs/how-to-create-your-template-using-placeholders.md)
* [How to auto-generate a document from your Jira work items](https://docs.togetha.software/docs/how-to-auto-generate-a-document-from-your-jira-work-items.md)
* [How to use DocGen for Jira](https://docs.togetha.software/docs/how-to-use-docgen-for-jira.md)
* [Required permissions](https://docs.togetha.software/docs/required-permissions.md)
* [Togetha DocGen for Jira Troubleshooting](https://docs.togetha.software/docs/togetha-docgen-for-jira-troubleshooting.md)
---
language: "en"
---
# User Guide - Togetha Feedback in Jira
This guide walks you through installing, configuring, and operating Togetha Feedback in Jira.
## In this section
1. [Installing Togetha Feedback in Jira](https://docs.togetha.software/docs/installing-togetha-feedback-in-jira.md)
2. [Initial configuration](https://docs.togetha.software/docs/initial-configuration.md)
3. [Creating a feedback form](https://docs.togetha.software/docs/creating-a-feedback-form.md)
4. [Mapping form fields to Jira](https://docs.togetha.software/docs/mapping-form-fields-to-jira.md)
5. [Submitting feedback (for users)](https://docs.togetha.software/docs/submitting-feedback-for-users.md)
6. [Reviewing and accepting submissions](https://docs.togetha.software/docs/reviewing-and-accepting-submissions.md)
7. [Viewing reports](https://docs.togetha.software/docs/viewing-reports.md)
8. [Required permissions](#)
9. [Togetha Feedback in Jira Troubleshooting](https://docs.togetha.software/docs/togetha-feedback-in-jira-troubleshooting.md)
---
language: "en"
---
# User Guide - Togetha MailDrop for Confluence
* [Installing Togetha MailDrop for Confluence](https://docs.togetha.software/docs/installing-togetha-maildrop-for-confluence.md)
* [How to import an email to a Confluence page](https://docs.togetha.software/docs/how-to-import-an-email-to-a-confluence-page.md)
* [Togetha MailDrop for Confluence Troubleshooting](https://docs.togetha.software/docs/togetha-maildrop-for-confluence-troubleshooting.md)
---
language: "en"
---
# Viewing reports
The **Reports** tab on the Feedback page shows aggregated submission data: counts by form, by status, and over time.
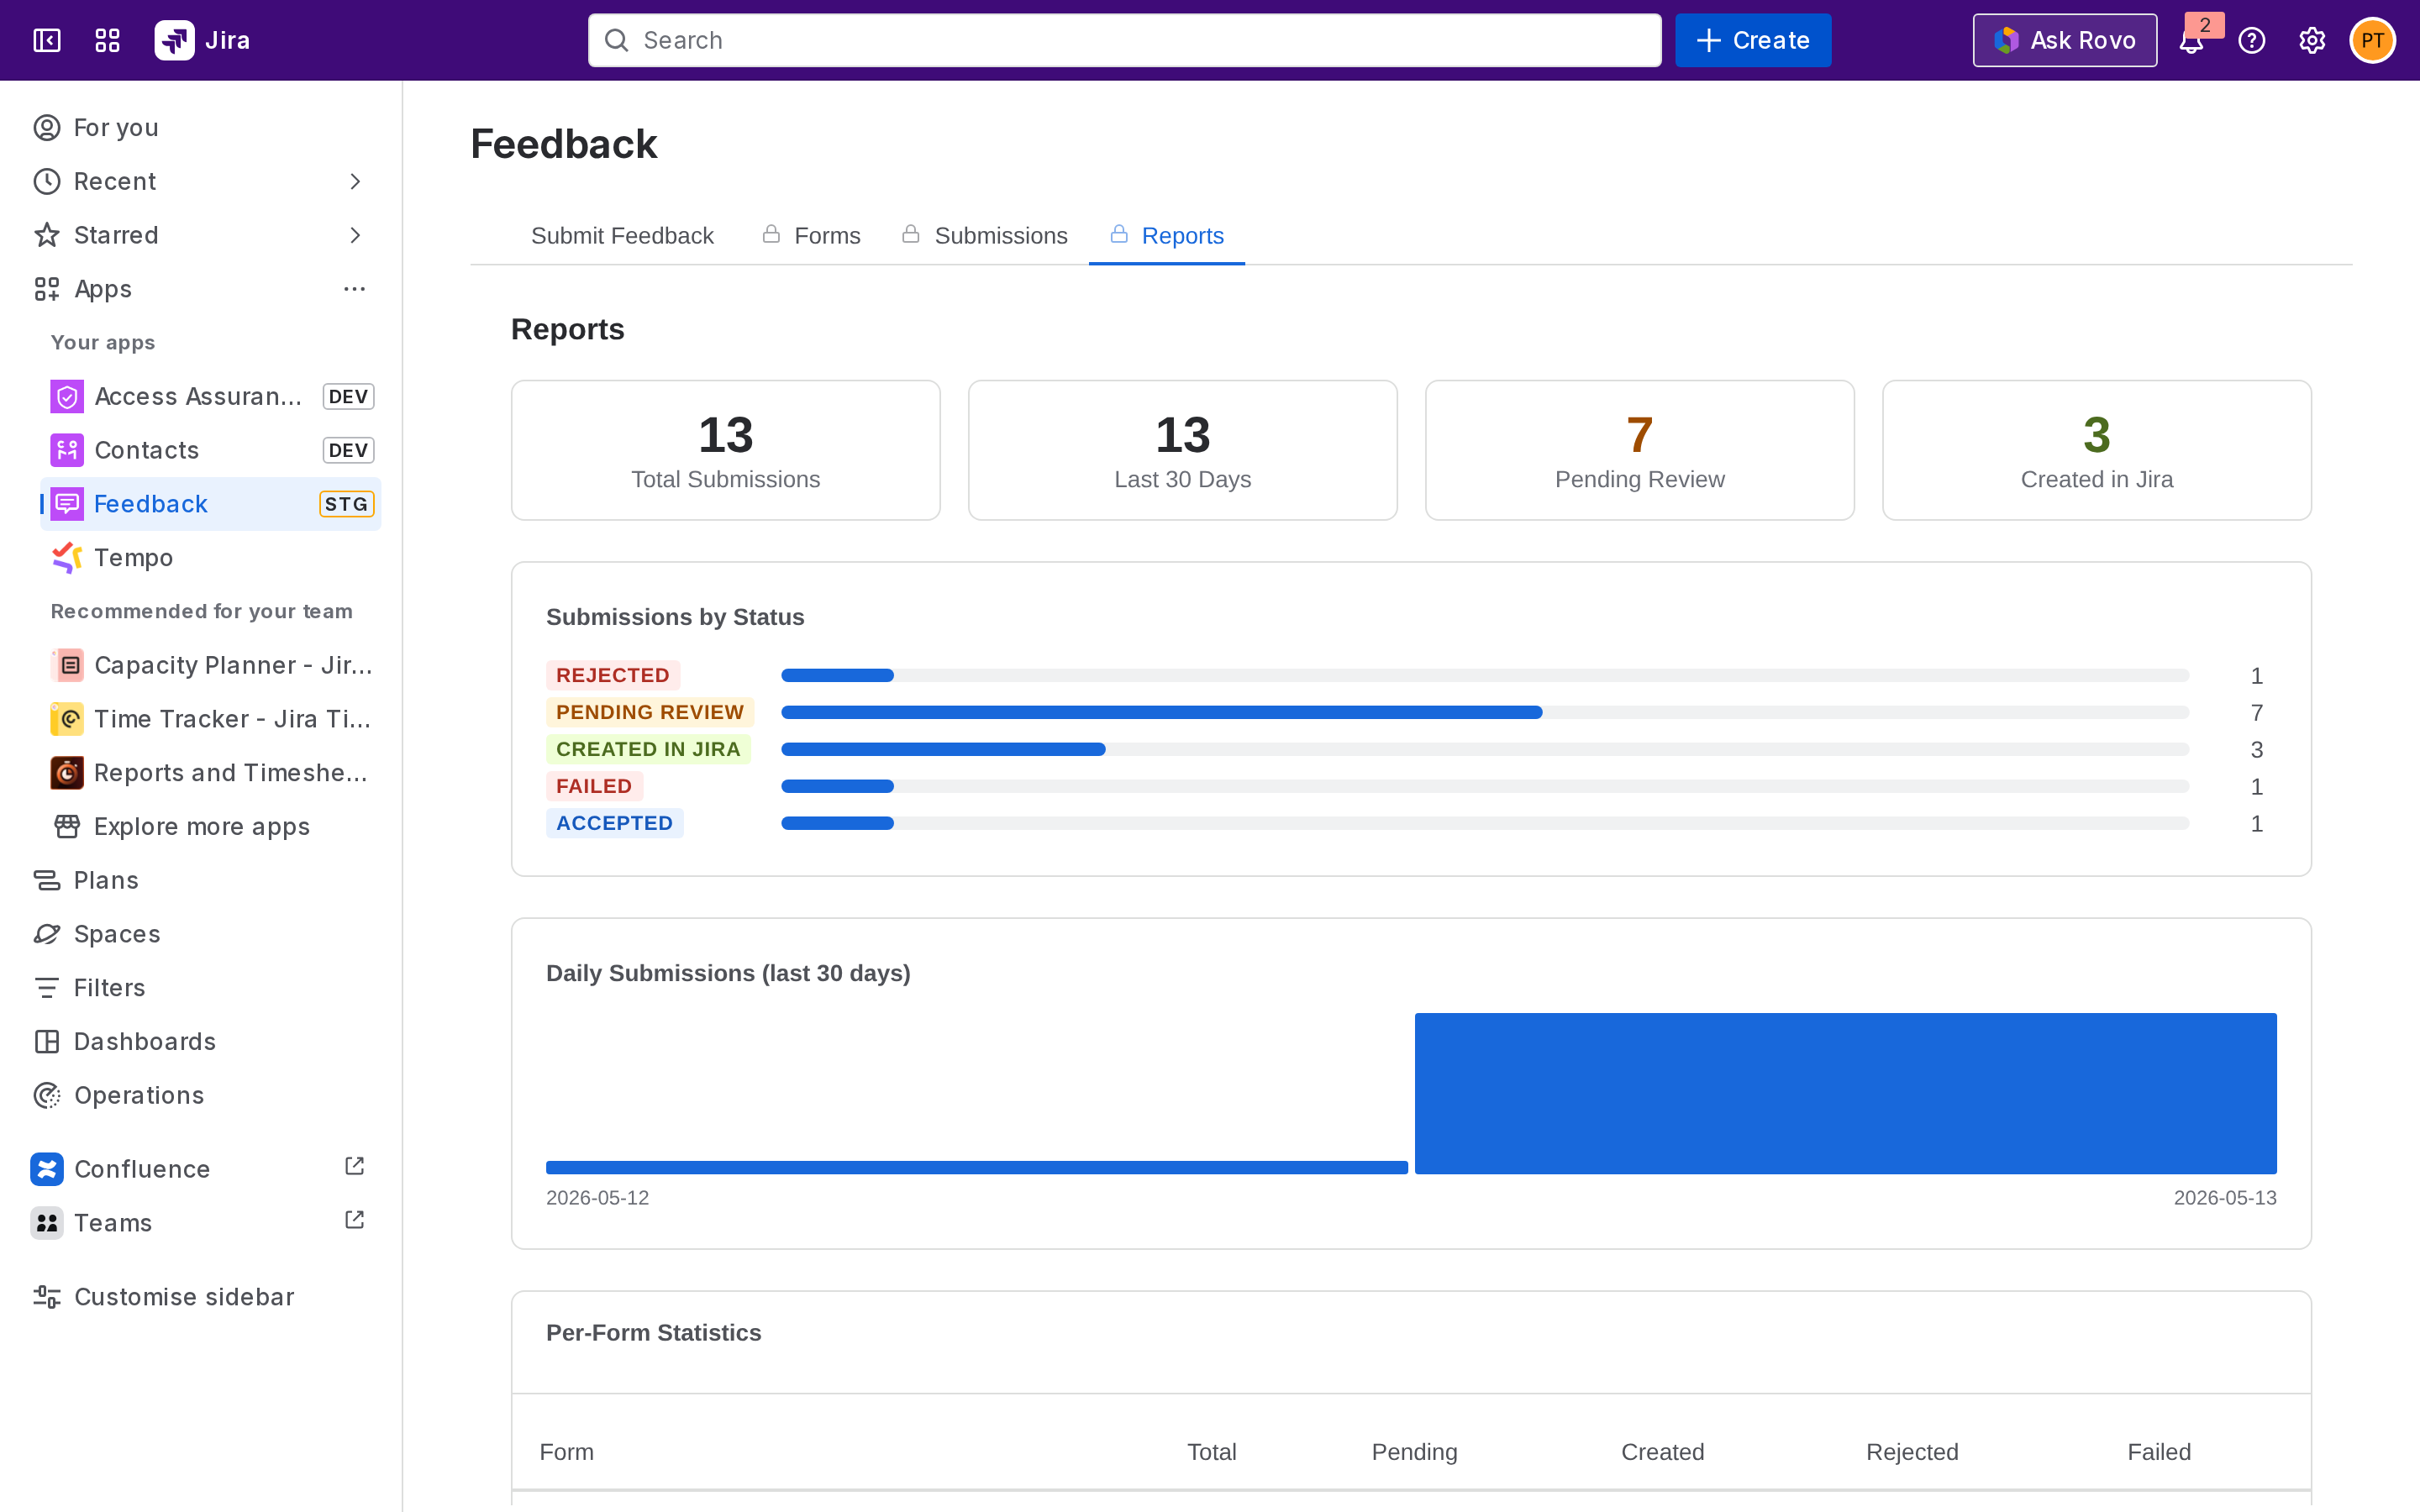
## Reading the counts
Reports include:
* **Total submissions** across all forms.
* **By status**, how many are Pending Review, Created, Accepted, Rejected, Failed.
* **By form**, submission volume per form.
* **By time period**, submissions over the last 7 / 30 / 90 days.
Use these to spot which forms are getting traction and which are stale, or to confirm that recently published forms are receiving submissions.
## Excel export
Click **Export to Excel** to download every submission as an `.xlsx` file. The export includes:
* Submission ID, form name, submitter (or *Anonymous*), timestamp, status.
* Every field value, one column per field.
* Linked Jira issue key (if any).
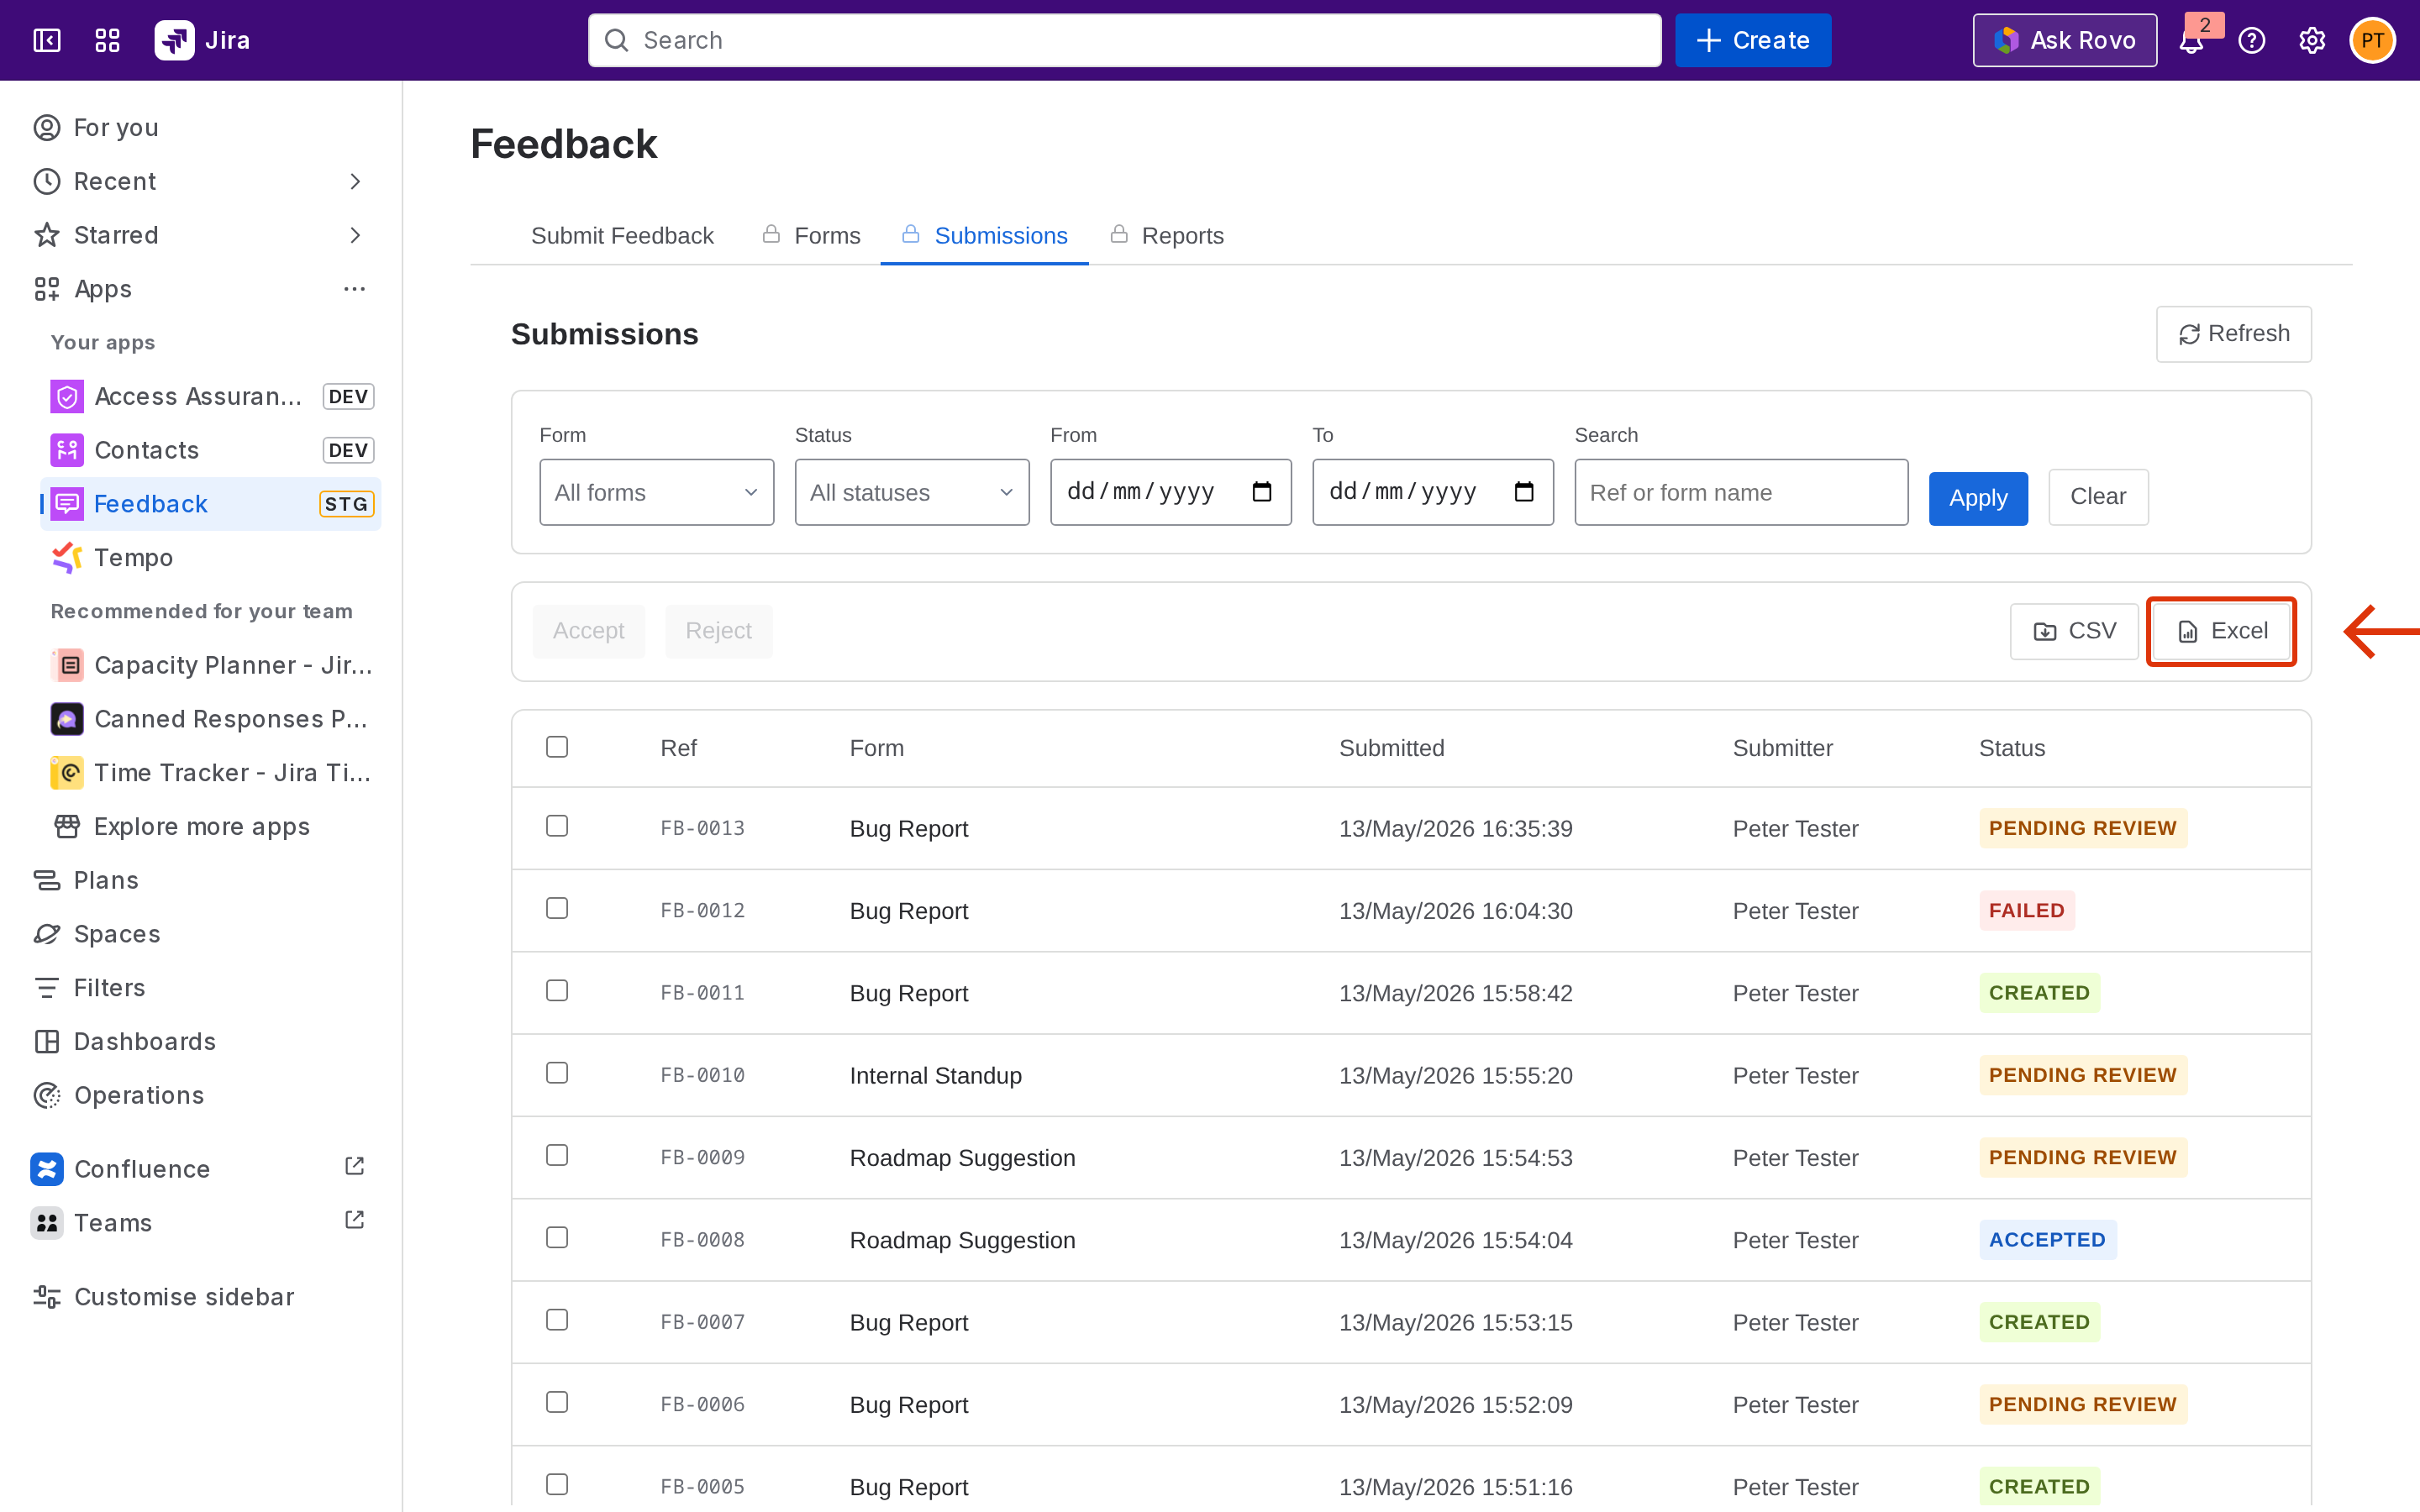
The export respects the active filters on the Submissions tab. To export everything, clear the filters first.
## Next step
[Required permissions](#) - Forge scopes, admin rules, anonymous submission storage.
---
language: "en"
---
# Why use Togetha DocGen for Jira?
## What is Togetha DocGen for Jira?
Togetha DocGen for Jira is an app that generates documents from your Jira and Jira Service Management (JSM) work items, transforming messy operational data into clean, official documentation automatically.
Work items can be tasks created internally by your teams, or JSM requests raised by customers in the portal.
Using Jira automation, Togetha DocGen pulls data from a work item and uses it to populate a pre-configured template. Then it generates a PDF or Word document from that template.
Explore the features, benefits, and use cases to understand how Togetha DocGen for Jira reduces manual documentation, improves accuracy, and enhances the customer experience.
### Key features
#### Structured data capture from any work item
Togetha DocGen captures data directly from your Jira work items, whether it comes from a customer-submitted JSM form or is entered manually by an internal user. In effect, documents can be created from both external requests and internal processes, with all relevant fields---including selections, text inputs, and quantities---serving as structured inputs.
#### Template-driven
Microsoft Word templates are used to define the structure, branding, and standard content of each document. Togetha DocGen automatically merges Jira field data into these templates. This makes sure outputs such as contracts, reports, order forms, and approval documents are consistent, accurate, and professional without any manual editing.
#### Fully automated
Automation rules manage the documentation process. Documents are generated when requests are submitted, work items are transitioned, or other predefined triggers are met. Your documentation is integrated directly into your existing Jira processes---no manual intervention required.
#### PDF or Word
The final output can be a PDF or Word document for maximum flexibility.
#### Automated attachment to work items
Generated PDFs or Word documents are automatically attached to the originating Jira work item, creating a single, centralised record that is easy to access. You can also configure the automation rule to add a reply to the customer on the work item once the automation completes, aiding visibility, adding useful context, and strengthening auditability and traceability.
### Benefits
#### Saves time
No more copying data out of Jira, pasting it into Word, formatting it, and exporting as a PDF. With Togetha DocGen, all of this is done automatically when a specified condition is met, e.g. when a work item changes status.
#### Improves accuracy and consistency
Manual documentation can lead to typos, missing fields, and people entering the wrong details. It can also lead to inadvertent formatting changes. Togetha DocGen eliminates all scope for error by pulling structured data directly from Jira fields and merging it into predefined Word templates. You get consistent, accurate, and reliable documents every time.
#### Improves the customer experience
Customers receive clean, polished PDFs or Word documents for their records without delay. If a customer wants to book training, purchase a support contract, or adjust an existing agreement, these documents act as an official record of their interactions, and can also include standard terms and additional details. This gives customers confidence that their requests are being handled promptly and reliably, while providing a clear reference they can access whenever they need to.
---
language: "en"
---
# Why use Togetha Feedback in Jira?
## What is Togetha Feedback in Jira
Together Feedback makes it effortless for your customers and internal teams to tell you what's working, what's broken, and what they want next --- all from a simple link in your portal or Jira. Capture rich, structured feedback in seconds, route only the valuable items into Jira, and keep change managers, support teams, and product owners aligned without adding more tools or complexity.
Explore the features and benefits to understand how Togetha Feedback in Jira can allow for quick feedback and comprehensive summaries and reporting all from one simple app.
### Key Features
#### Portal feedback link
Togetha Feedback in Jira adds a simple "Feedback" link to your help centre or portal. This allows users to submit insights quickly via a fast, intuitive form that includes structured fields as well as free-text feedback.
#### Add app admins to allow for easy access
A Jira admin is required to set up the app, but once done, any Jira user can design feedback forms, control fields and permissions, and configure Jira task mapping---all from inside Jira. We made the app accessible to all users so that anyone can gather and act on feedback without waiting on admin support.
#### Permissions and shareable links
Jira permissions ensure that only the right people can access or submit feedback. Shareable form links allow you to target specific Jira groups, e.g. marketing, when you need feedback from specific stakeholders.
#### Anonymous or attributed feedback
Configure whether a submission should be anonymous or attributed to suit scenarios like change management or sensitive topics.
#### Rich feedback capture and flexible fields
The purpose-built editor supports headings, formatting, and draft persistence. Flexible field types---including text, labels, multi-selects, and checkboxes---ensure feedback is structured and actionable. Every submission maps cleanly into Jira, simplifying triage and integration into existing workflows.
#### Workflow automation and review queues
Feedback can be turned into Jira work items automatically. You can also route feedback through a review queue with accept/reject controls. This ensures feedback moves efficiently from insight to action.
#### Analysis and reporting
Feedback can be displayed in lists and filtered by date or category, e.g. "change management feedback" or "solution feedback". Key metrics are displayed on a Jira-like reporting dashboard with direct links into related Jira work items. You can also export CSVs for deeper analysis and reporting outside of Jira.
### Main Benefits
#### Quickly validate whether changes are providing value for users
Creates a fast, consistent feedback loop so you can quickly validate whether changes and updates are delivering value for users. Togetha Feedback helps you uncover opportunities for improvement early, before small problems escalate.
#### Easier for users to communicate with you
Makes it easy for users to share quick comments without needing to raise tickets or send emails. This can prevent users from feeling ignored or frustrated, and feedback flows without friction, driving real improvement.
#### More structured and actionable feedback
Togetha Feedback delivers more structured, actionable feedback via scenario-specific forms, required fields, and structured inputs. The direct mapping from feedback submissions to Jira work items, turns insight into action immediately.
#### A truer picture of your ITSM performance
Togetha Feedback supports anonymous feedback so internal users can be honest about pain points and misunderstandings. This way you get a clearer, more accurate picture of how your ITSM services, changes, and updates are truly performing.
[Next Page](https://docs.togetha.software/llms-full.txt/1)